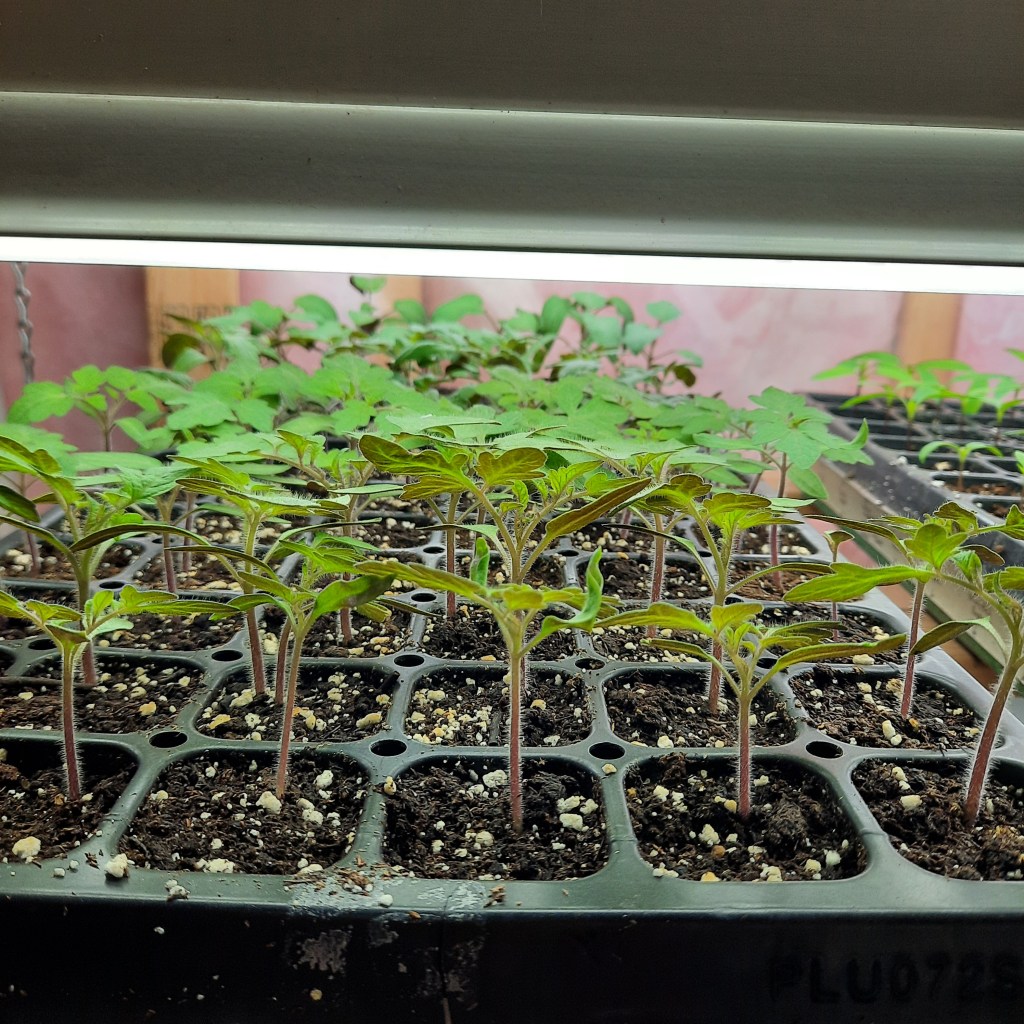
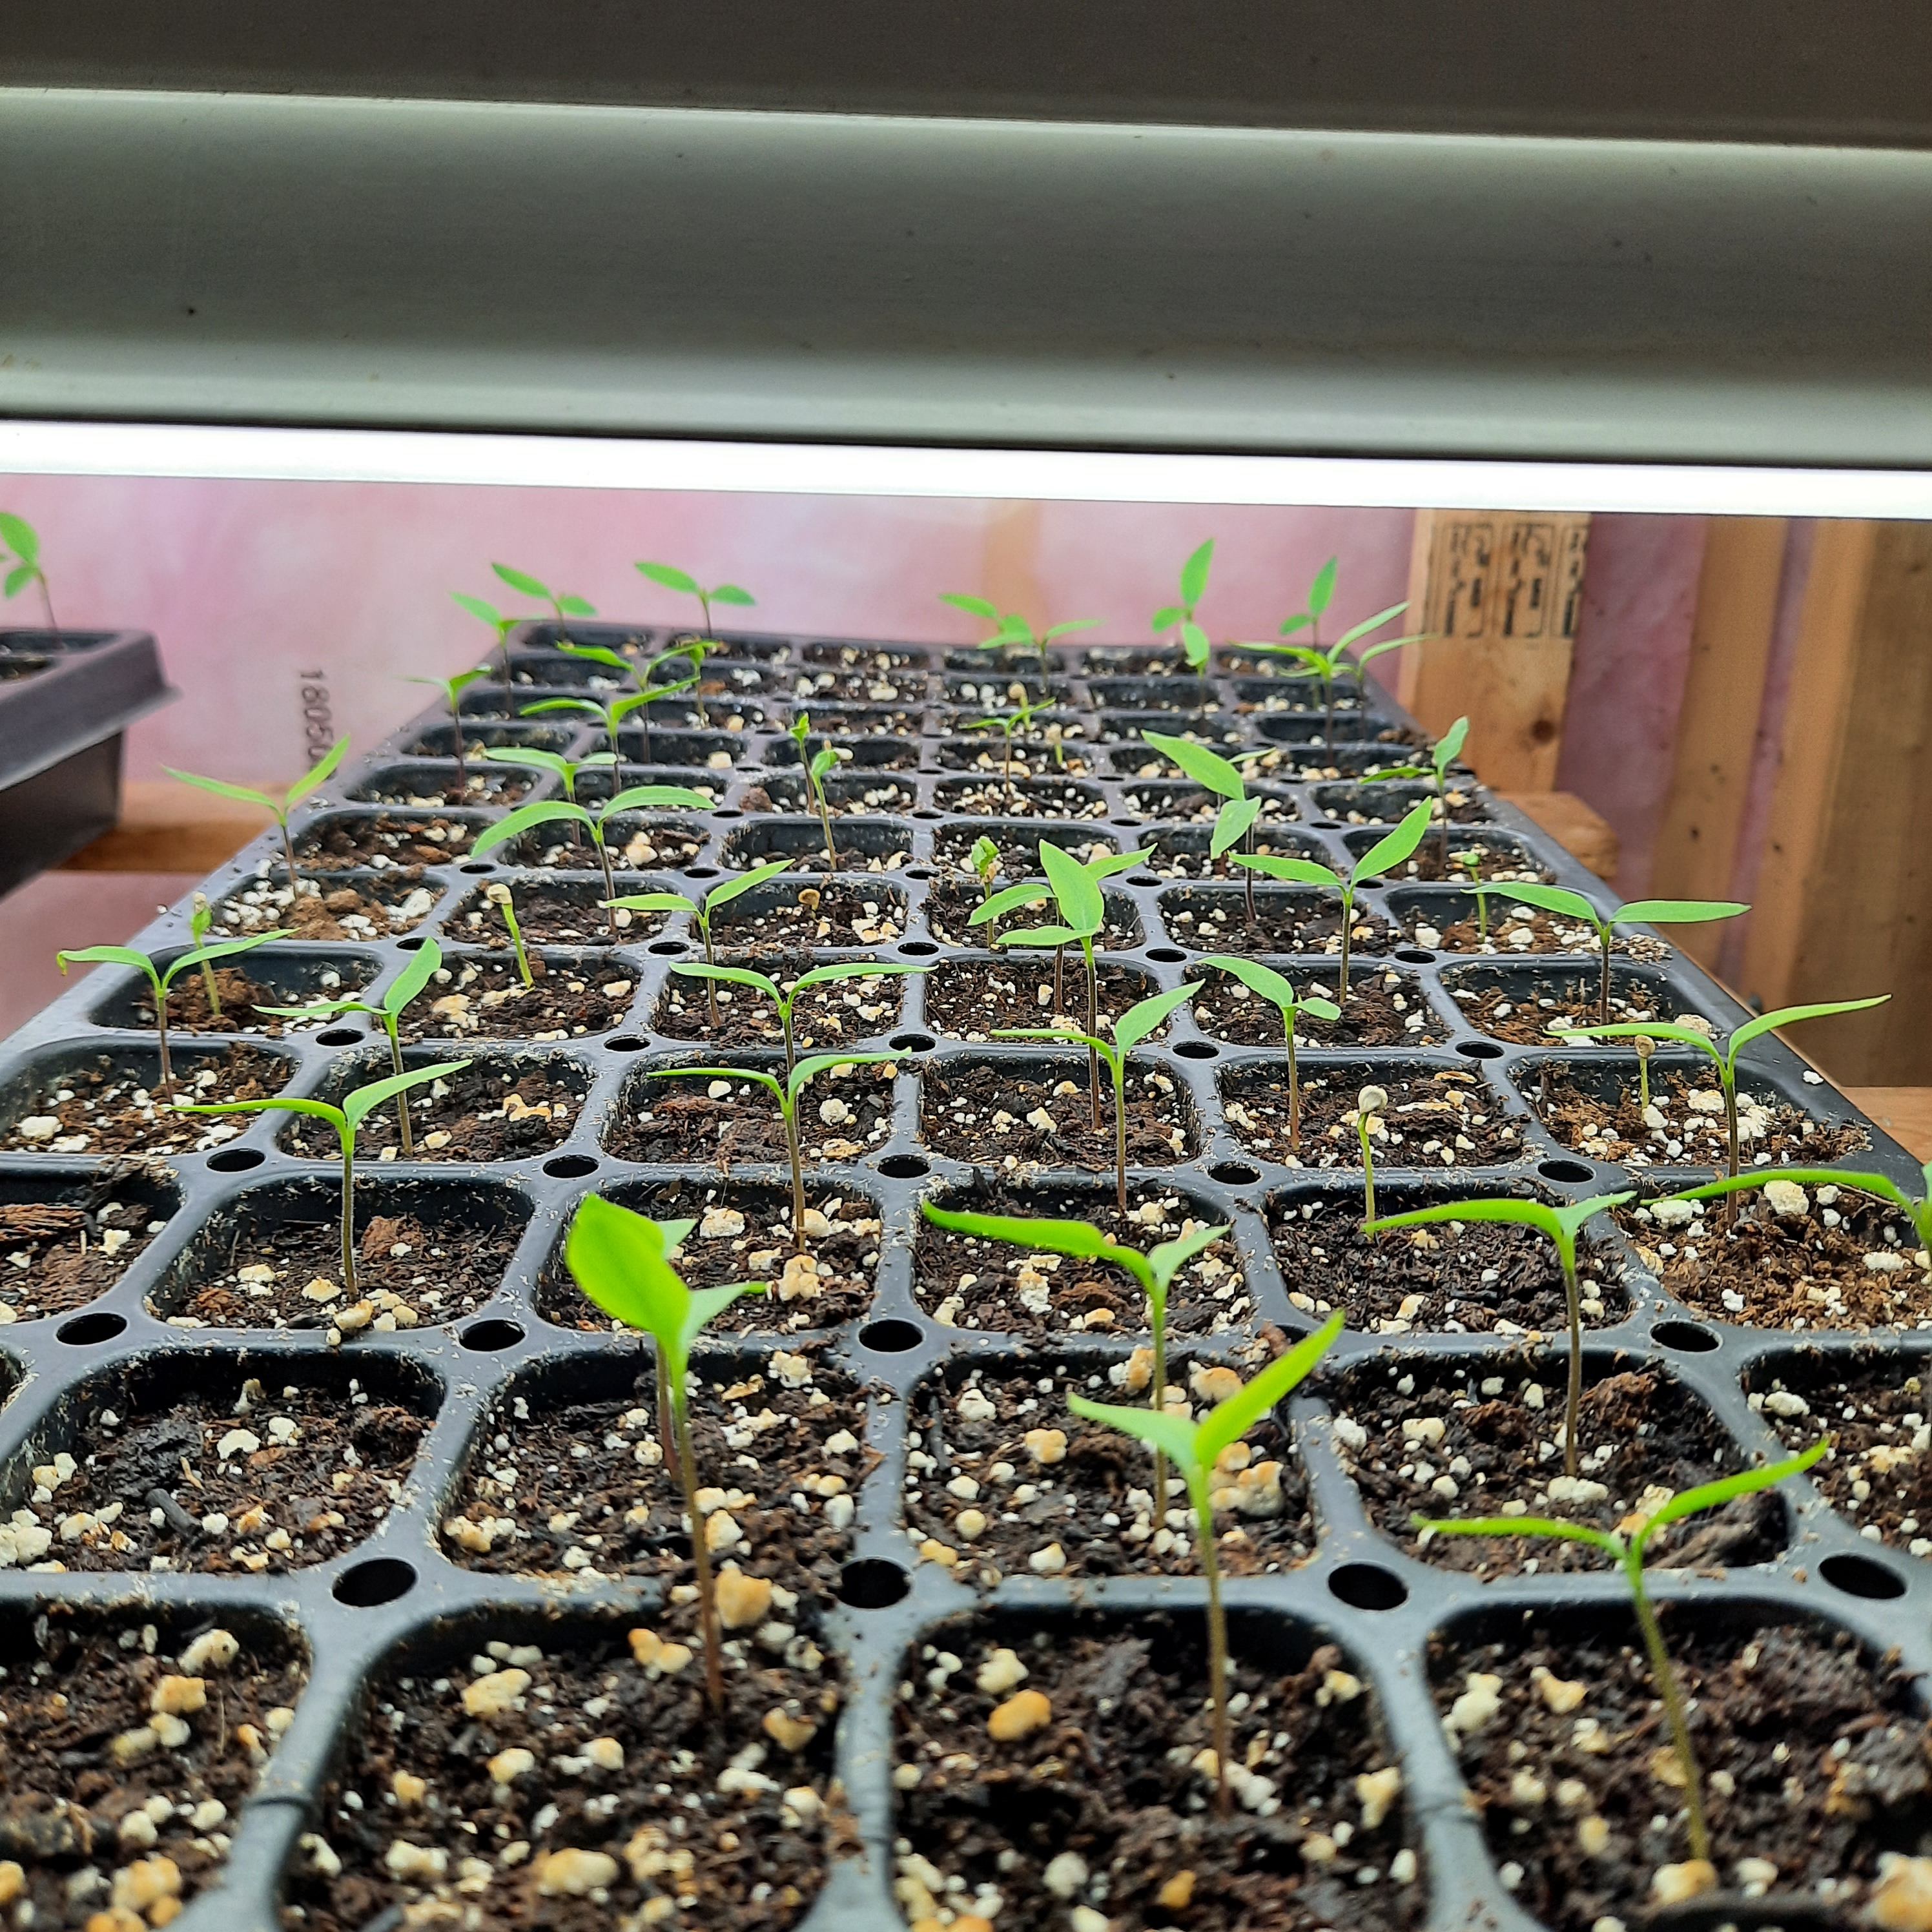
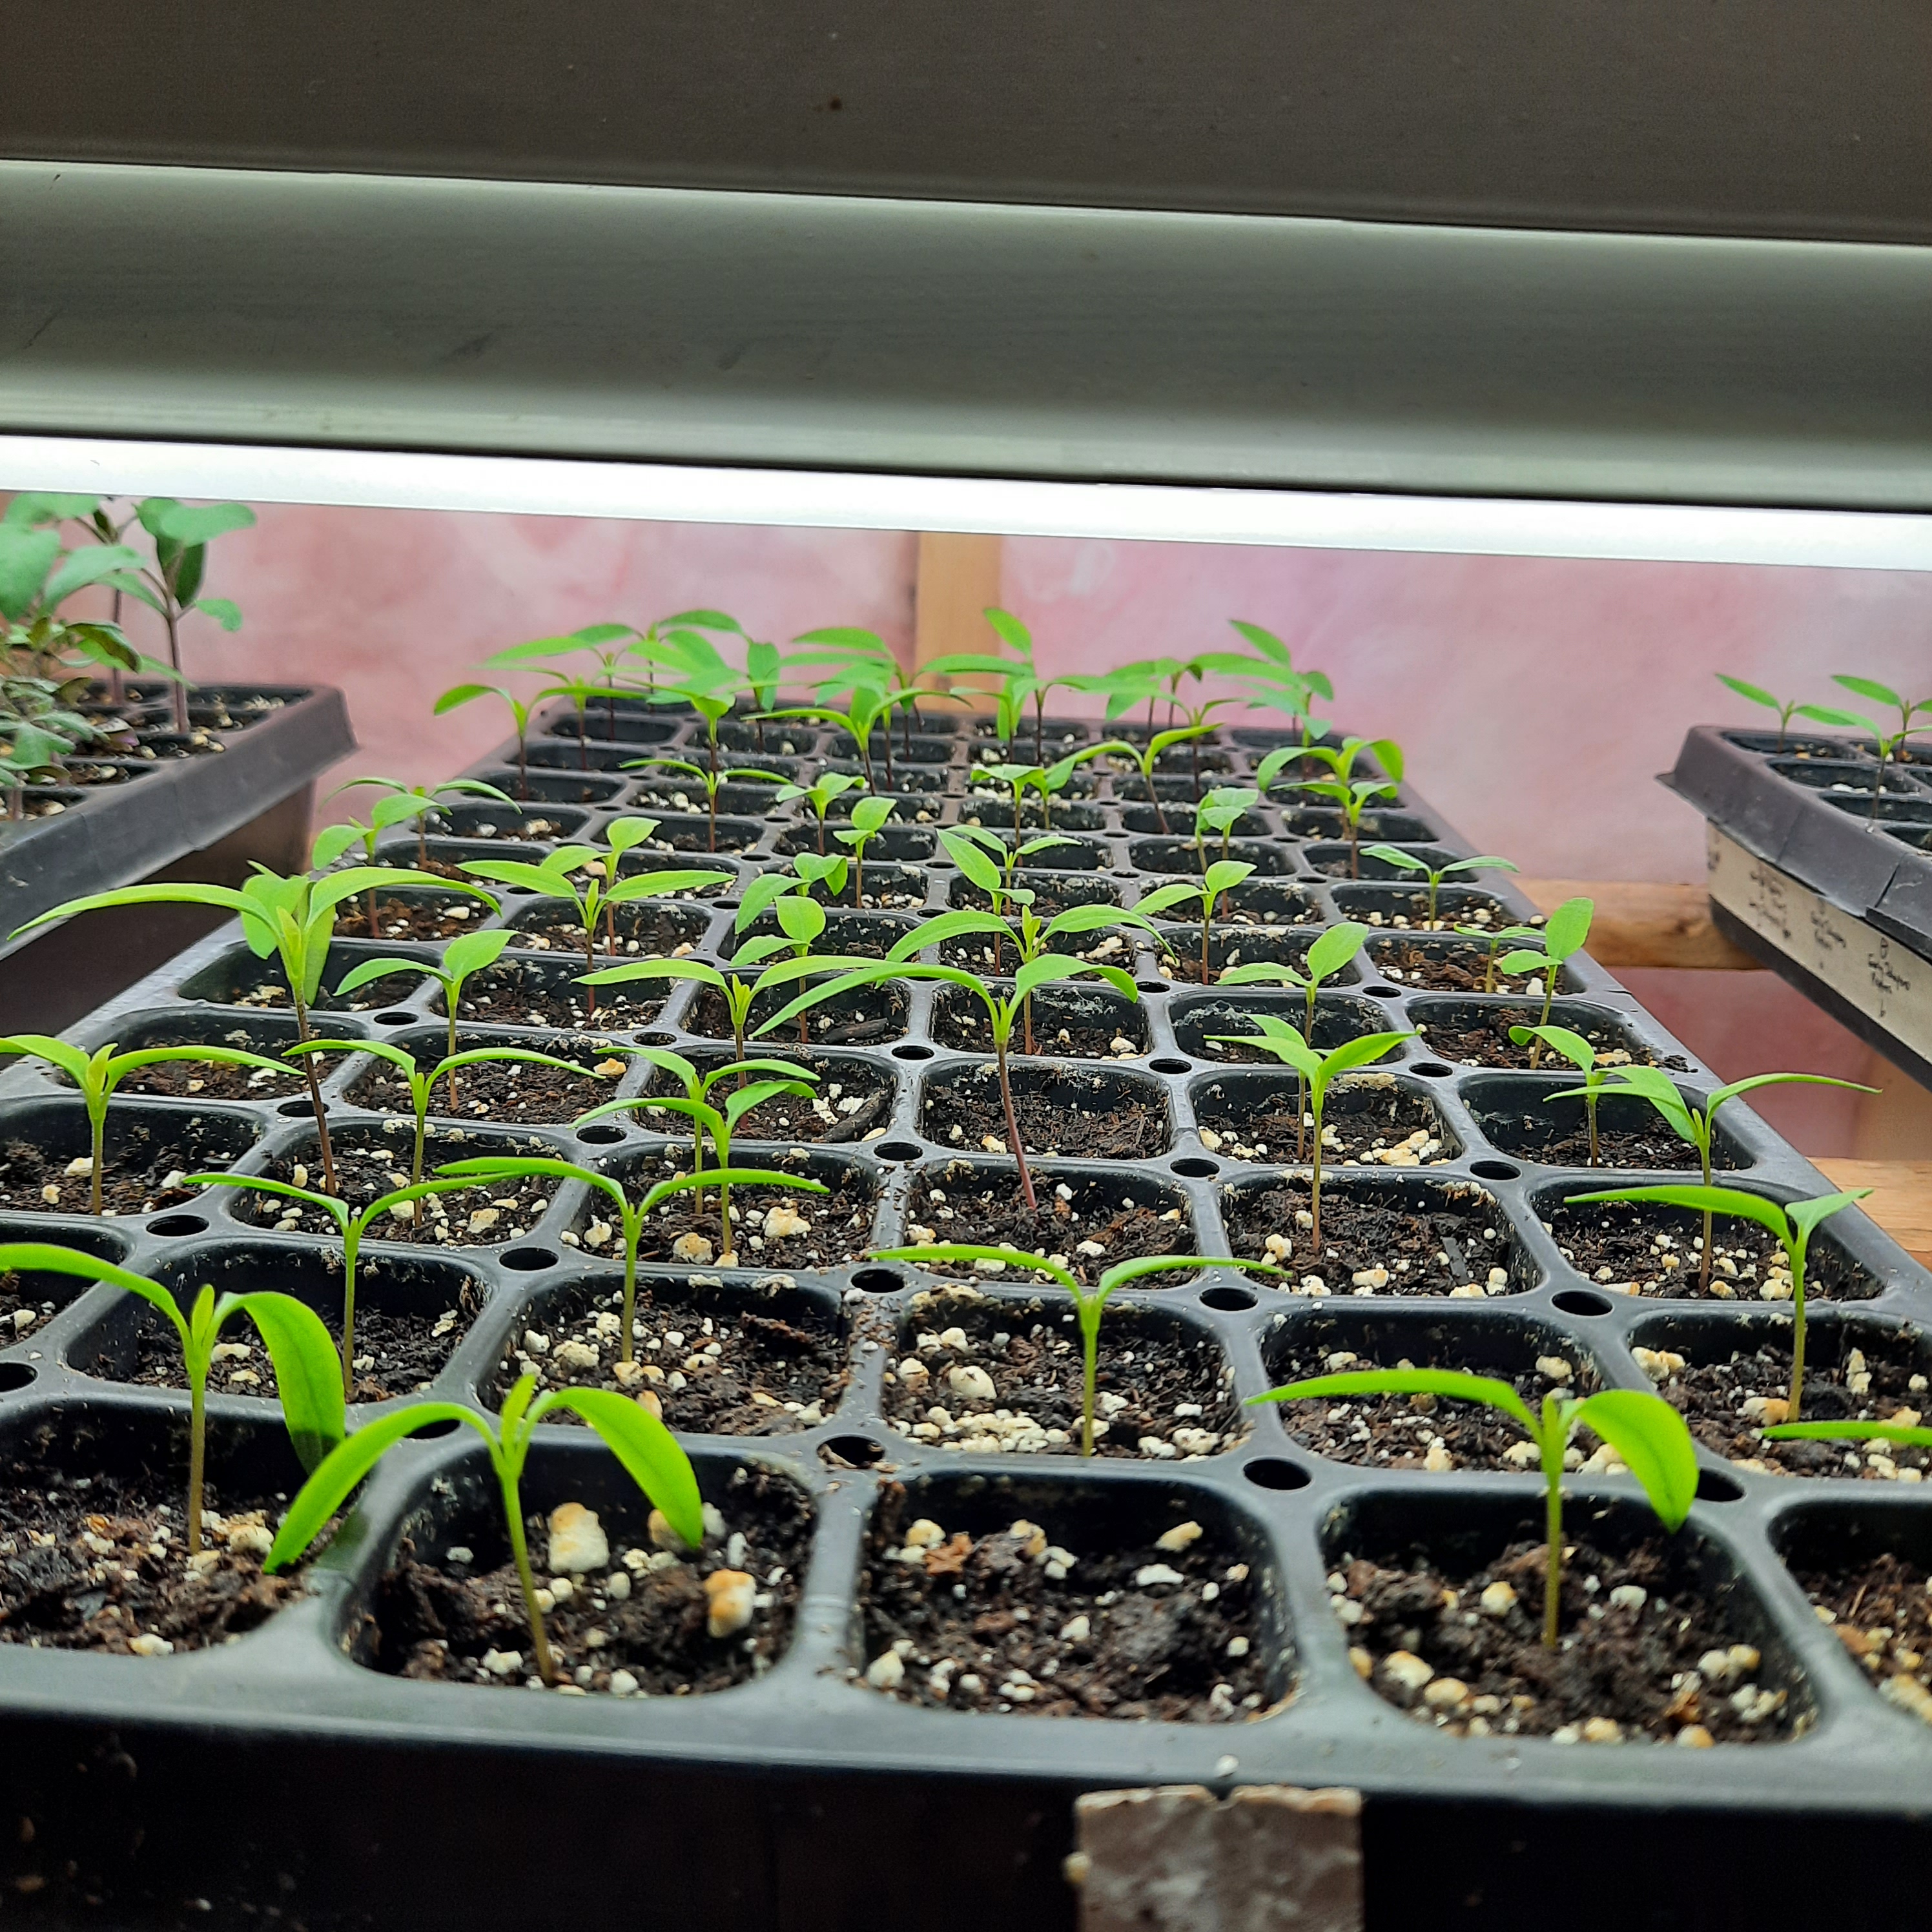
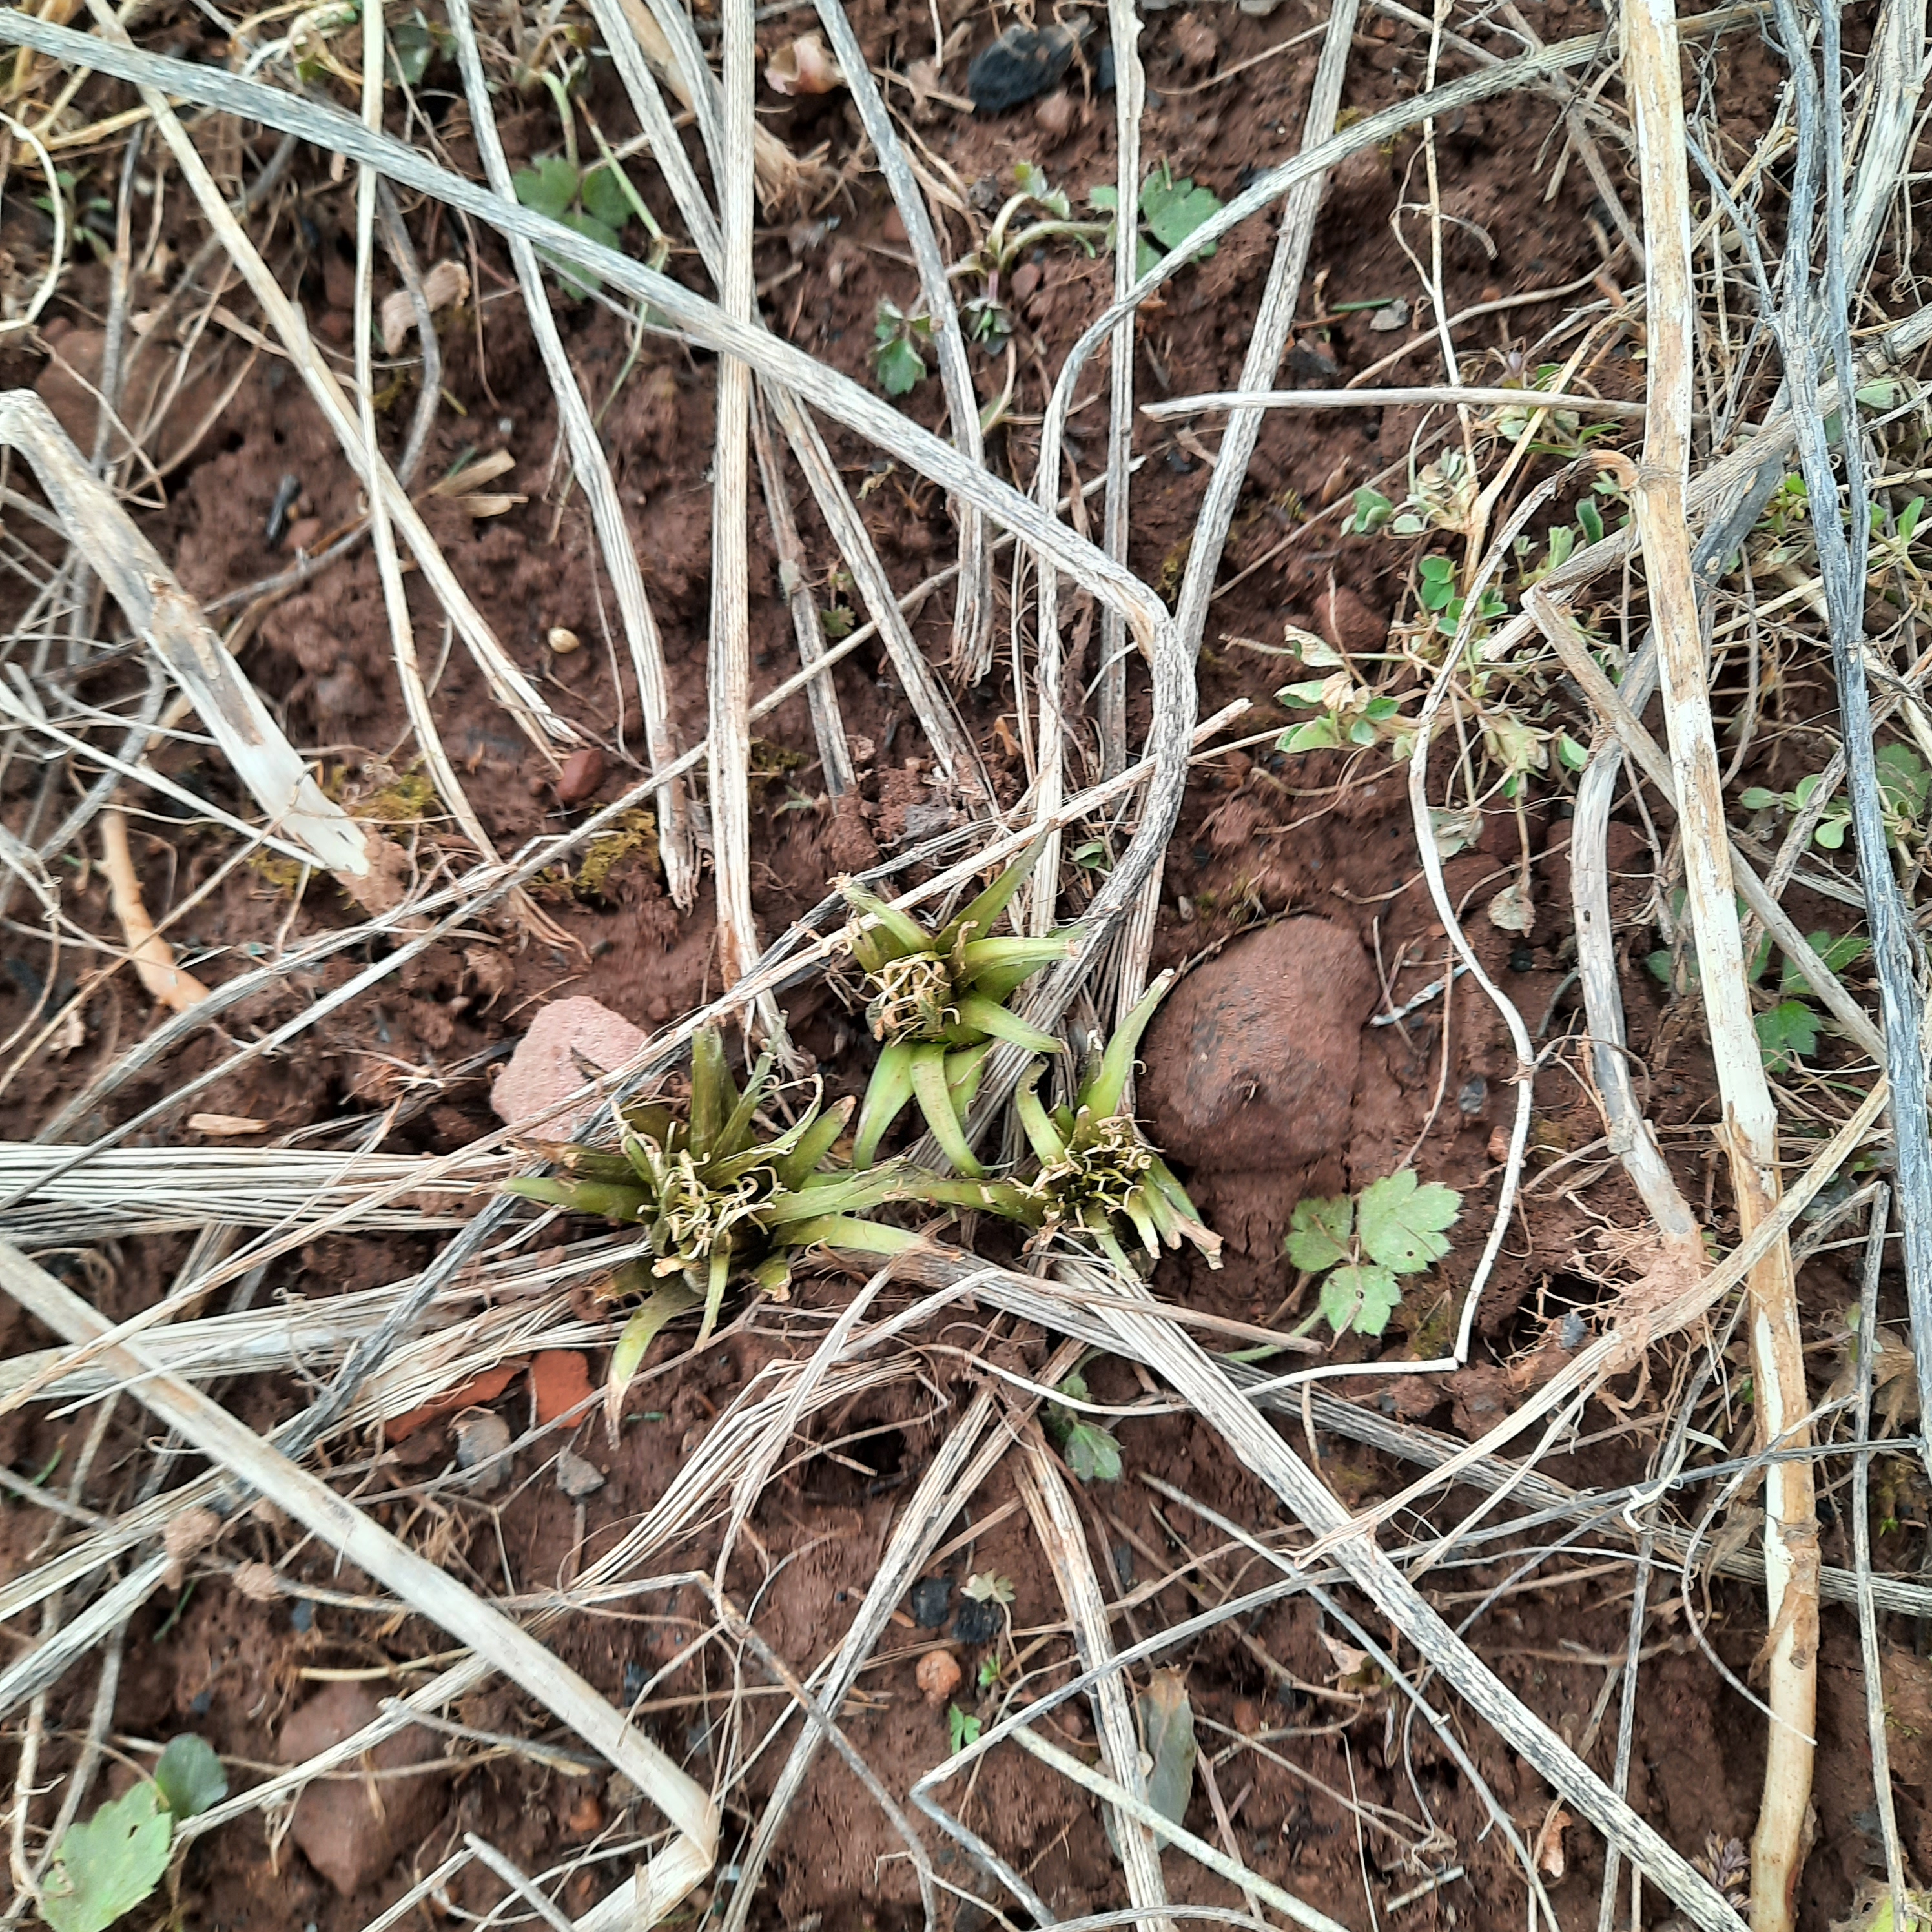
Just a little picture update on the seedlings plants the last couple weeks.
I will be starting more flower seeds this afternoon♡

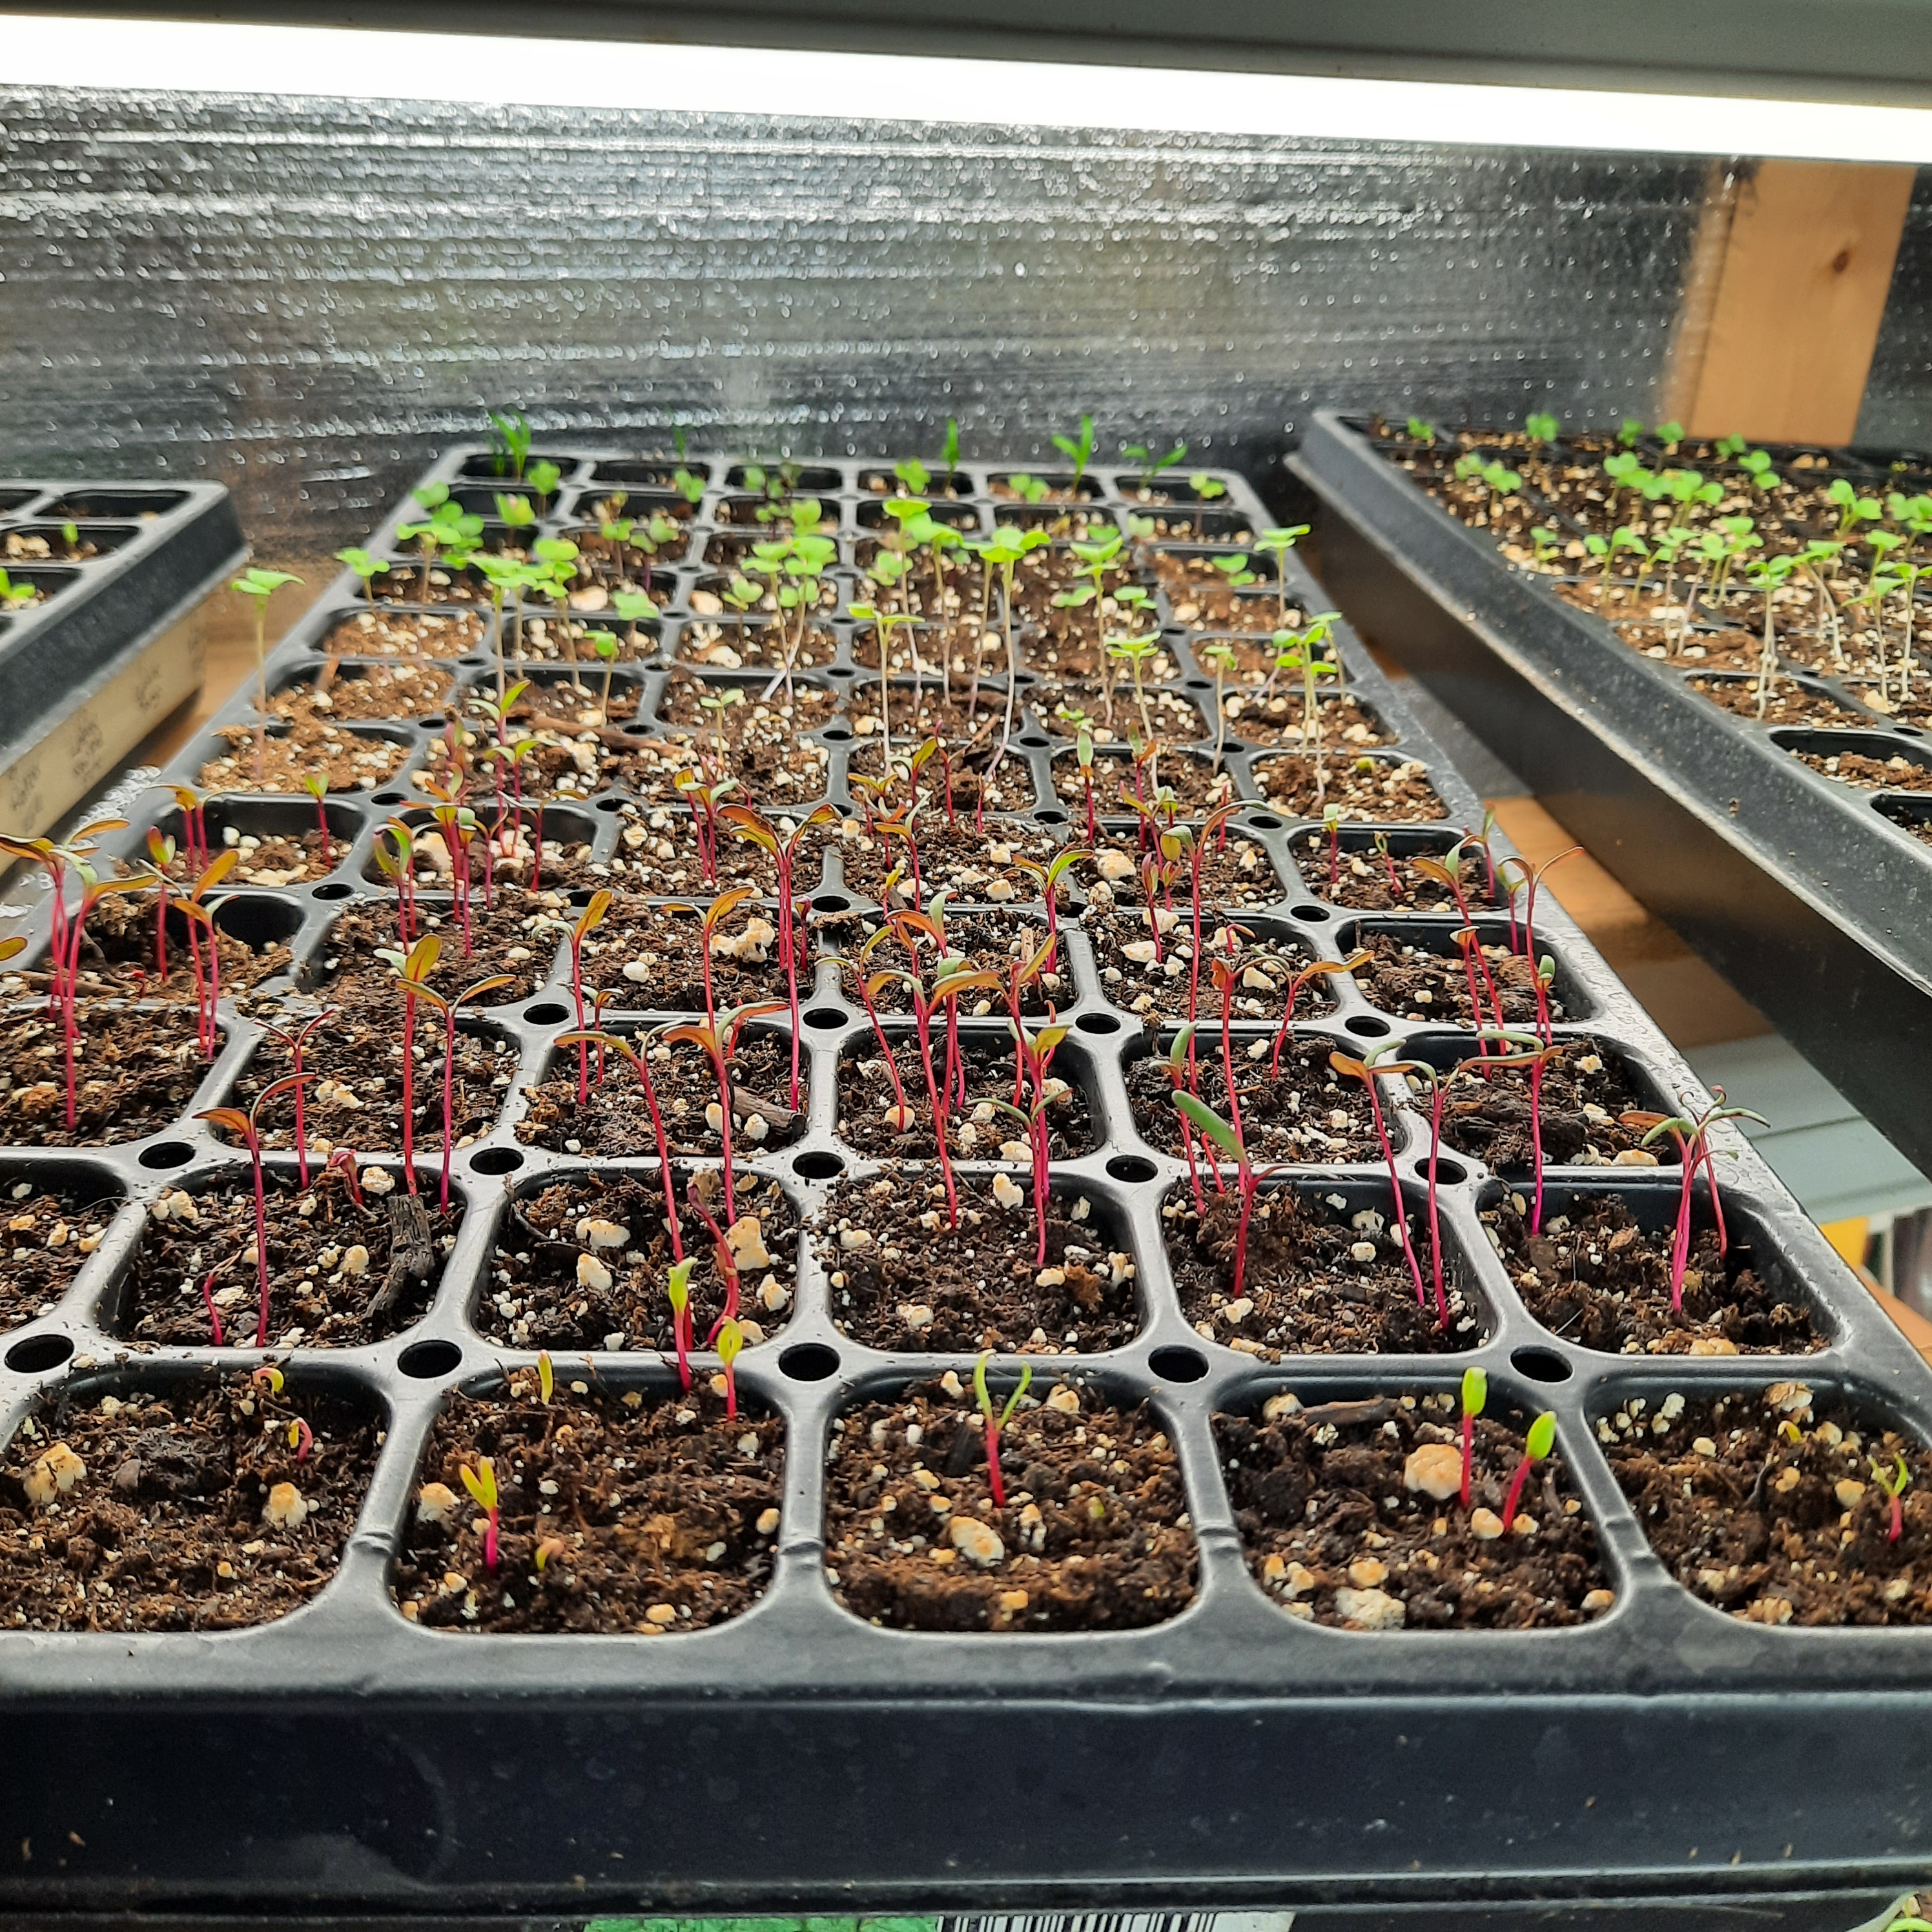
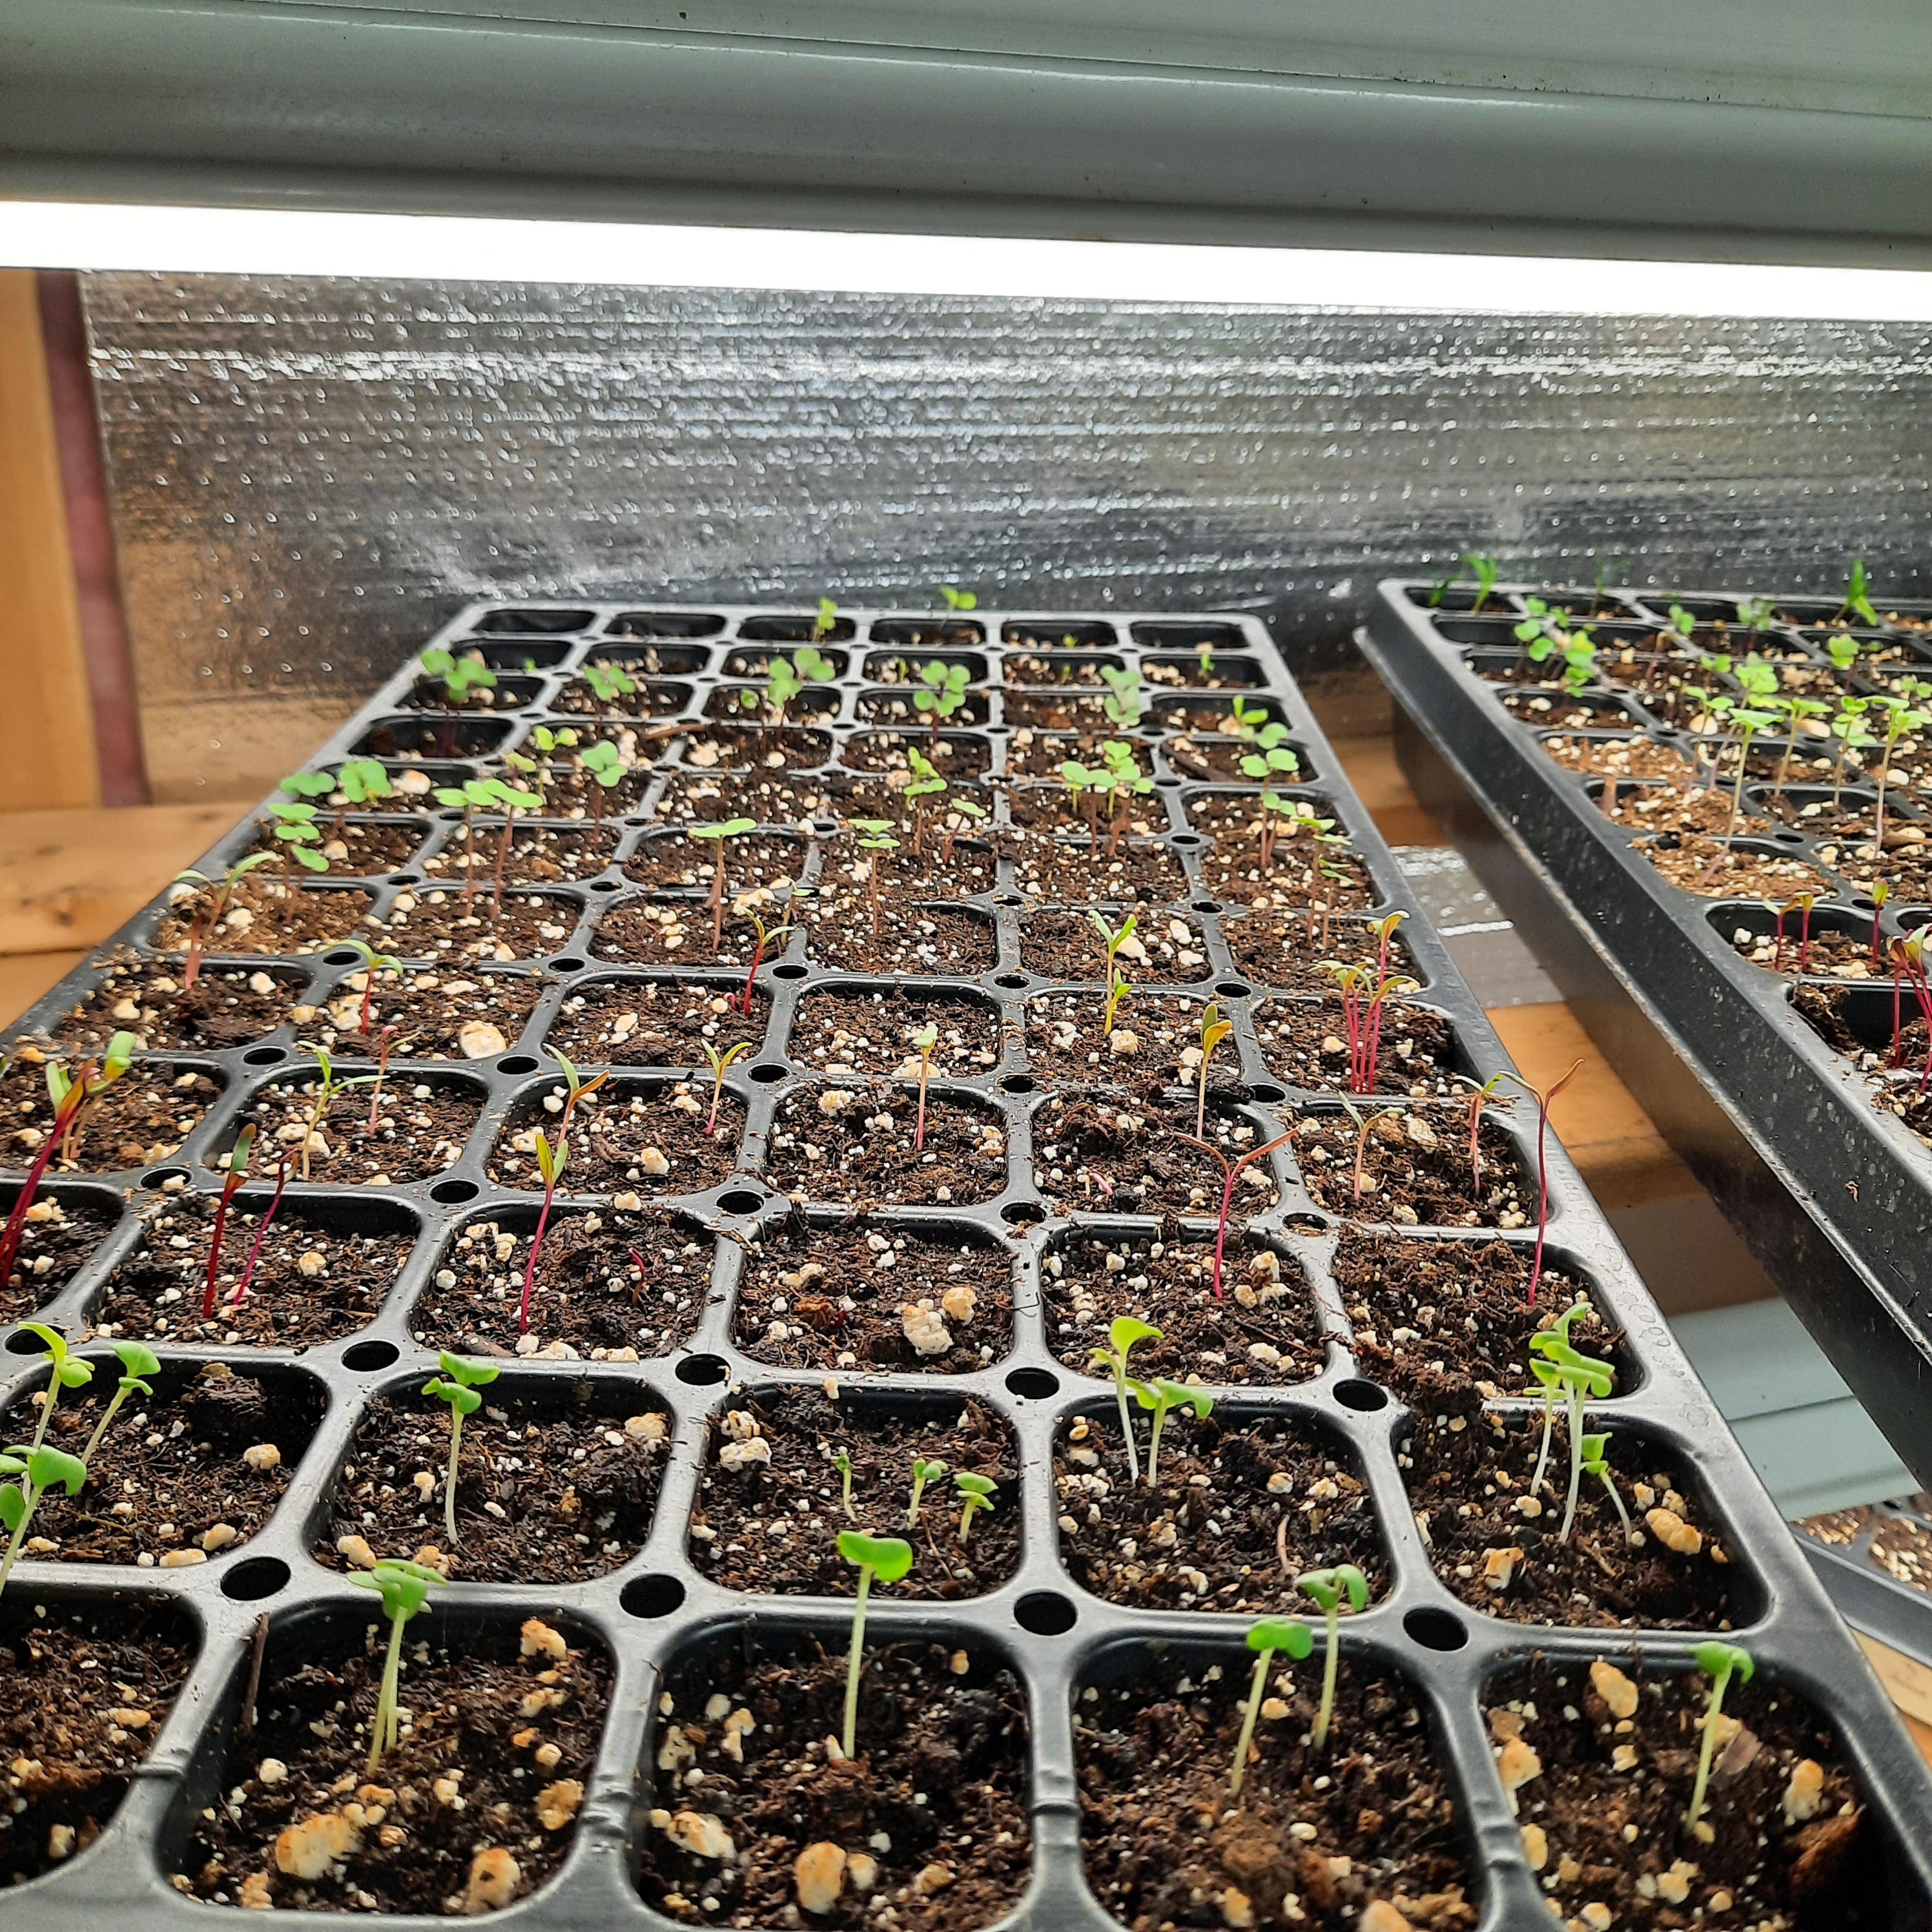
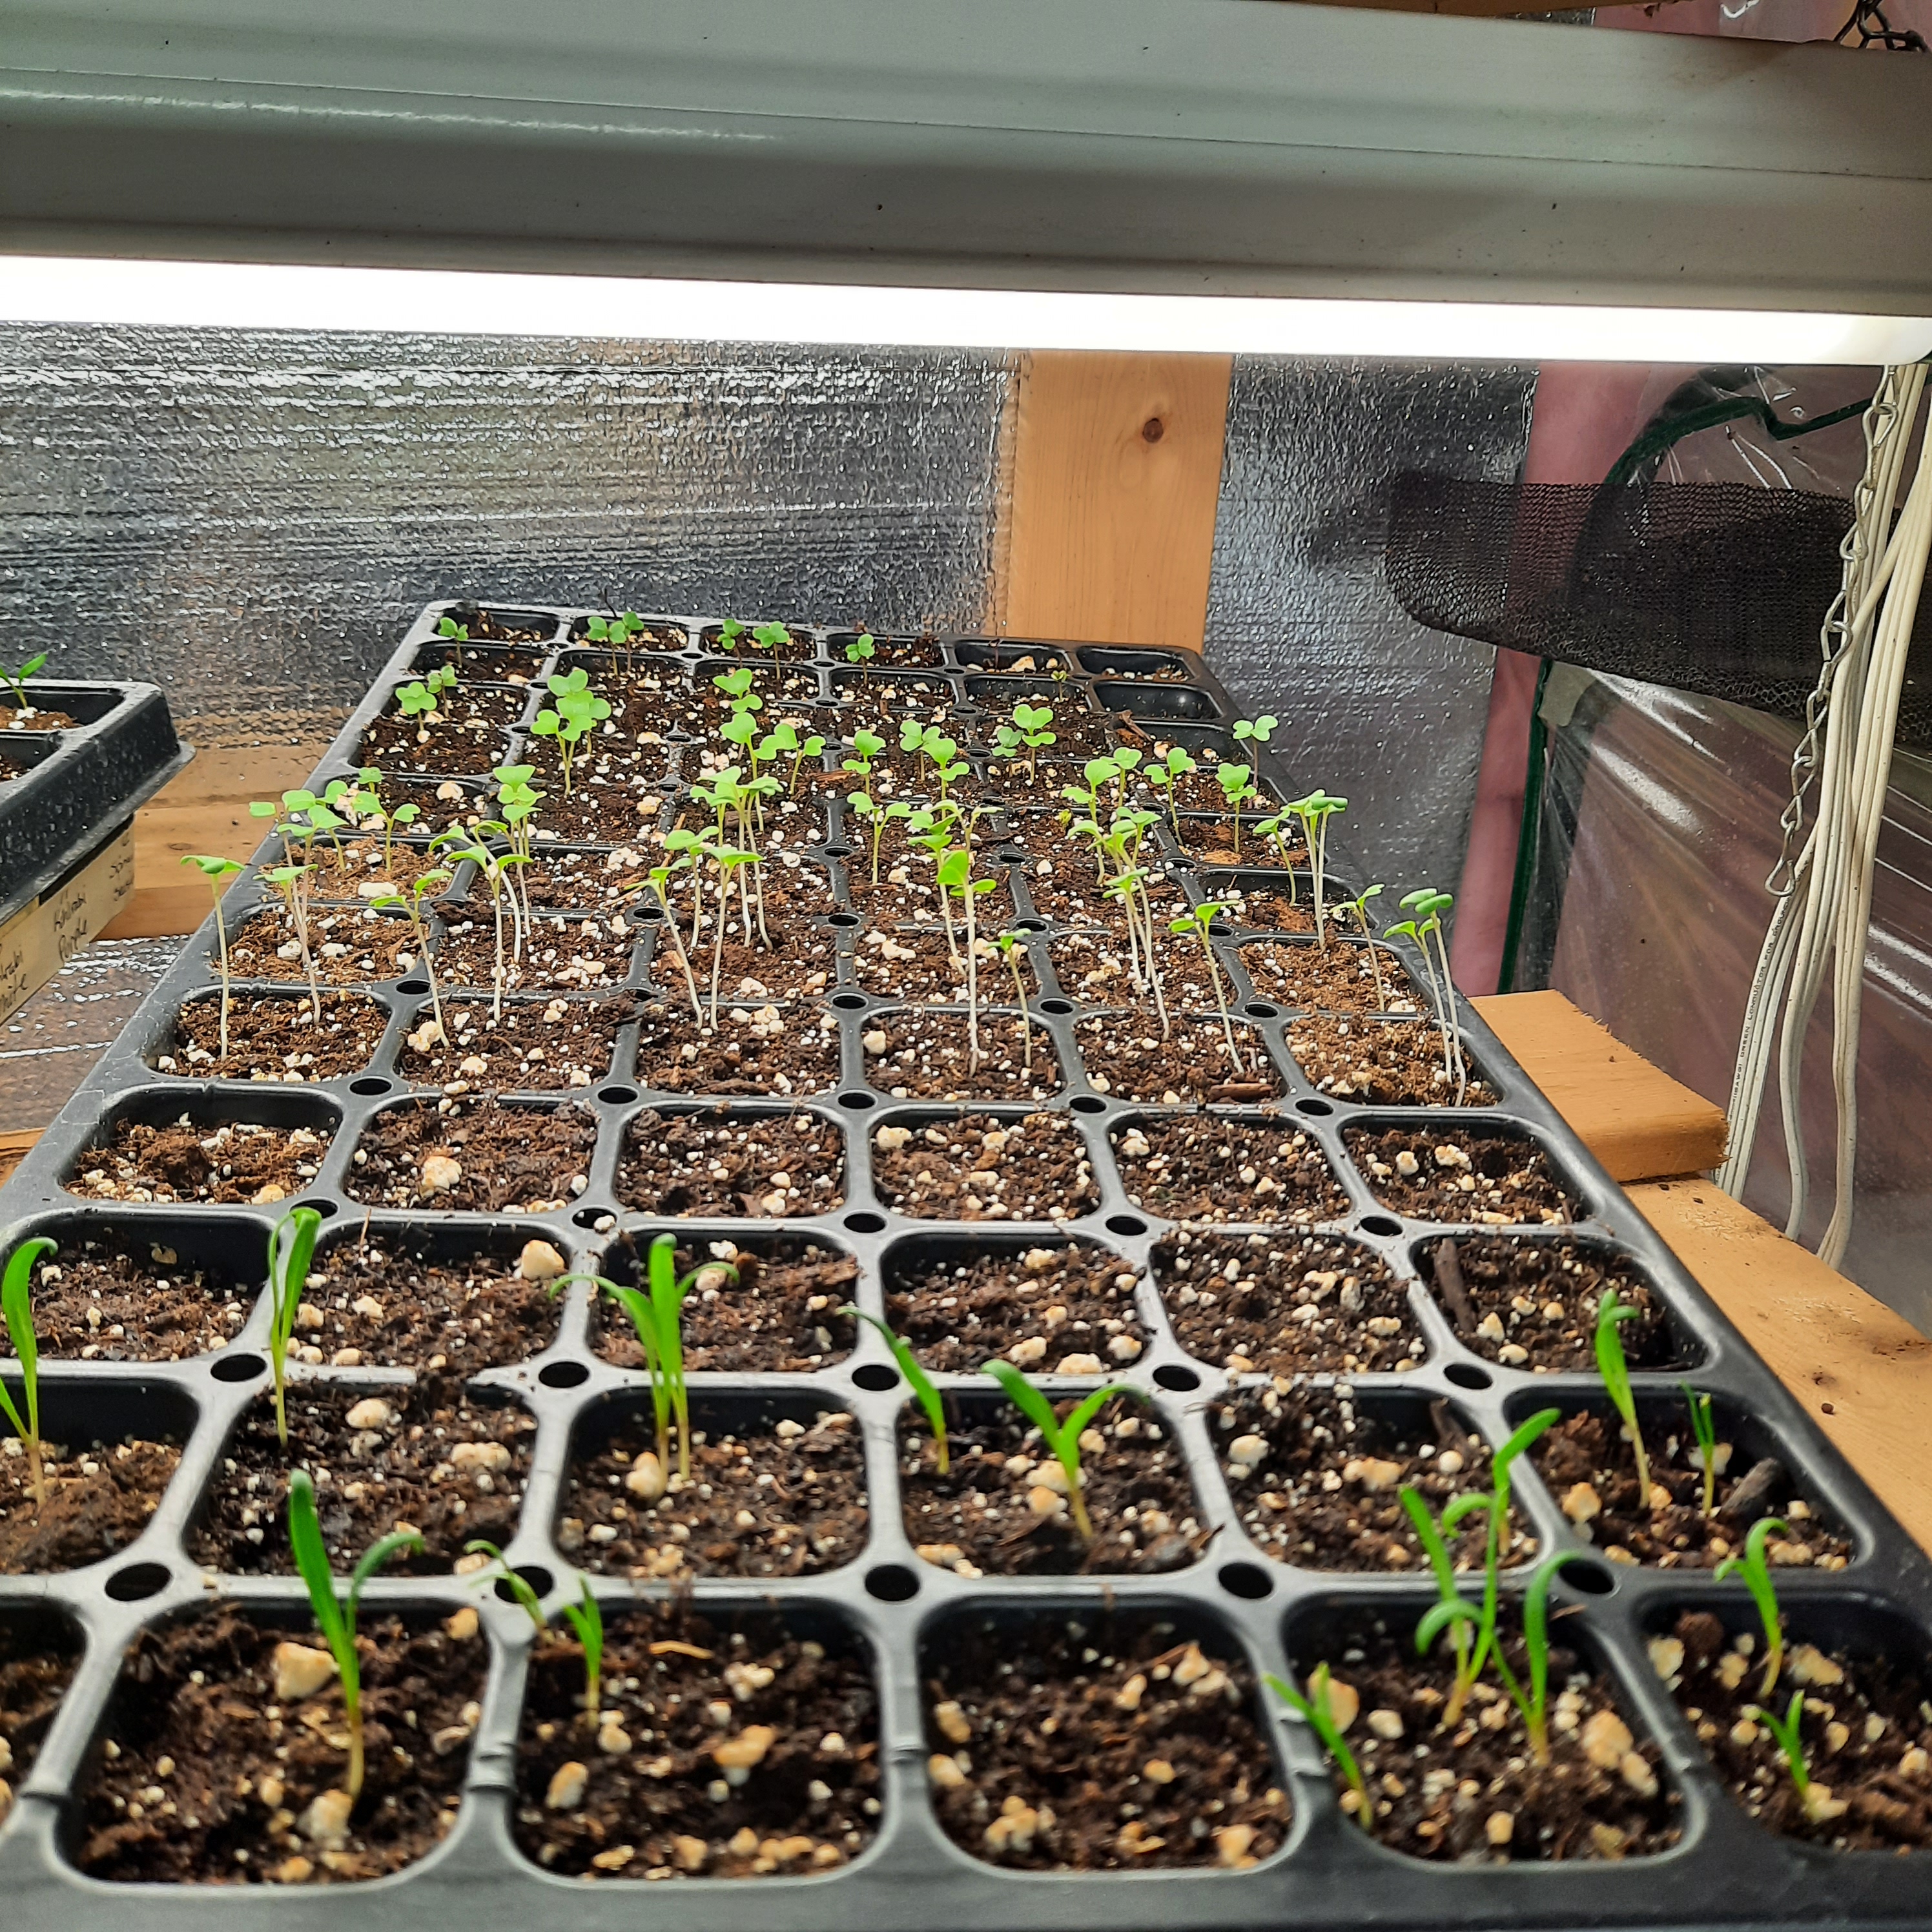
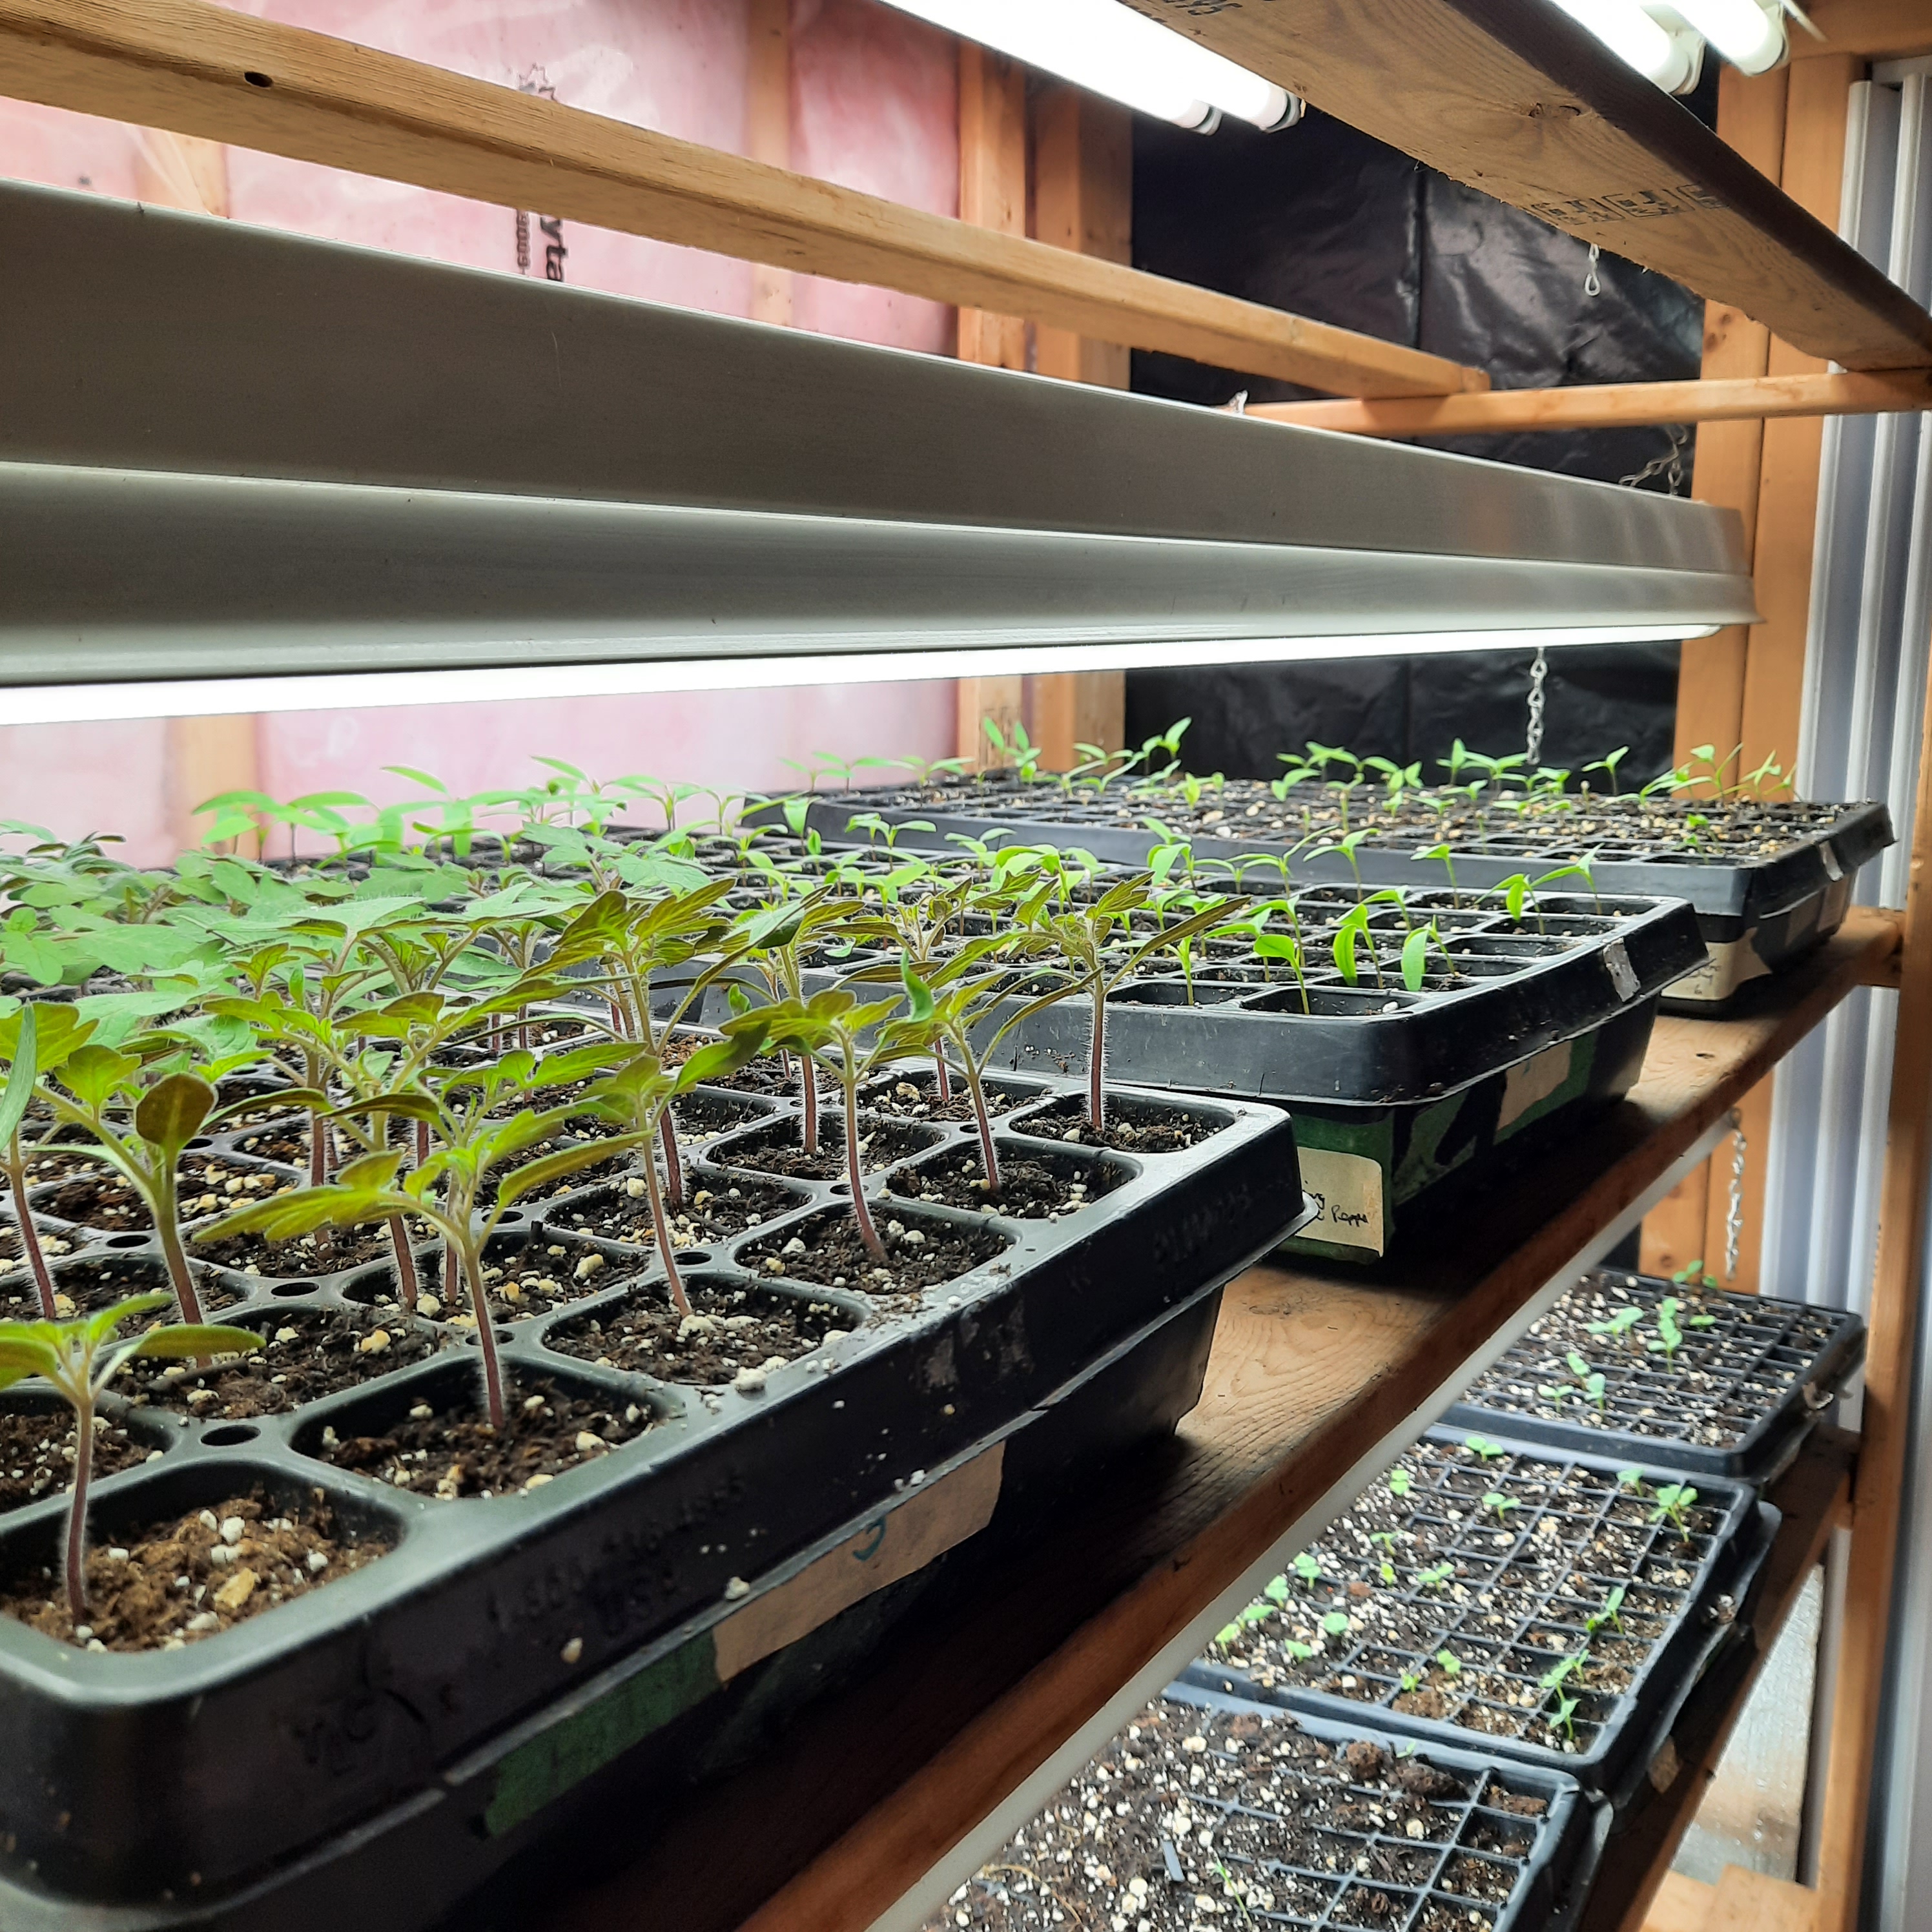
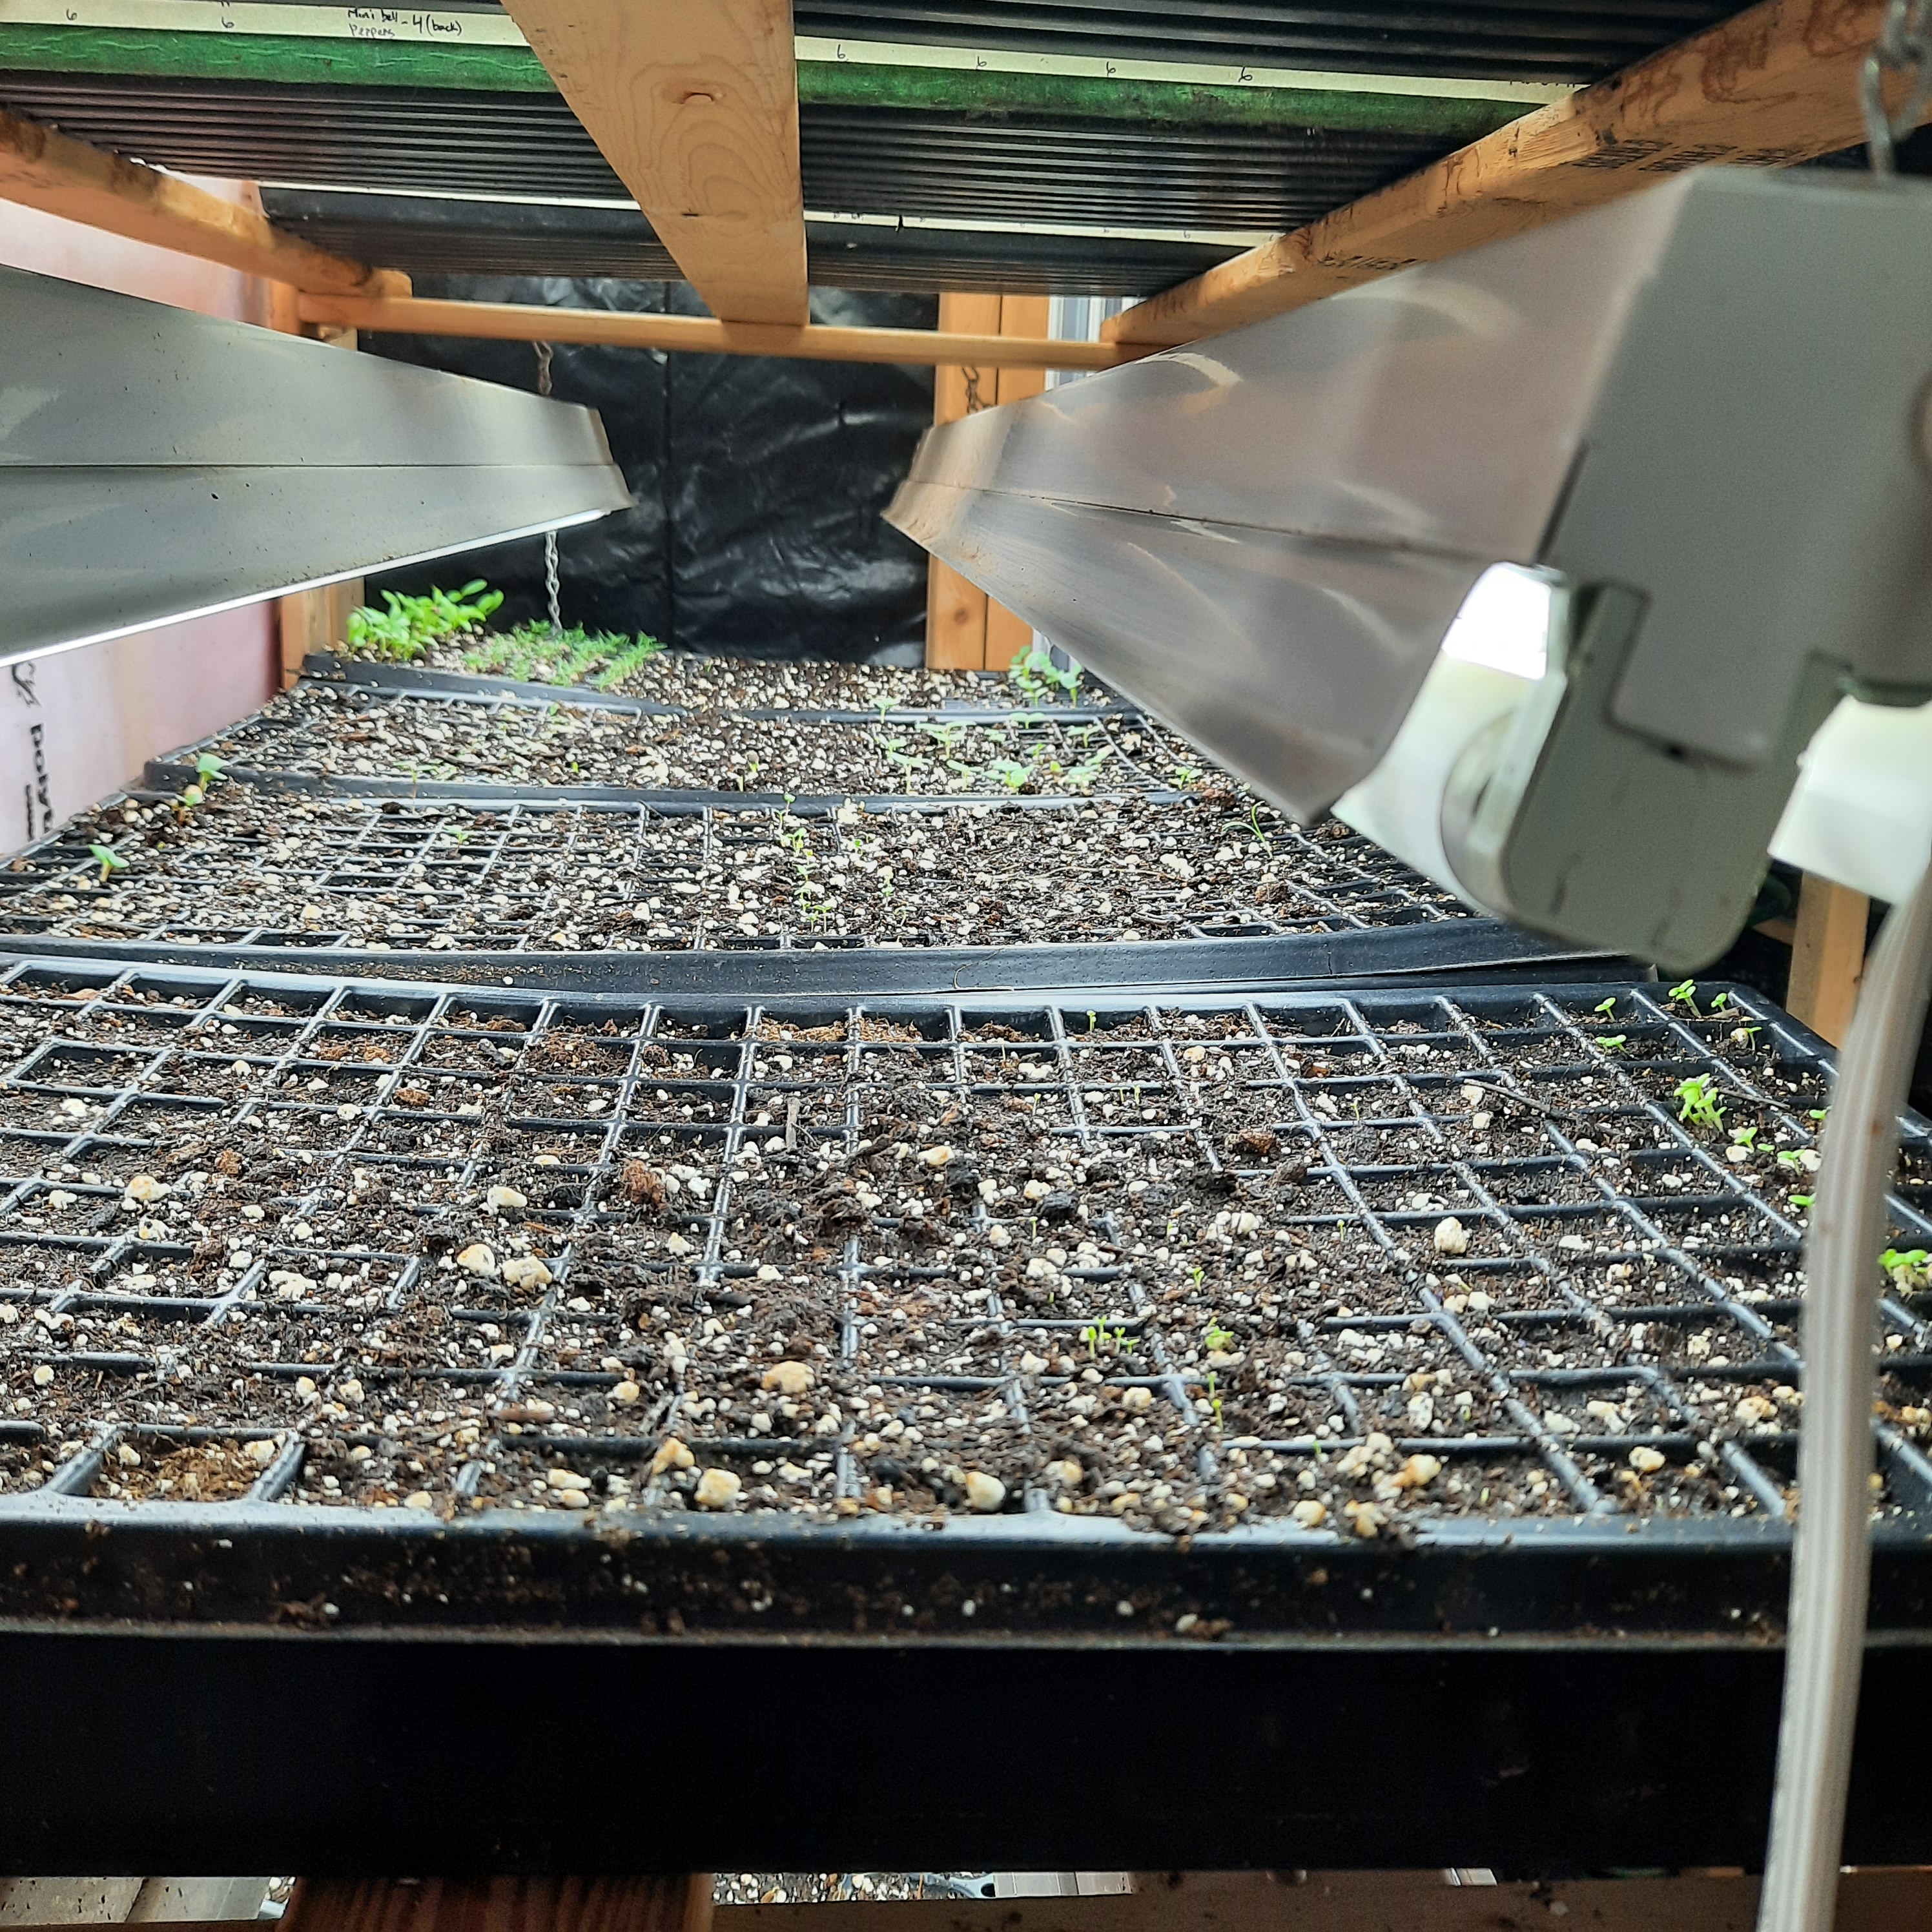
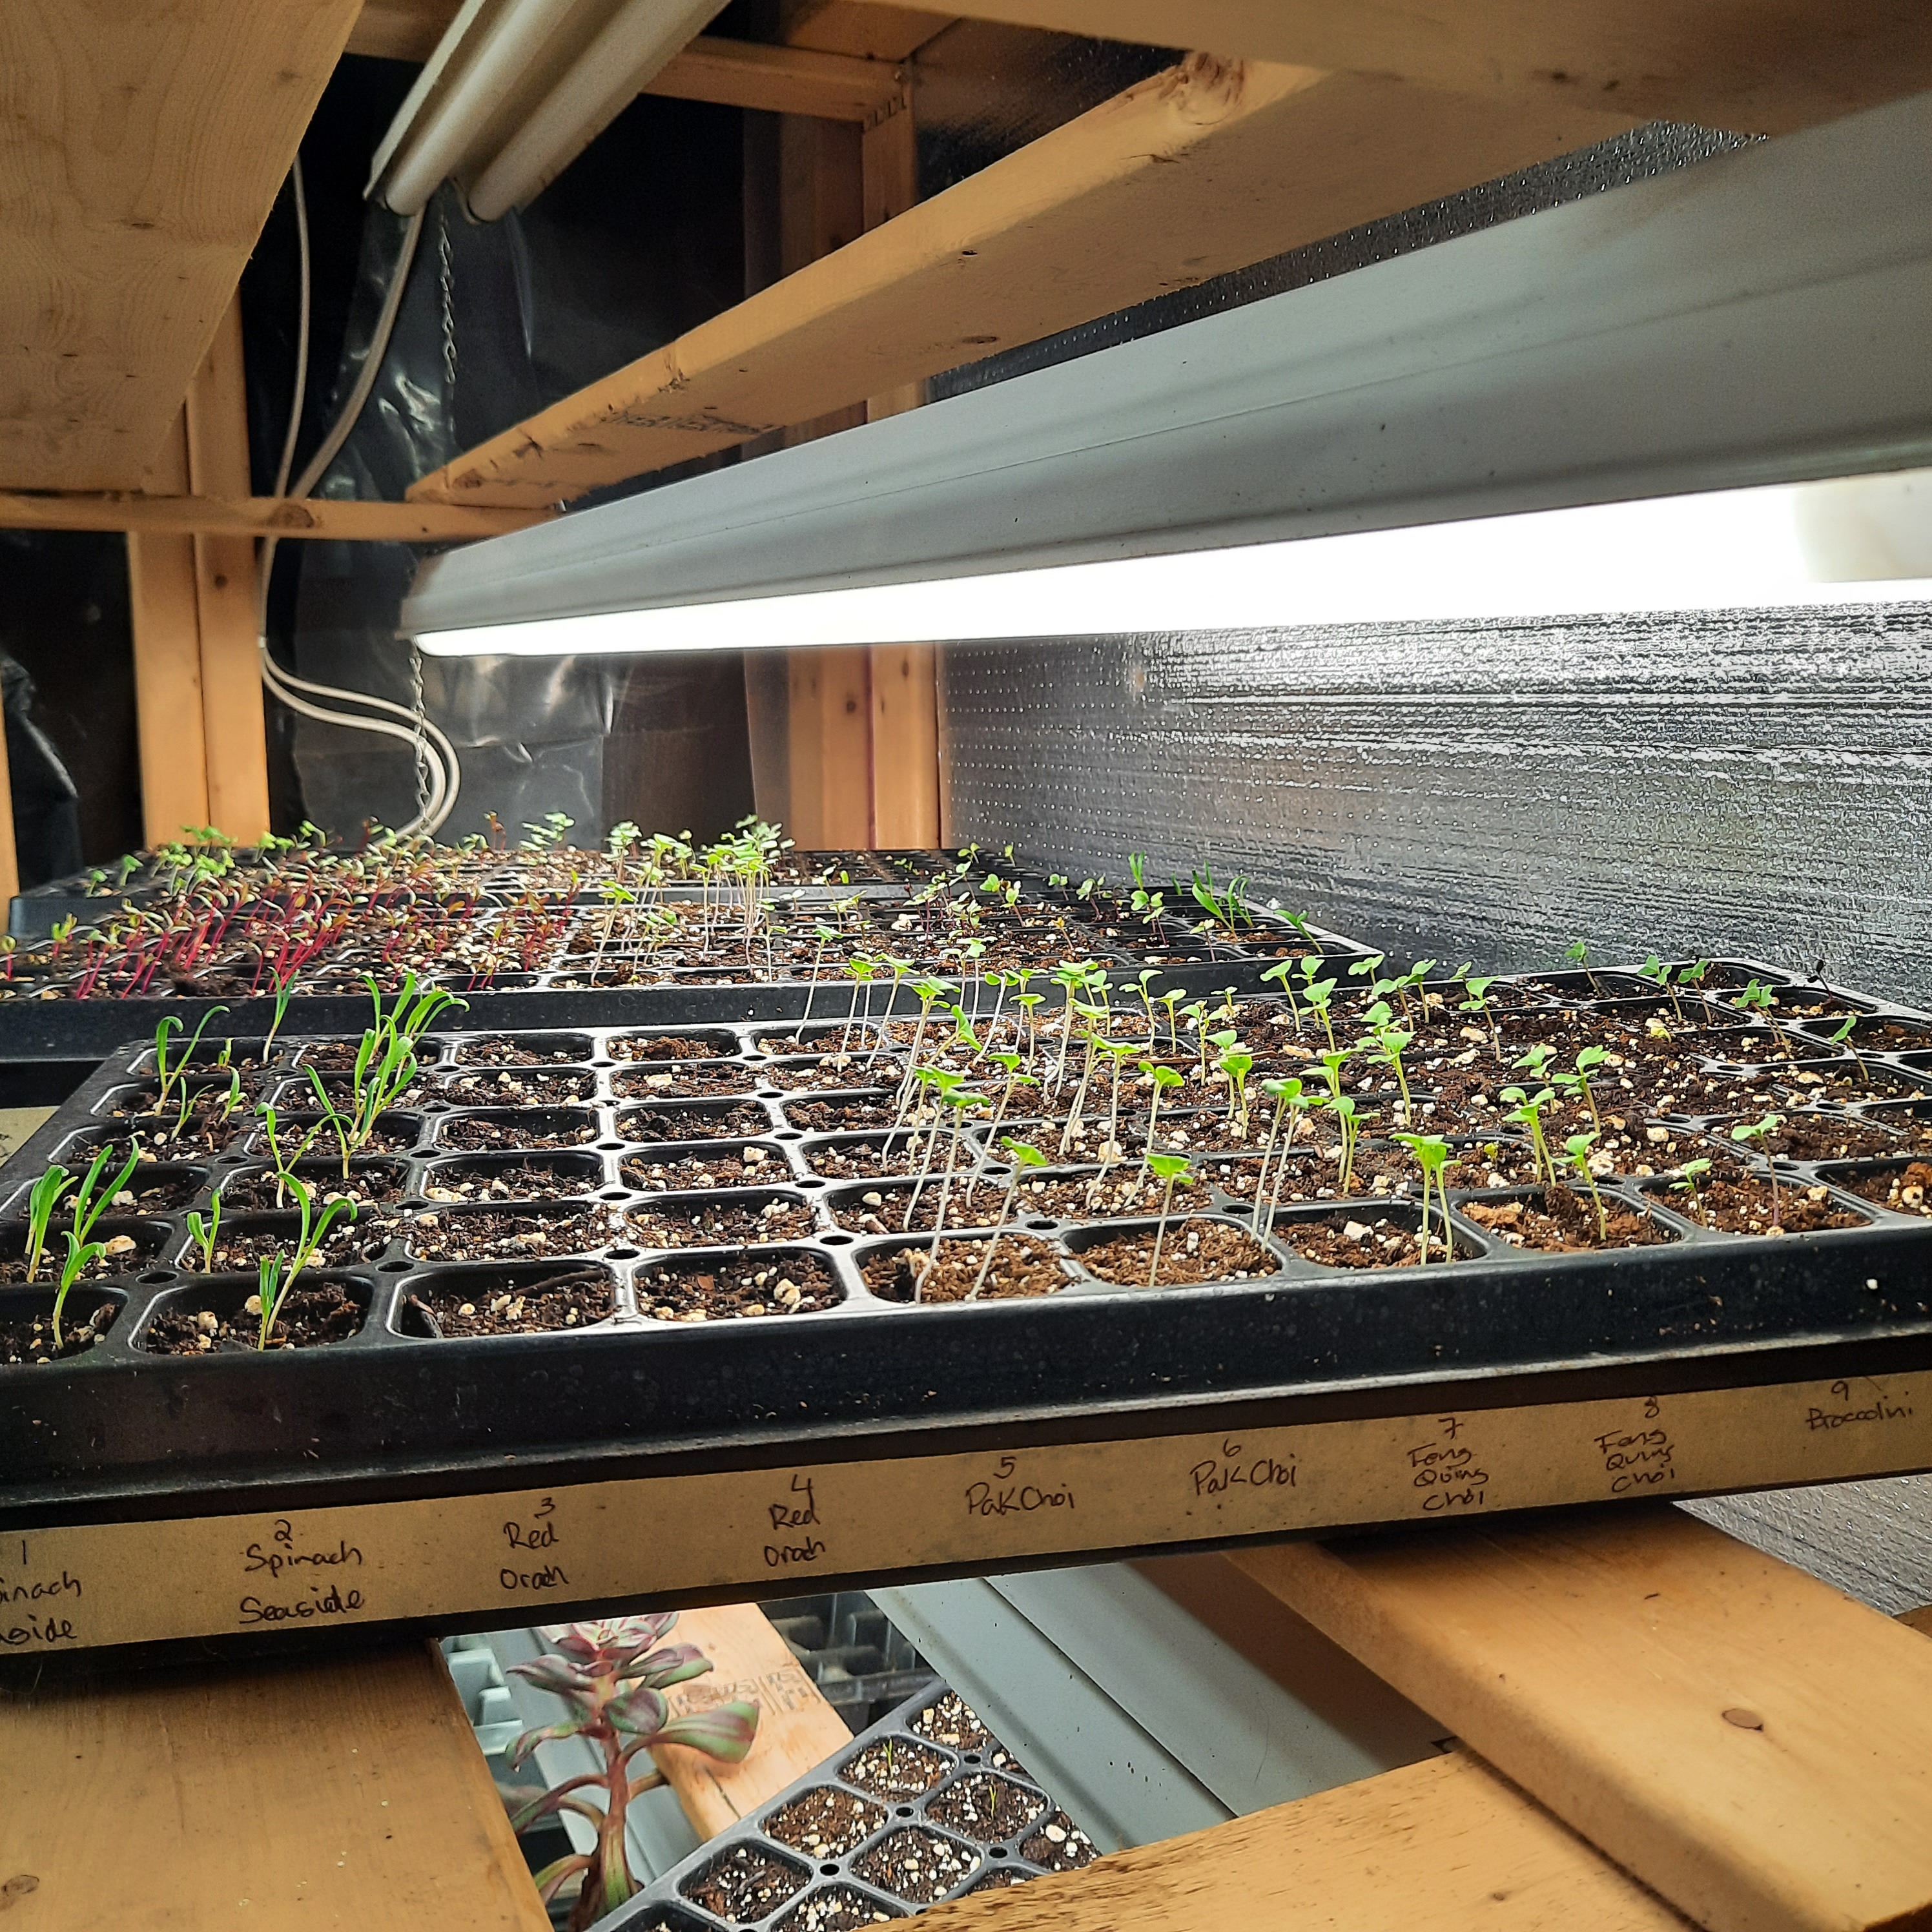

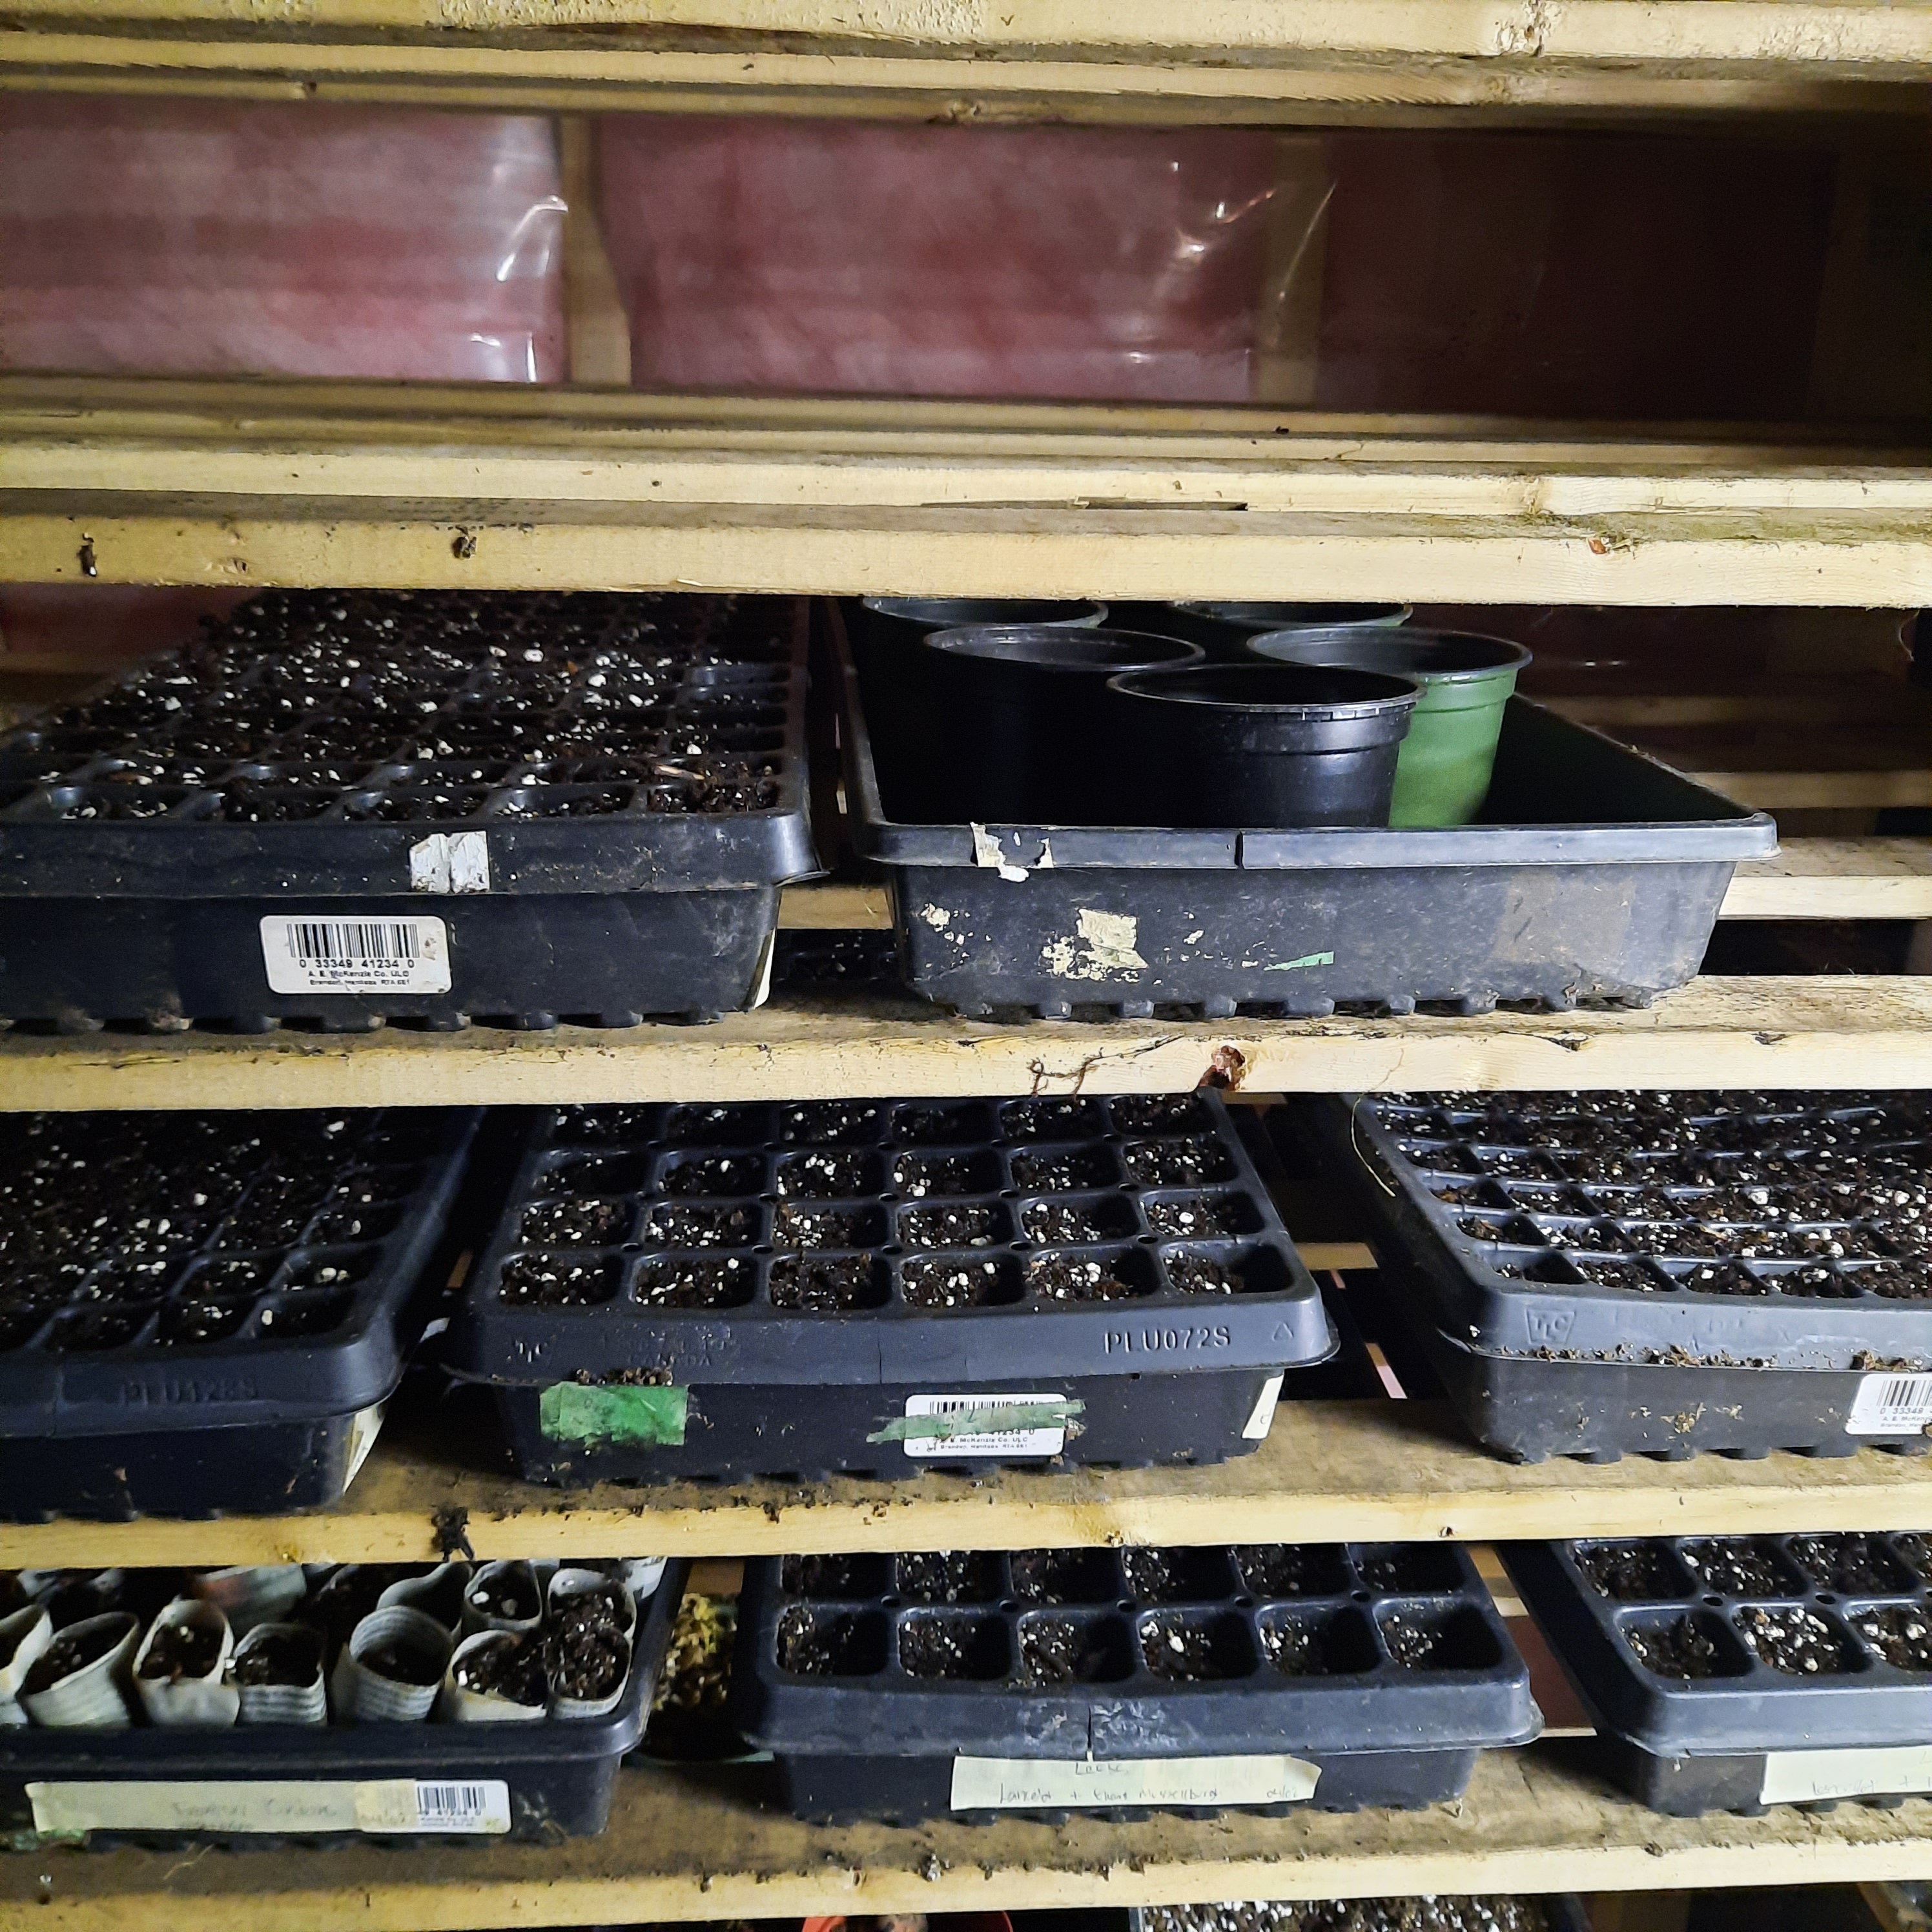
Just a little picture update on the seedlings plants the last couple weeks.
I will be starting more flower seeds this afternoon♡
Homesteading is in my mind quite rewarding. It’s like minded thoughts and goals and like a big family. In being part of that community we learn new skills from each other which is so cool. So I am learning a new skill in my fermenting chapter this week.
I have watched a few friends online show how they are practical and frugal and creative in how they use parts of the harvest and the harvest and dried preserved harvest to create amazing products that up your cooking and house cleaning abilities.
Homemade vinegars is a new skill I am taking on and I am sharing with you to grow your skills as well. They can be made several ways and used in several ways that makes it very practical.
In this blog I am using dried fruits to make my eating vinegars. This is a two stage procedure that requires the first stage called the alcohol stage and then the second which is the vinegar acidic stage.
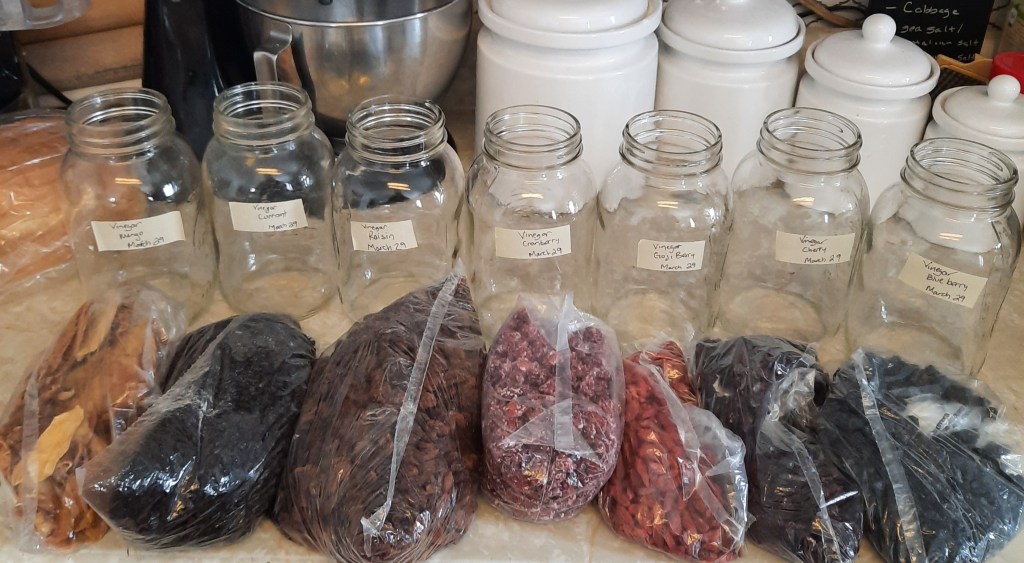
So for the 7 vinegars I am going to make….. I actually went out and bought a couple of the dried fruits and the others were ones I already had on hand. So I bought dried cherries and mangos, but I had in my dried fruit stash blueberries, goji berries, currents, raisins and cranberries.
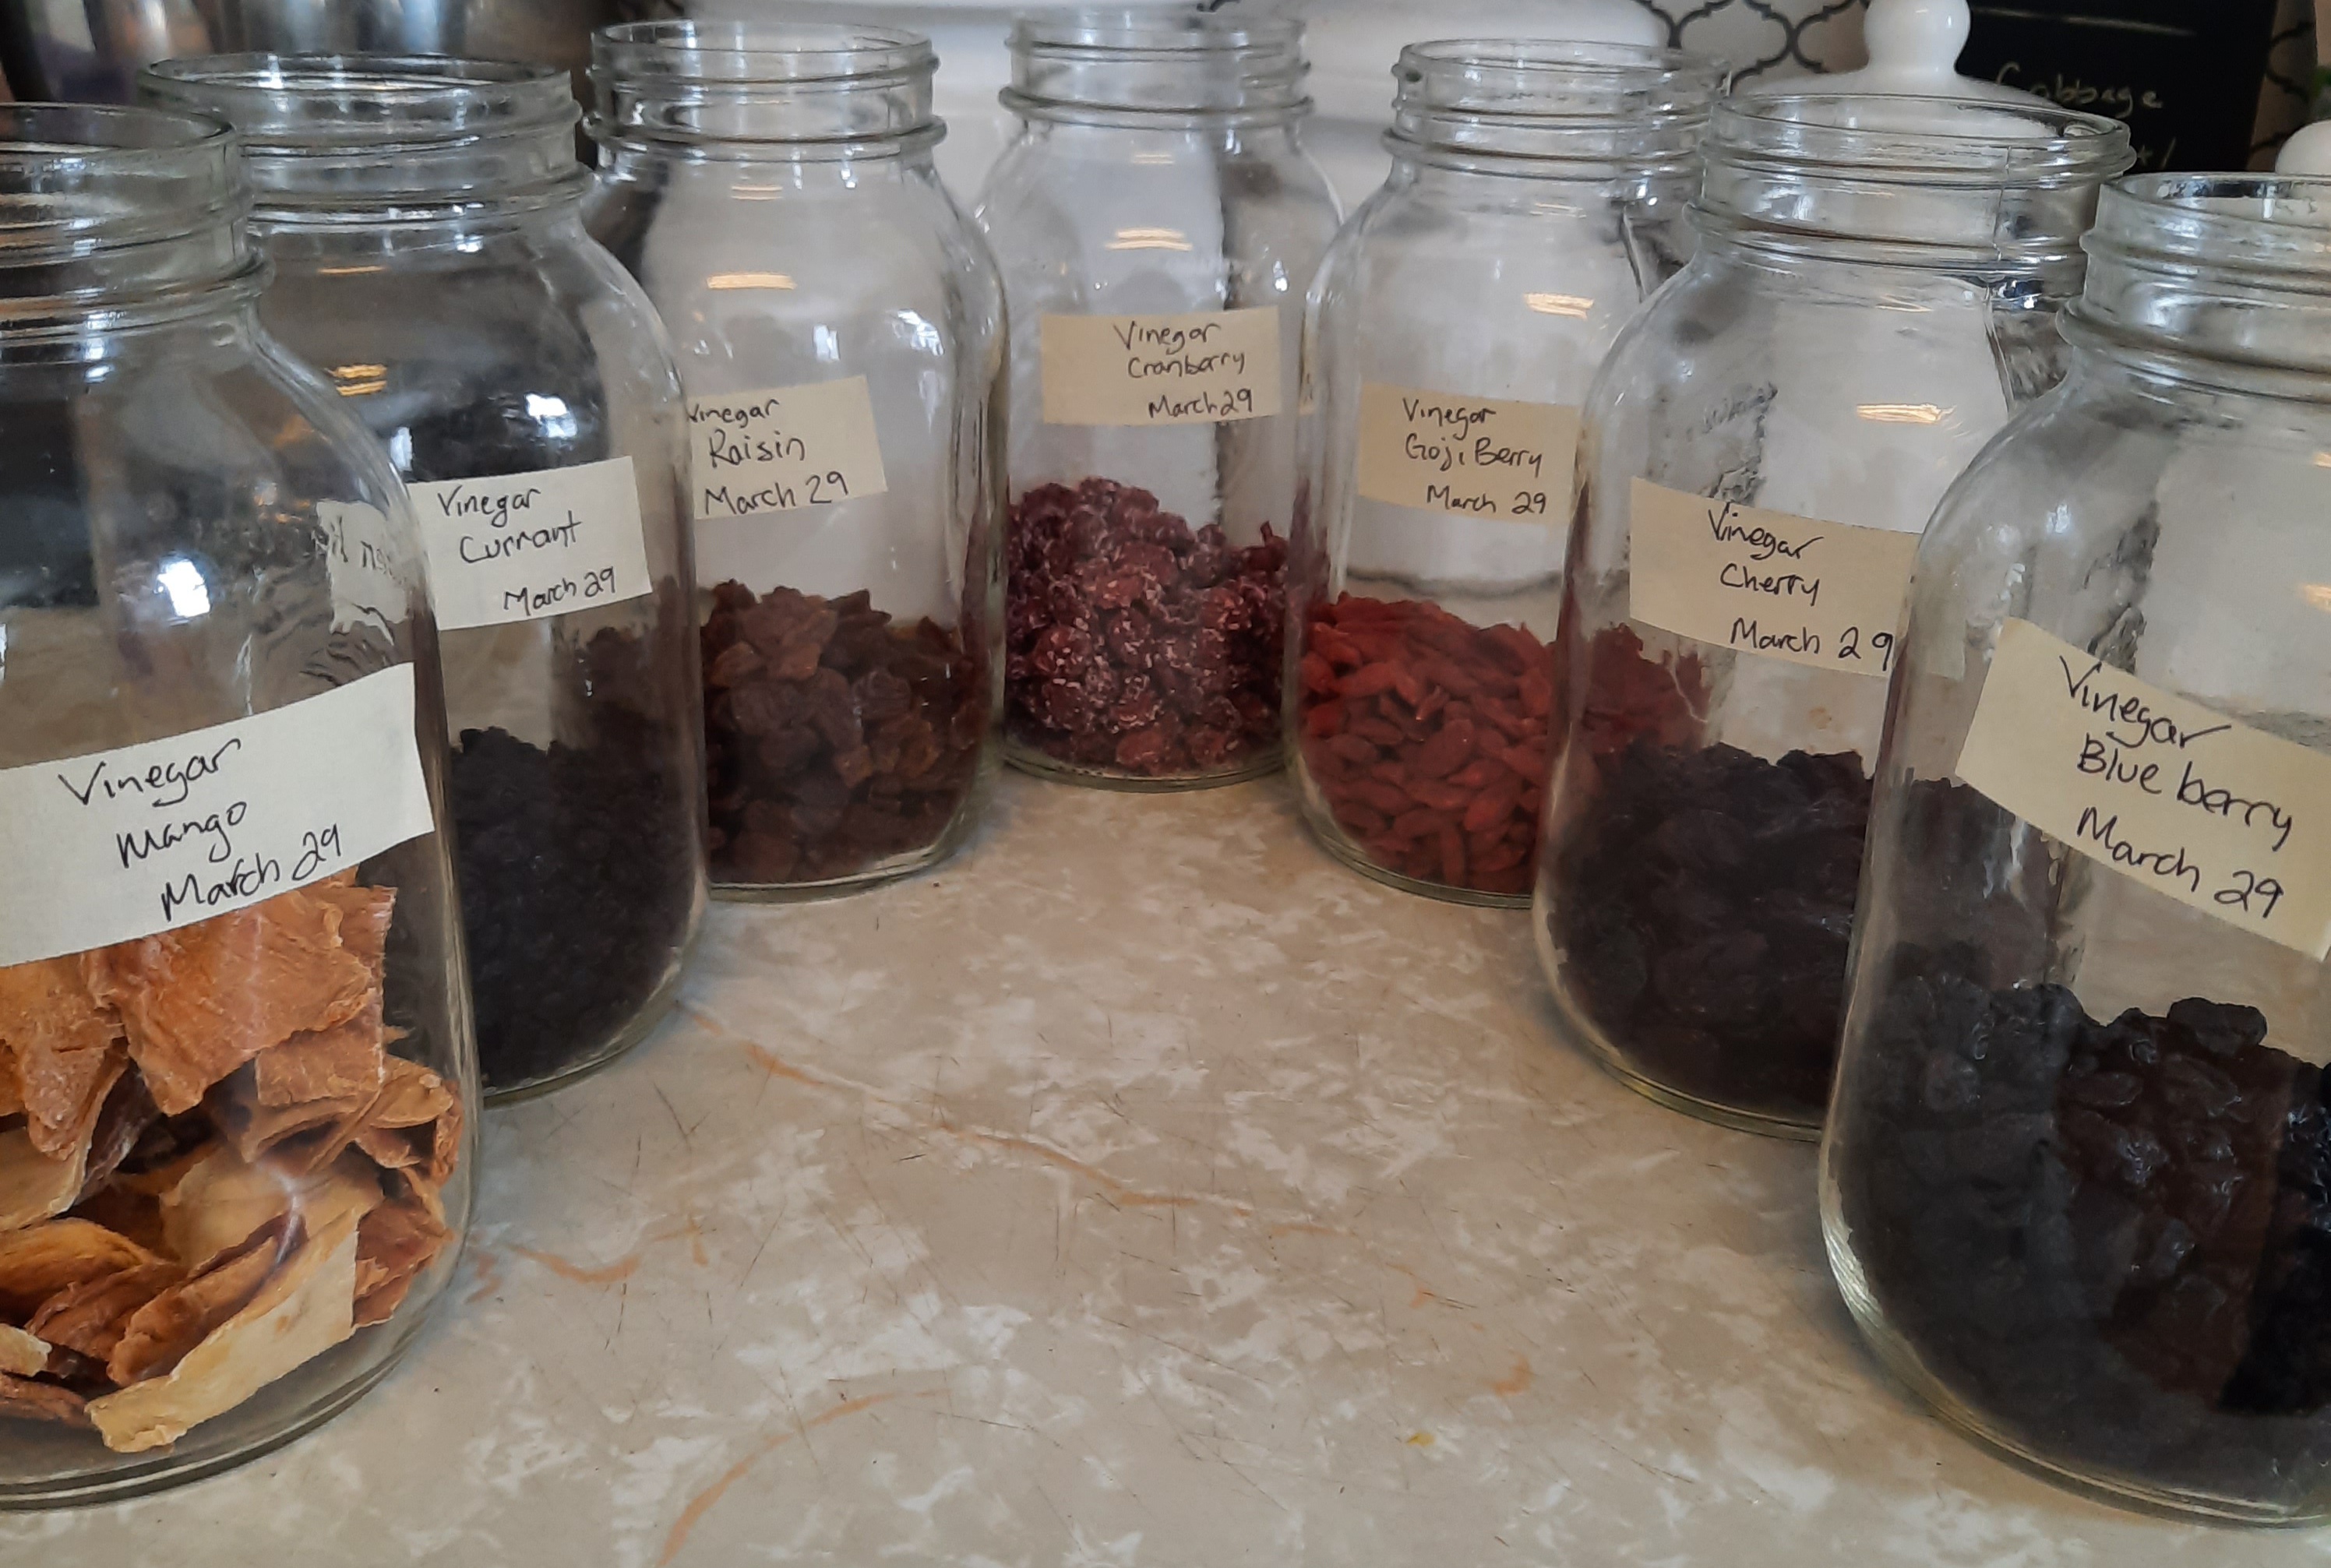
I am using quart jars covered with coffee filters because you need oxygen to help grow the bacteria needed to ferment the fruits to create the 2 steps to vinegar. So we start off with 1 cup of dried fruit in each jar topped up with untreated well water or uncoordinated or treated water. Those chemicals stunt or prevent the fermenting process.
So now that the jars have the dried fruit and water in them and are covered, we wait. We’ll there is a little bit of daily action required….. each jar needs to be stirred once a day….
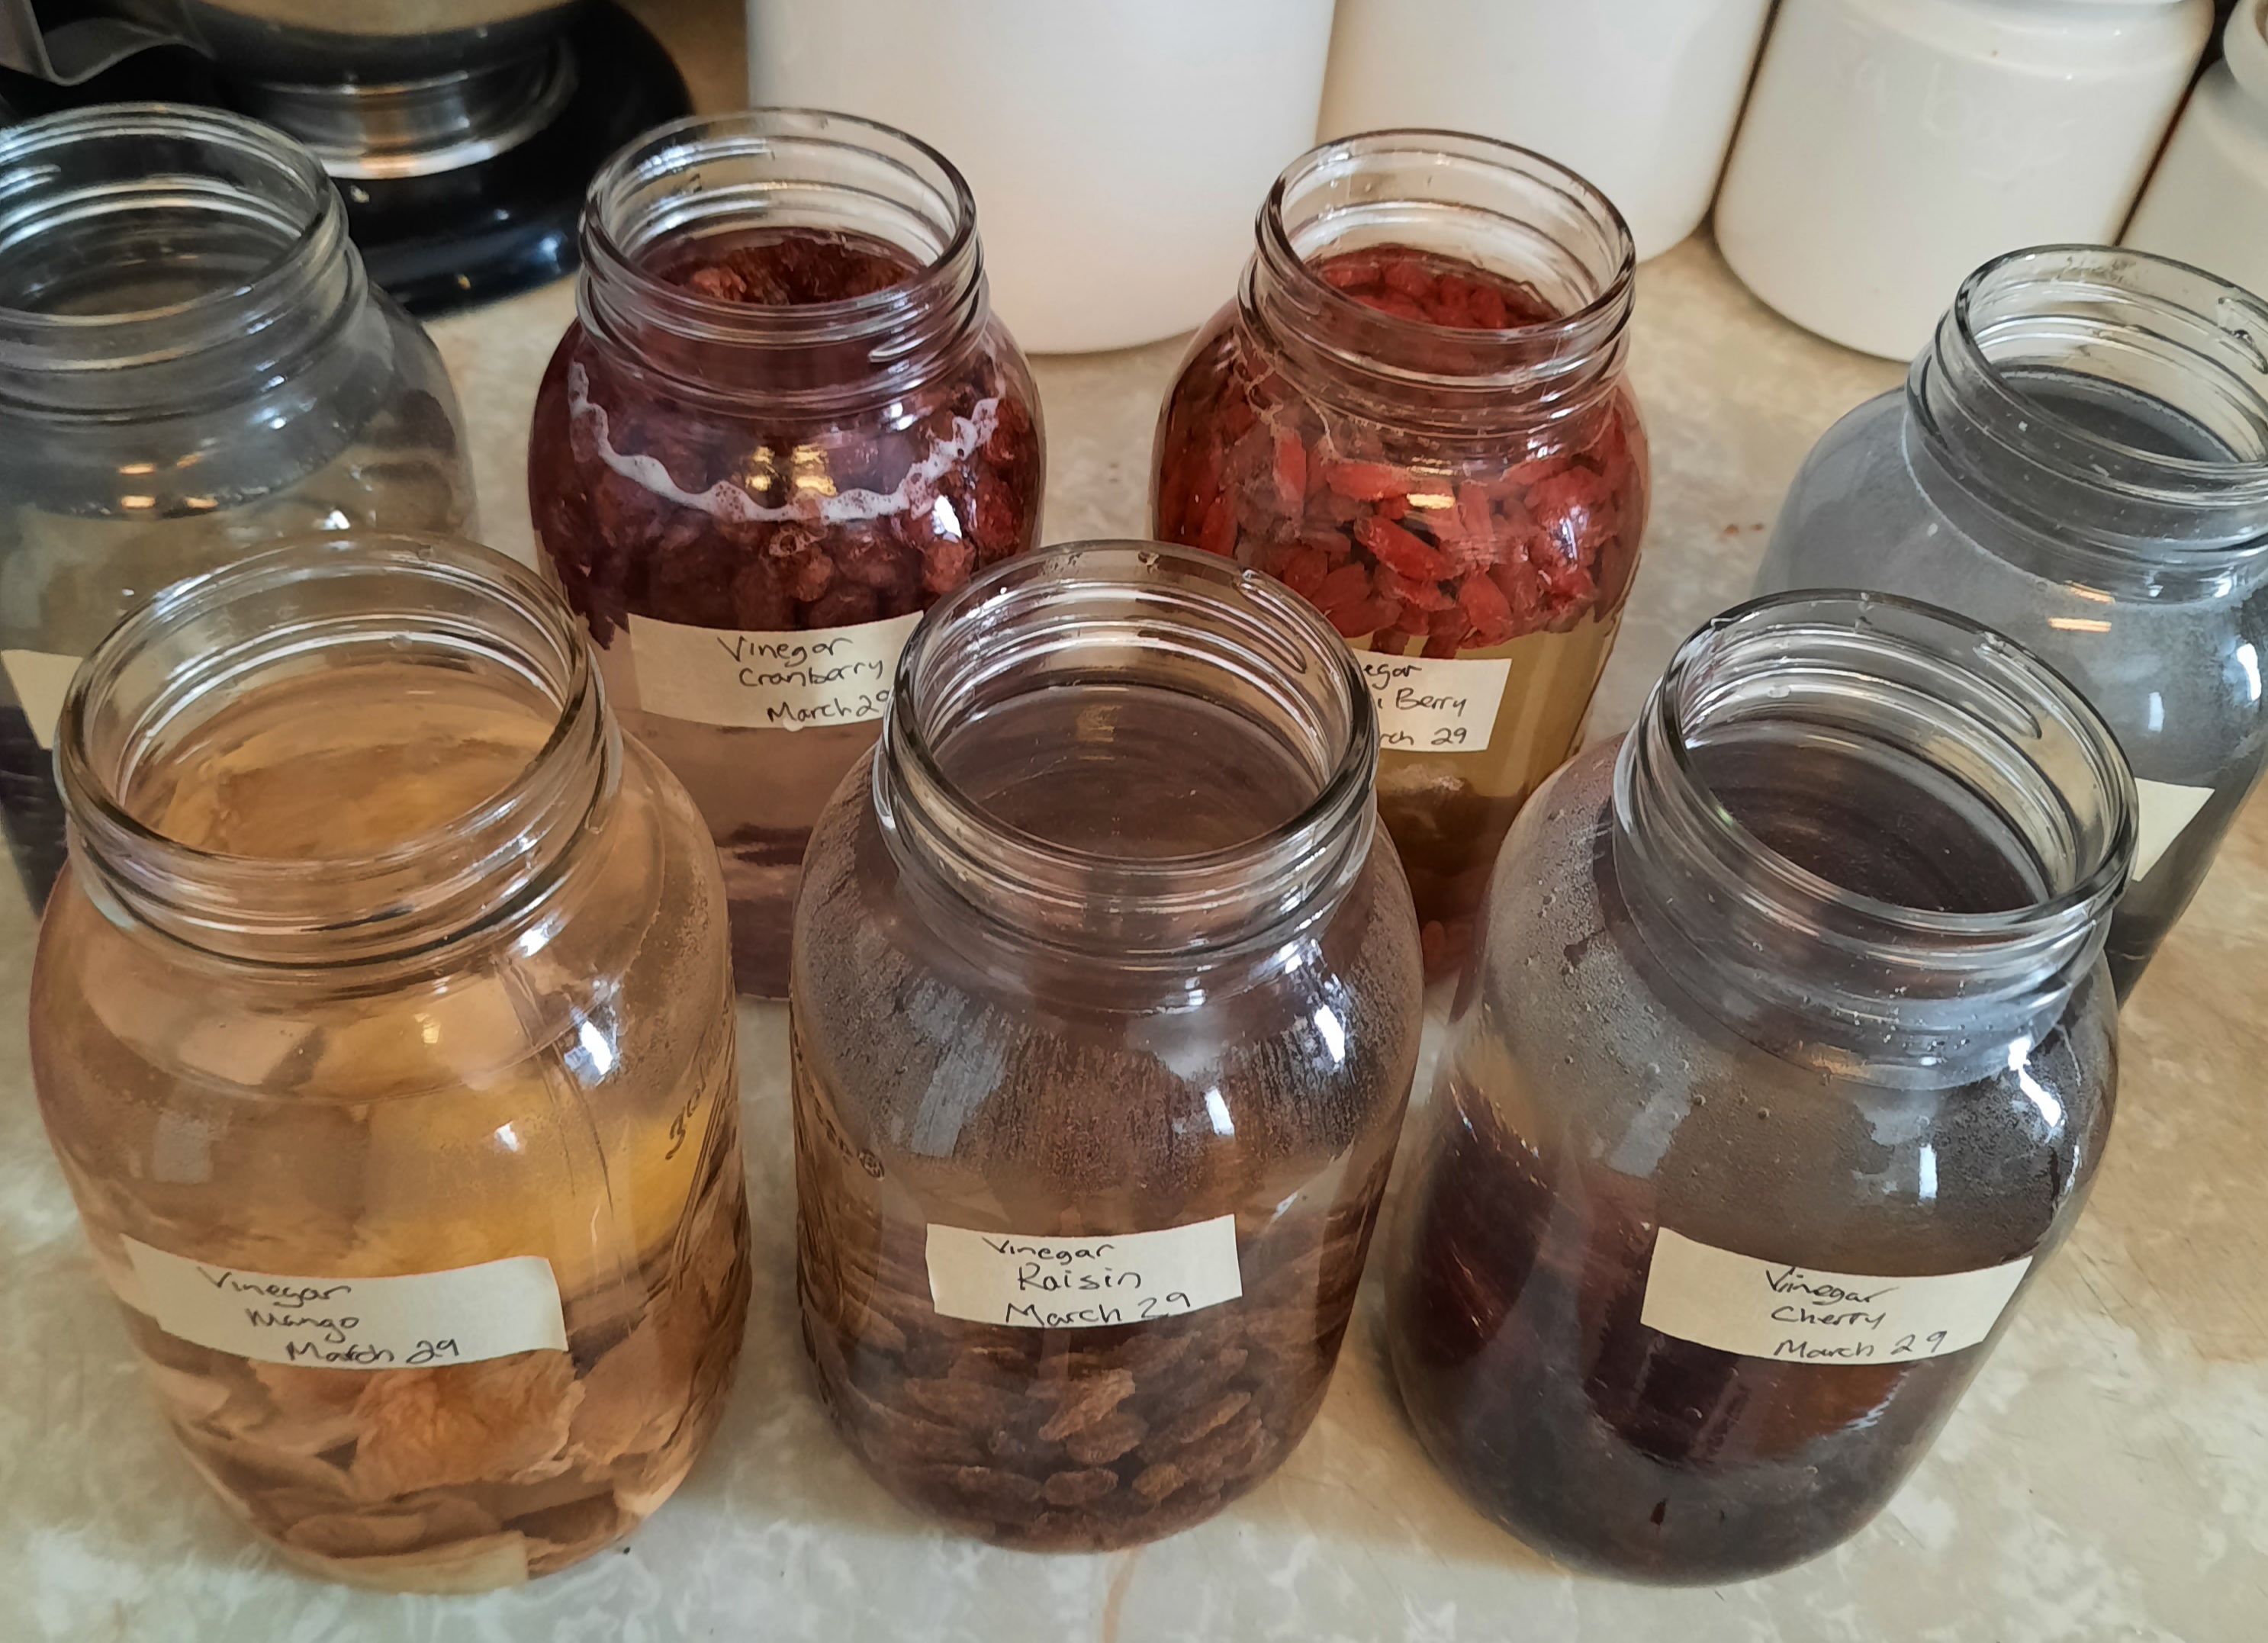
By day 5-10 we should have reached the alcohol stage depending on how warm your kitchen is. By day 20 the fruit can be strained off and by day 30 -60 you should have an amazing fruit vinegar. You should smell a hint of vinegar smell around day 20 which tells you it’s happy….. and really By day 30 you could use it as long as the frizzy bubbles are now gone. The longer it ages the better the taste.

So expect another post update in the next weeks or so on the progress.
Please leave me a comment if you have a question and I will try to answer it for you.
Now if you were gonna use fresh fruit to make your vinegar the process is slightly different and here is were you can be a bit frugal. If you were canning and you had say some left o er peach pits and skin with a bit of flesh on them or even some soft peach fruit… you can add that to your quart jar with 1/4 cup of organic sugar and top it up with water and then the process is the same….. you can do the same with apple peels and cores, pear peel and cores etc…. I think even concord grapes would be good.
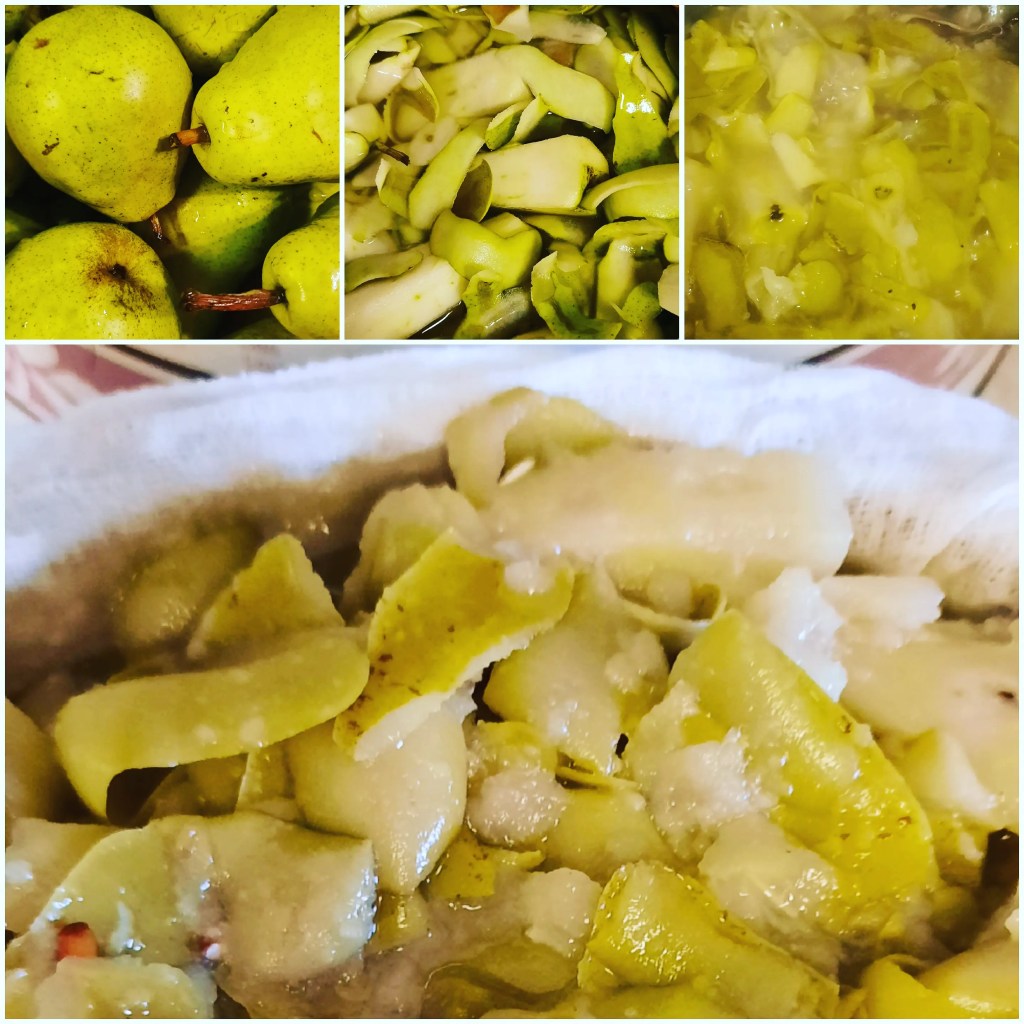
Again the fruit and the sugar and mix daily…. be sure not to over sugar the mixture as that actual prevents the fermenting process.
If you want to change things up think about adding herbs and or hot peppers. The sky’s the limit I guess… get creative and start something in the kitchen today♡.
For anyone that knows me being a tad whimsical in the garden this year might be exactly who I am.
The veggie beds have always been very structured because I market garden farm. But since my illness last year that really made me sit back and do hardly anything all season and really put things into perspective for me.
I got back to why we originally came here and my goals changed. I will be growing lots of beautiful veggies and fruits for us with some to perhaps sell but the growing strategy has changed drastically.
I want everything to look and be different this year. I want to look out back from the back of the house and from the upstairs bathroom or bedroom and say wow that looks crazy awesome.
I can’t begin to tell you how happy I am to be making these changes…. in some cases it might seem like more work. But I believe that what we will reap from the free feeling whimsical changes I am going to make the it will be big.
I already have 800 cell plugs of early flowers started. That does not include the 4-6 week flowers I have yet to start the two bags of wild flower seed mixes and a huge bag of sunflower seeds I am going to plant. I think if all goes well…. anyone passing by the homestead/farm is gonna be 😮 surprised.
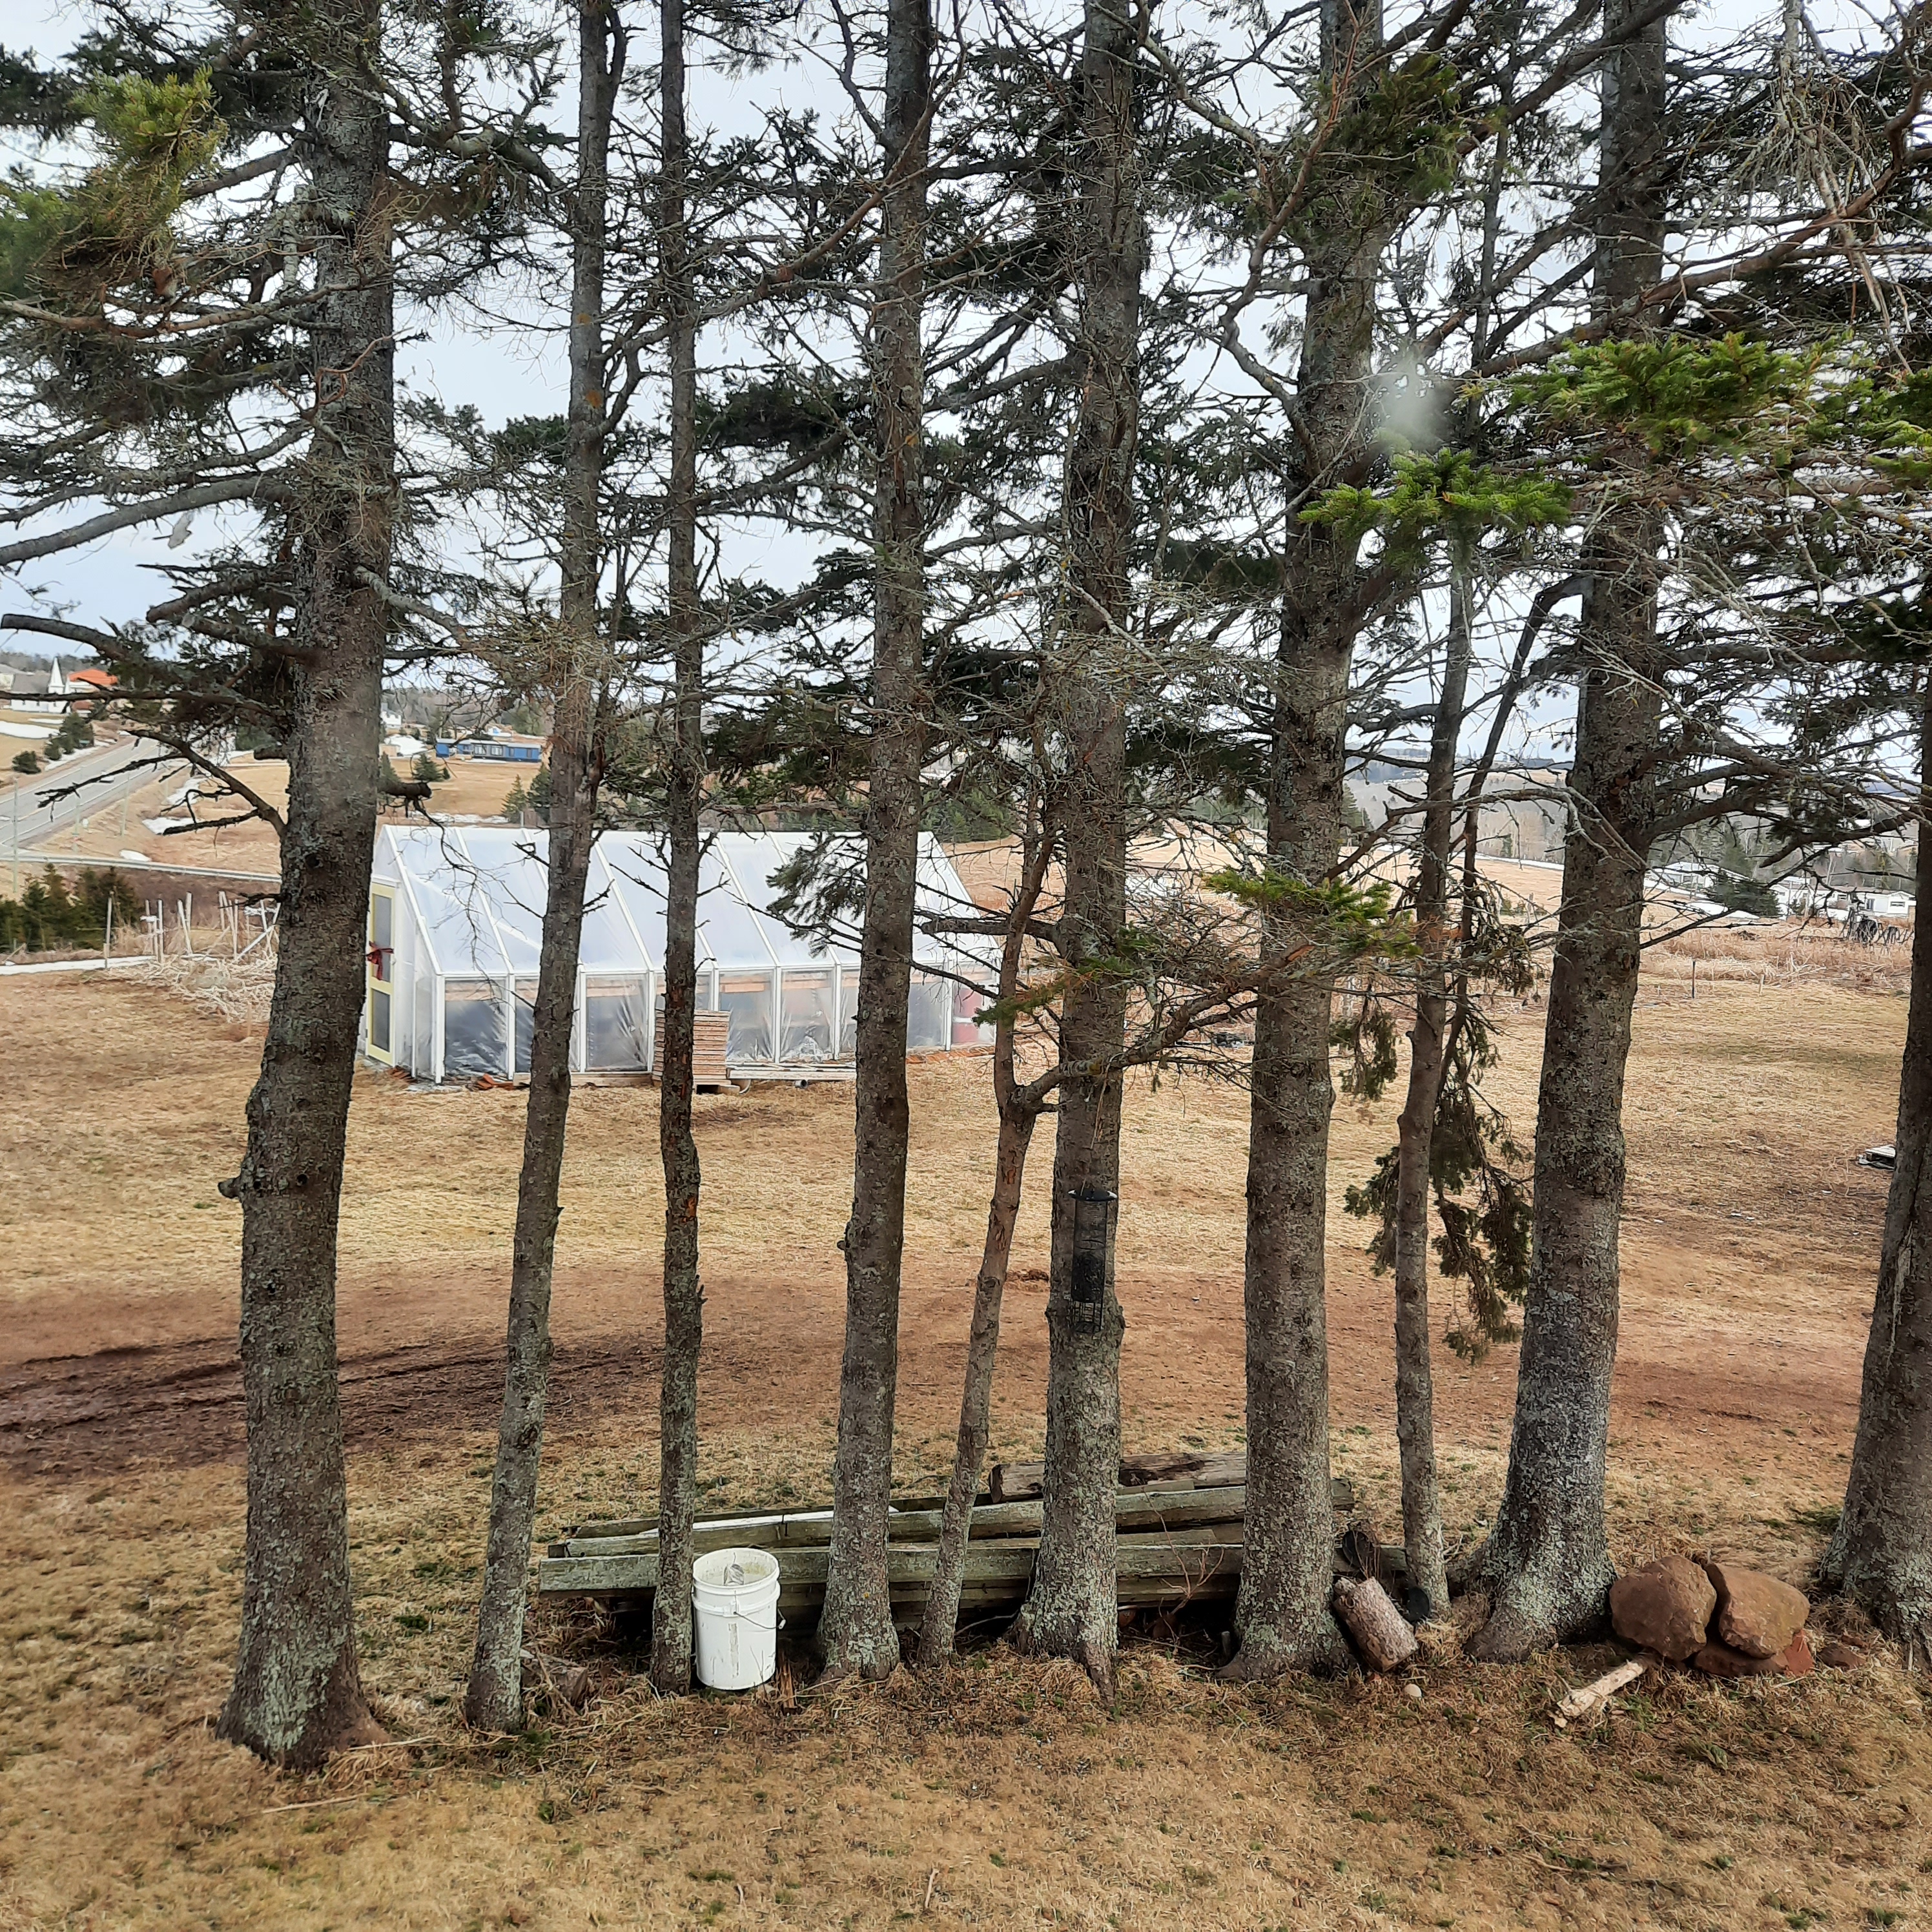
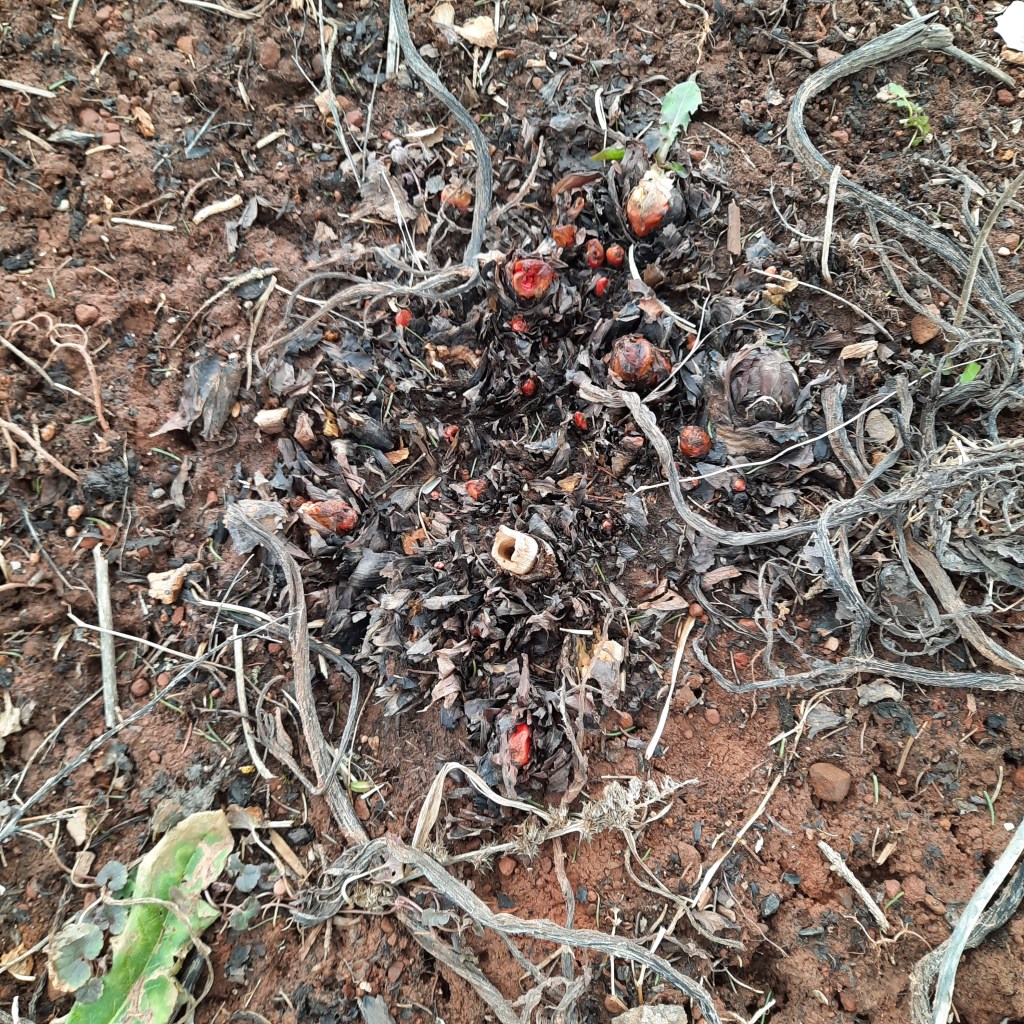
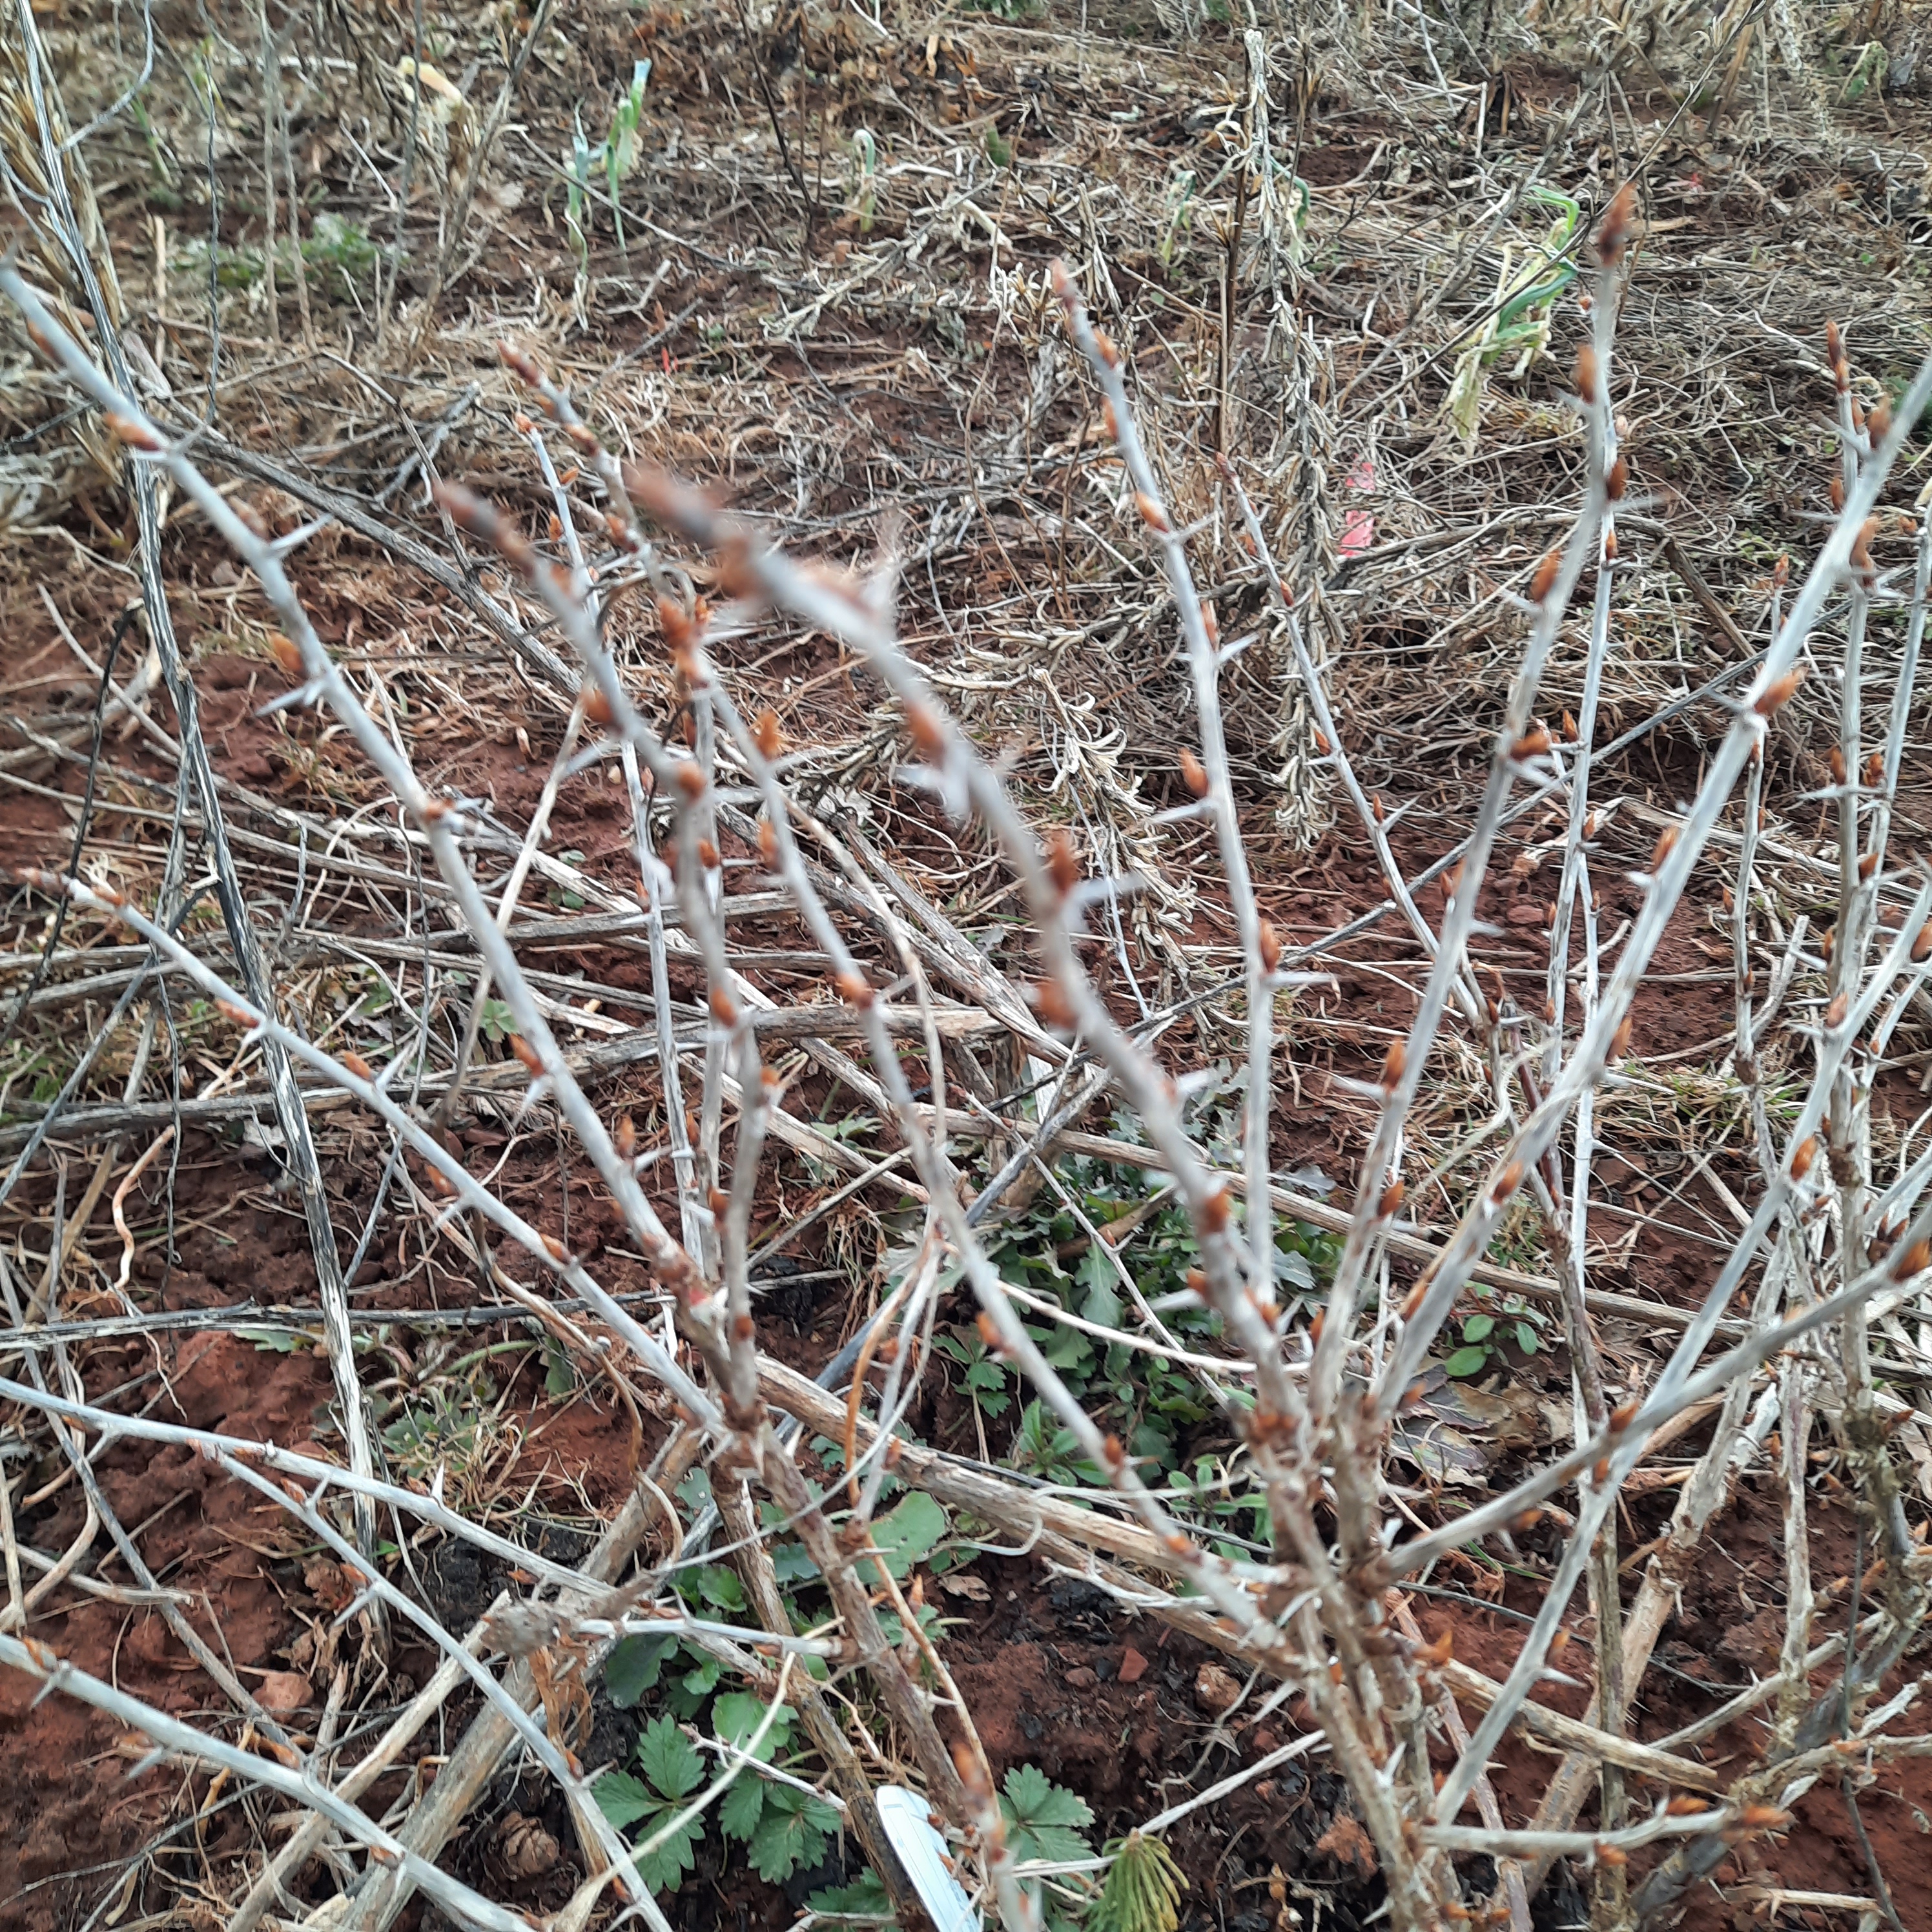
I was out in the gardens and greenhouse today taking a curious look around. I can already see some perennial veggies starting to show life as well as some of our fruit bushes…. I love this time of year. Now we are preparing for a bunch of snow and freezing rain again tonight in Wednesday but hey the end of March and beginning of April are always wild in the weather dept.

So I am making some big changes in the beds… hopefully the pictures won’t be too confusing. The first to pictures are what the garden looks like right now. The red lines drawn in are where the new proposed bed blocks are going to be.


So going from a standard 4 ft x 50ft – 5 row plots system to a 24ft x 25ft square block set up with at least 6 block designs so far that can be intertwined throughout the bed system.
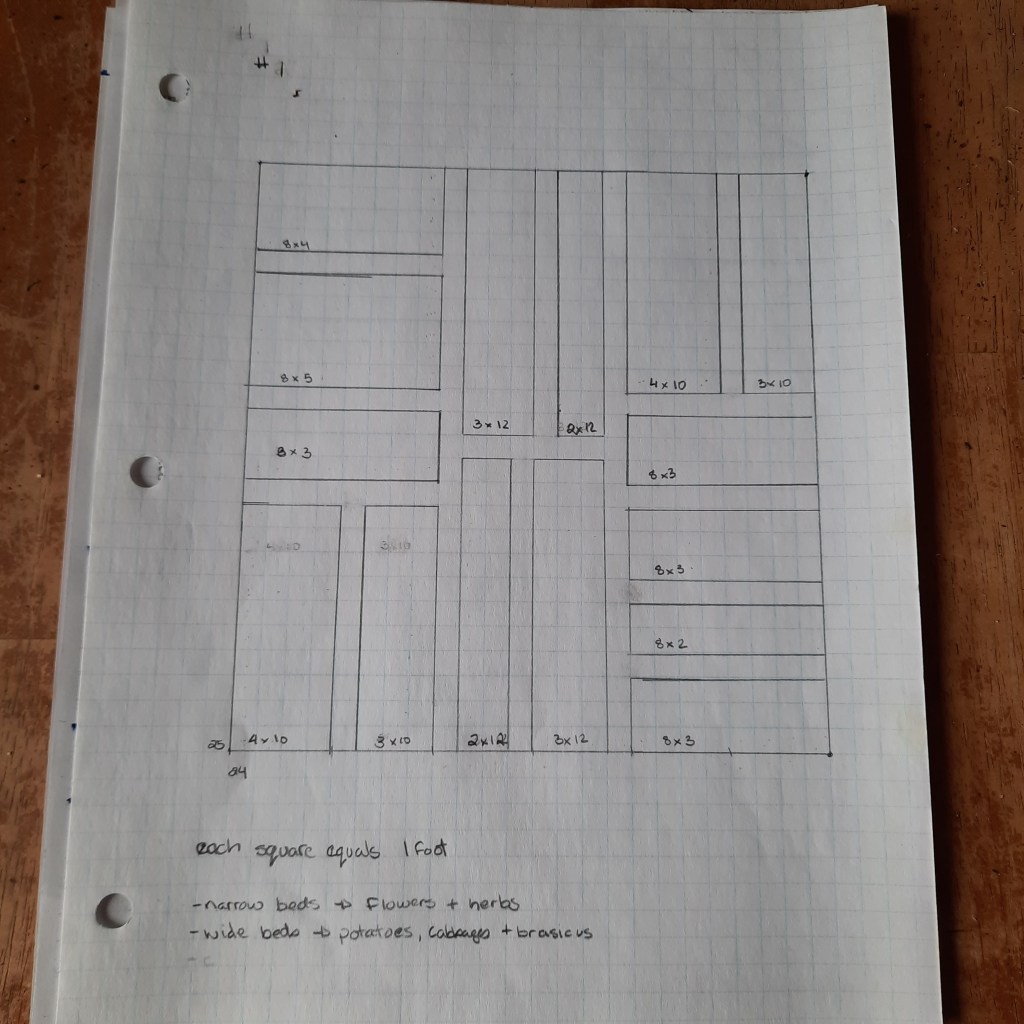


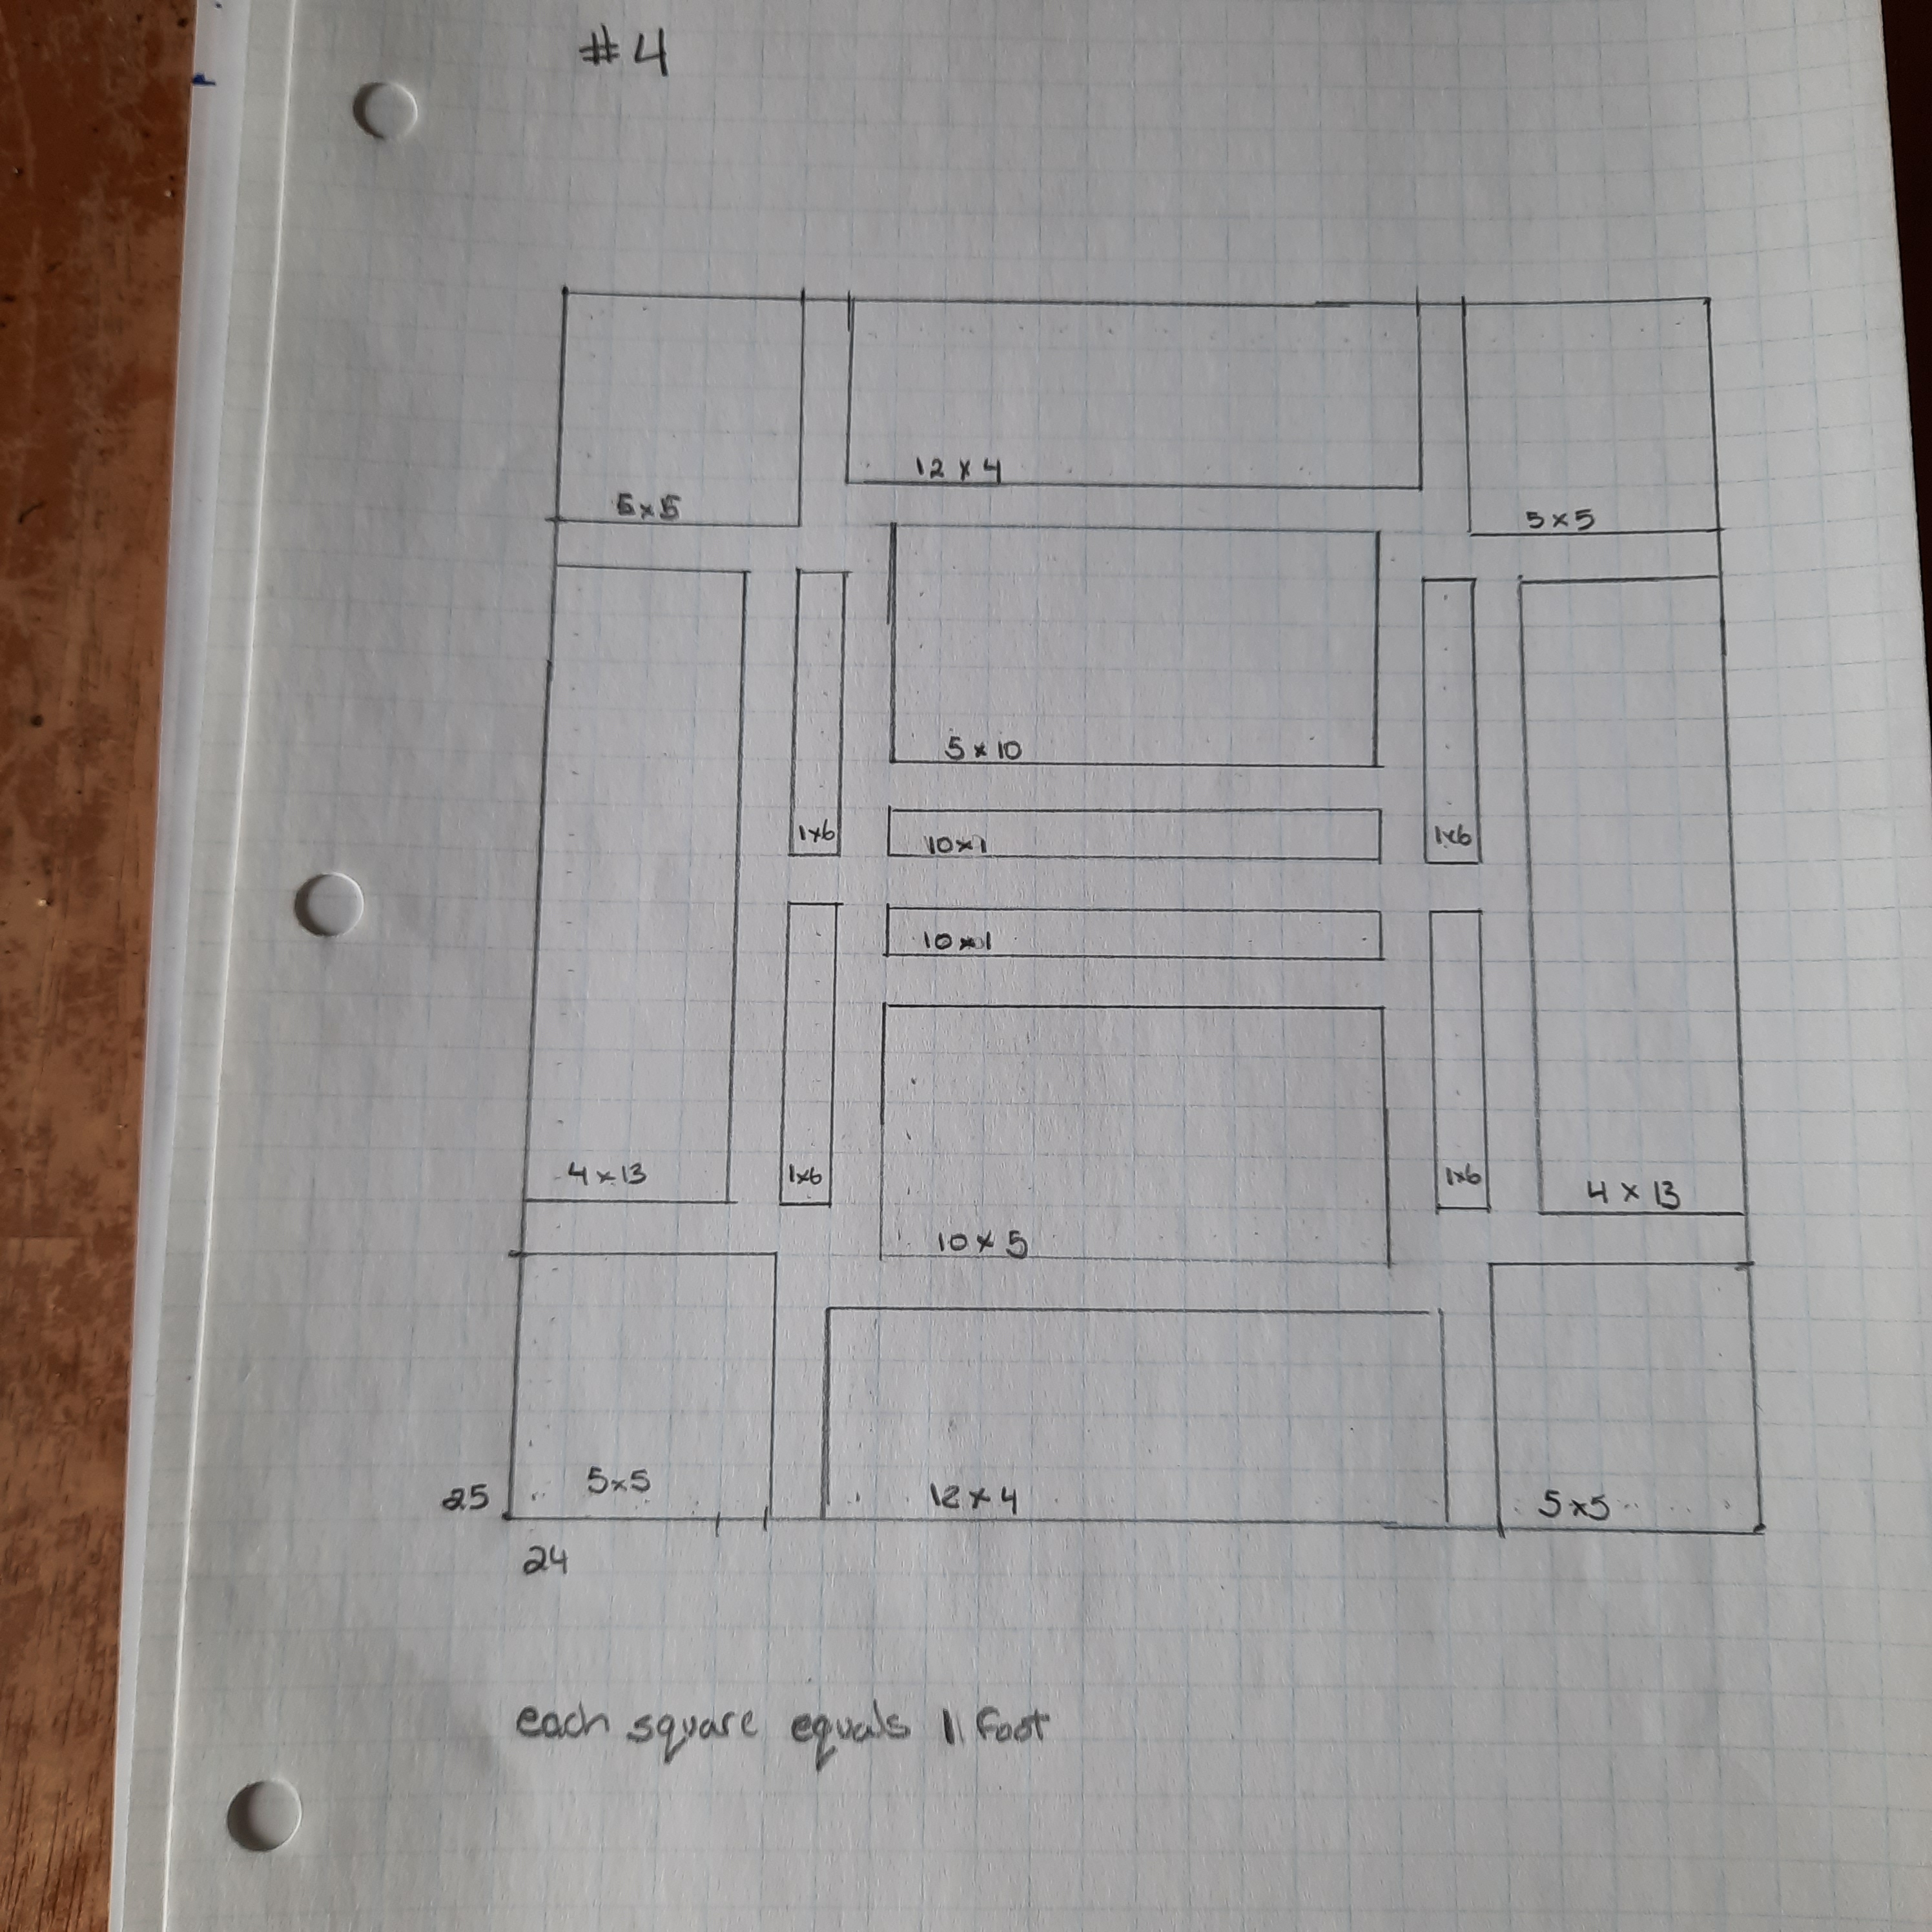
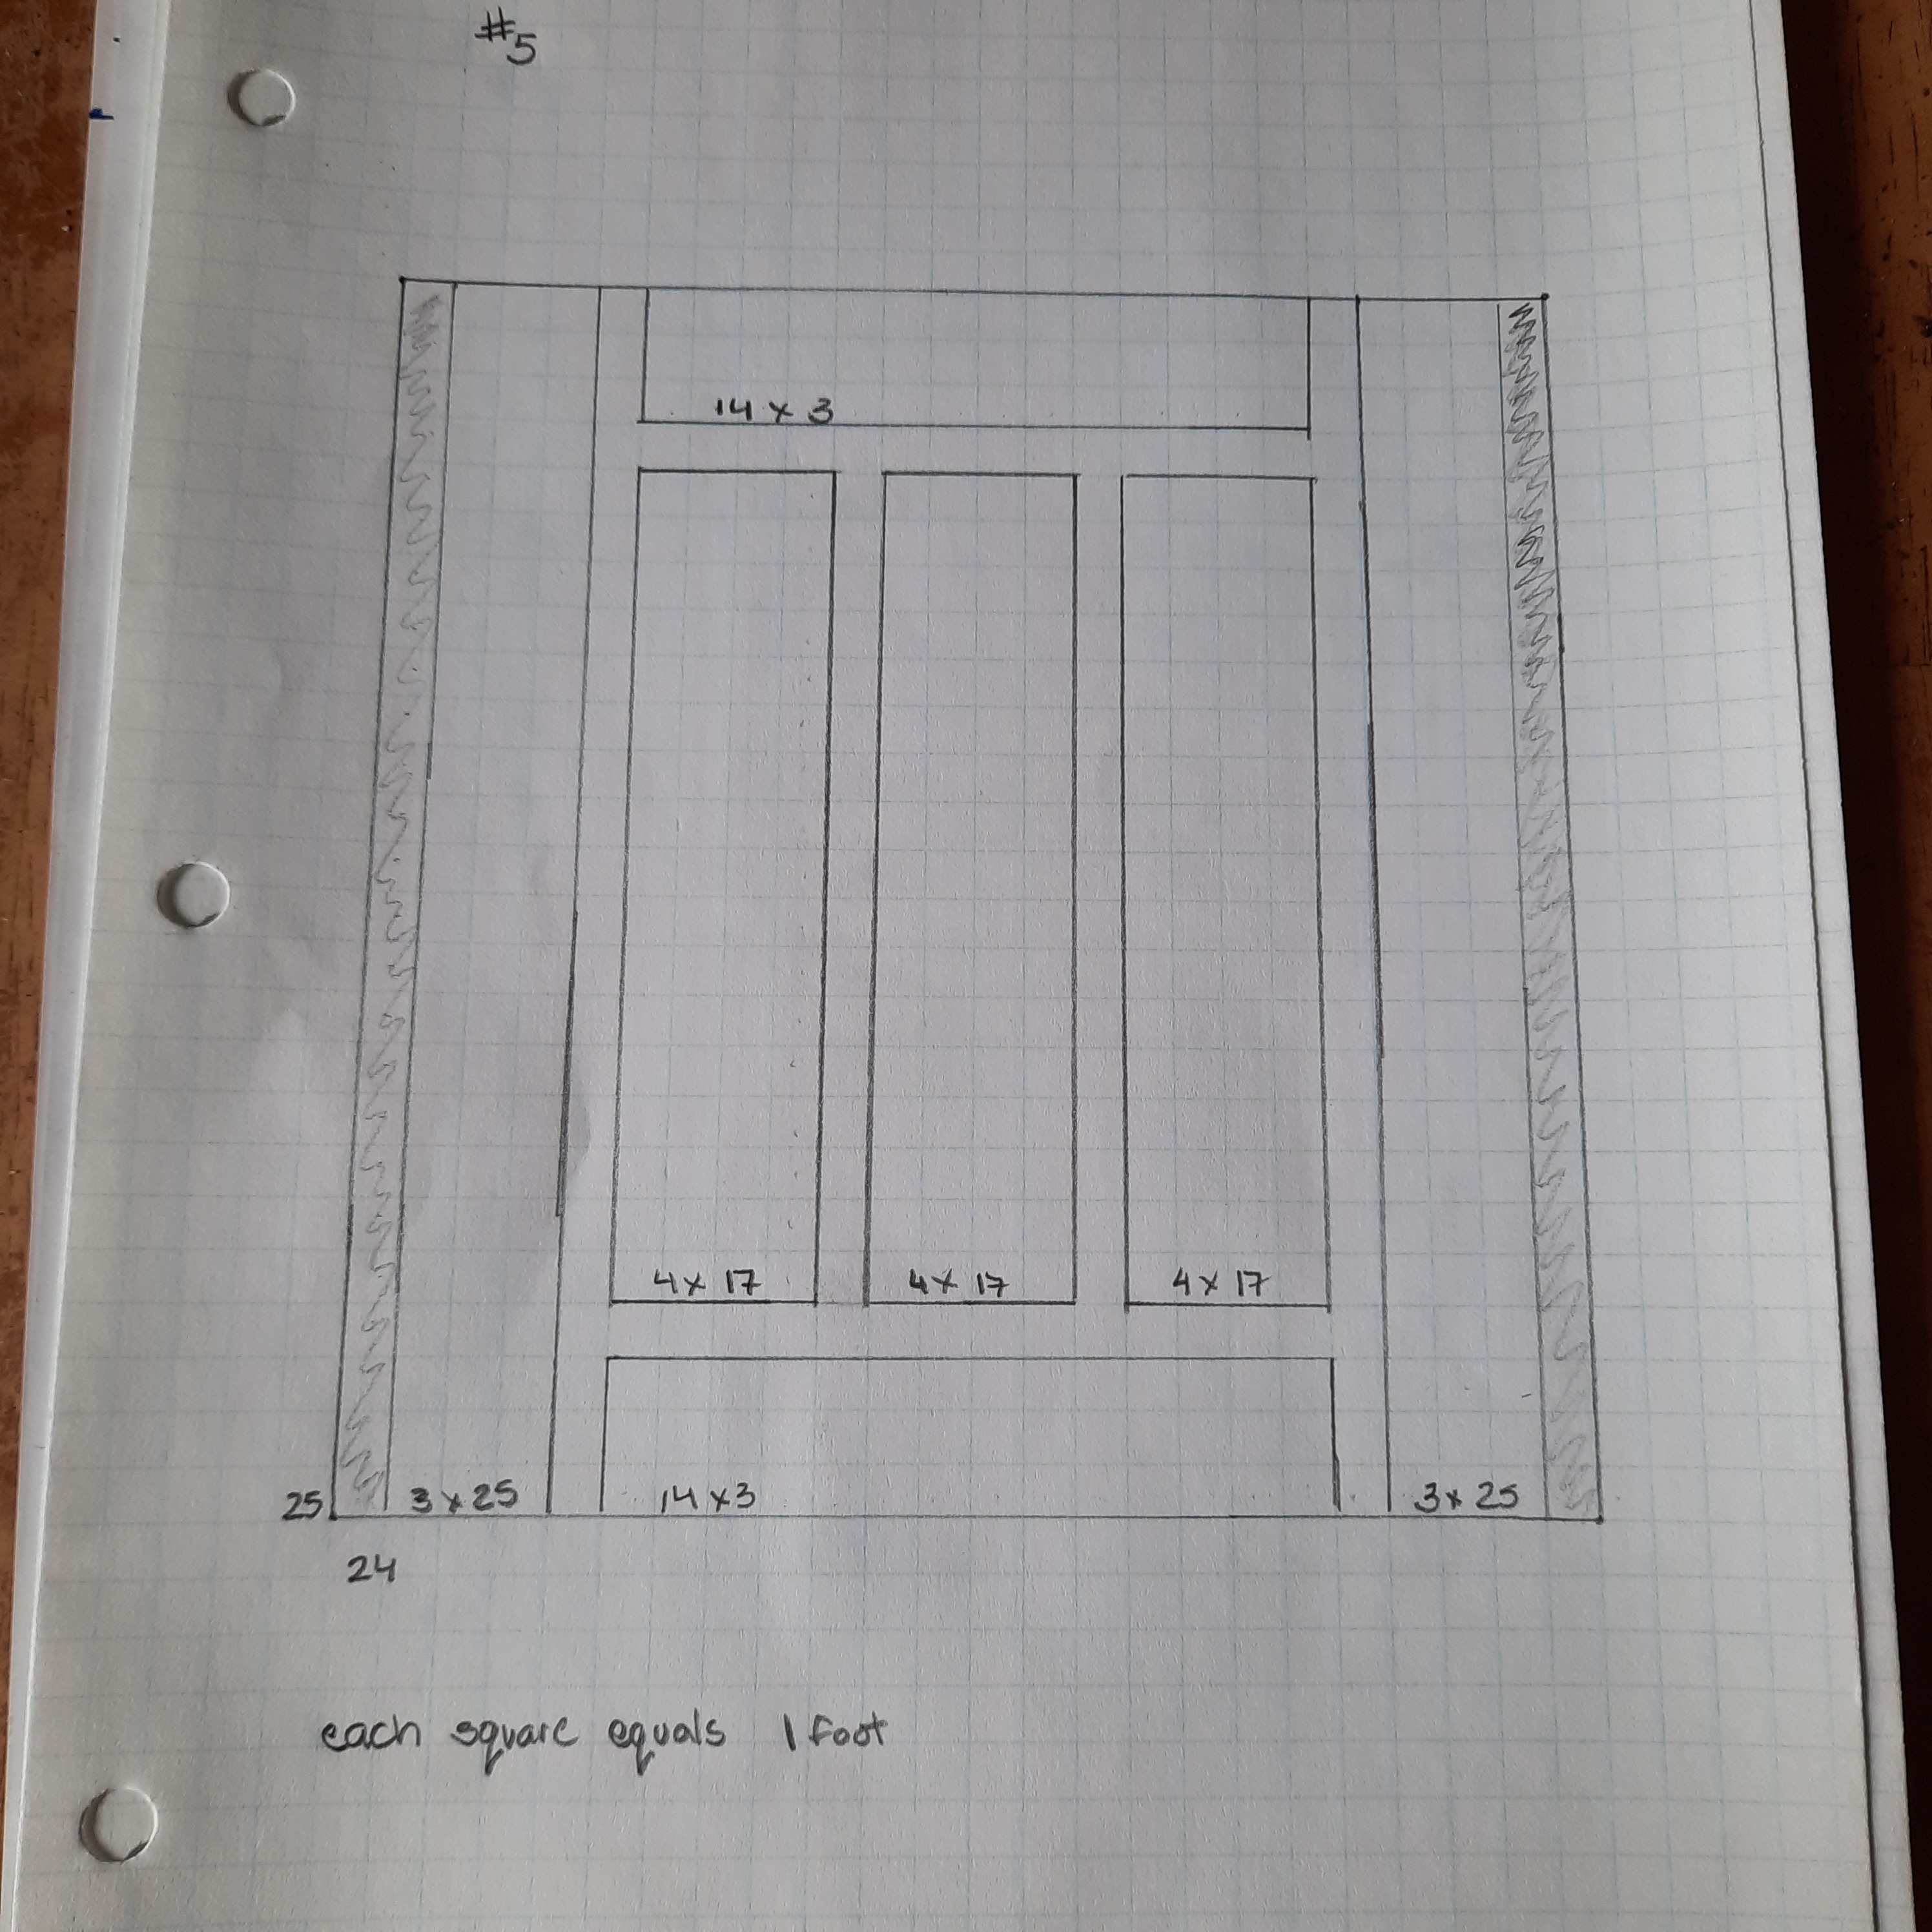

In each of the square blocks I will have both short crops and long crops intermingled. Lots of companion growing and I am introducing flowers that are beneficial to pest control and eating.
All in all I think it’s gonna look spectacular. I will be able to cover up the beds not in use right away after it all gets tilled over and then I will get busy……
I will still be doing succession plantings throughout the summer and growing season its just that those planting will not be in 50 ft rows. I think being able to change things up my have my long term crops intermingled in a block with shorter crops will help with weeding and pests.
Can you imagine seeing corn, beans, tomatoes, herbs, flowers, onions and greens like lettuce or shard all sharing a block in different sized beds all benefiting from each other? I can and I can’t wait to share pictures when they come.
I was thinking that I could even have a themed blocked for canning specifically or just have lots of fun. I think I will have some cool scarecrows and other wind chime like stuff going too… it will be fun but serious at the same time. Considering I spend so much time out there…. why not make it interesting.
So stay tuned into spring and summer pictures as I go forward with my free whimsical veggie/fruit/flower beds.
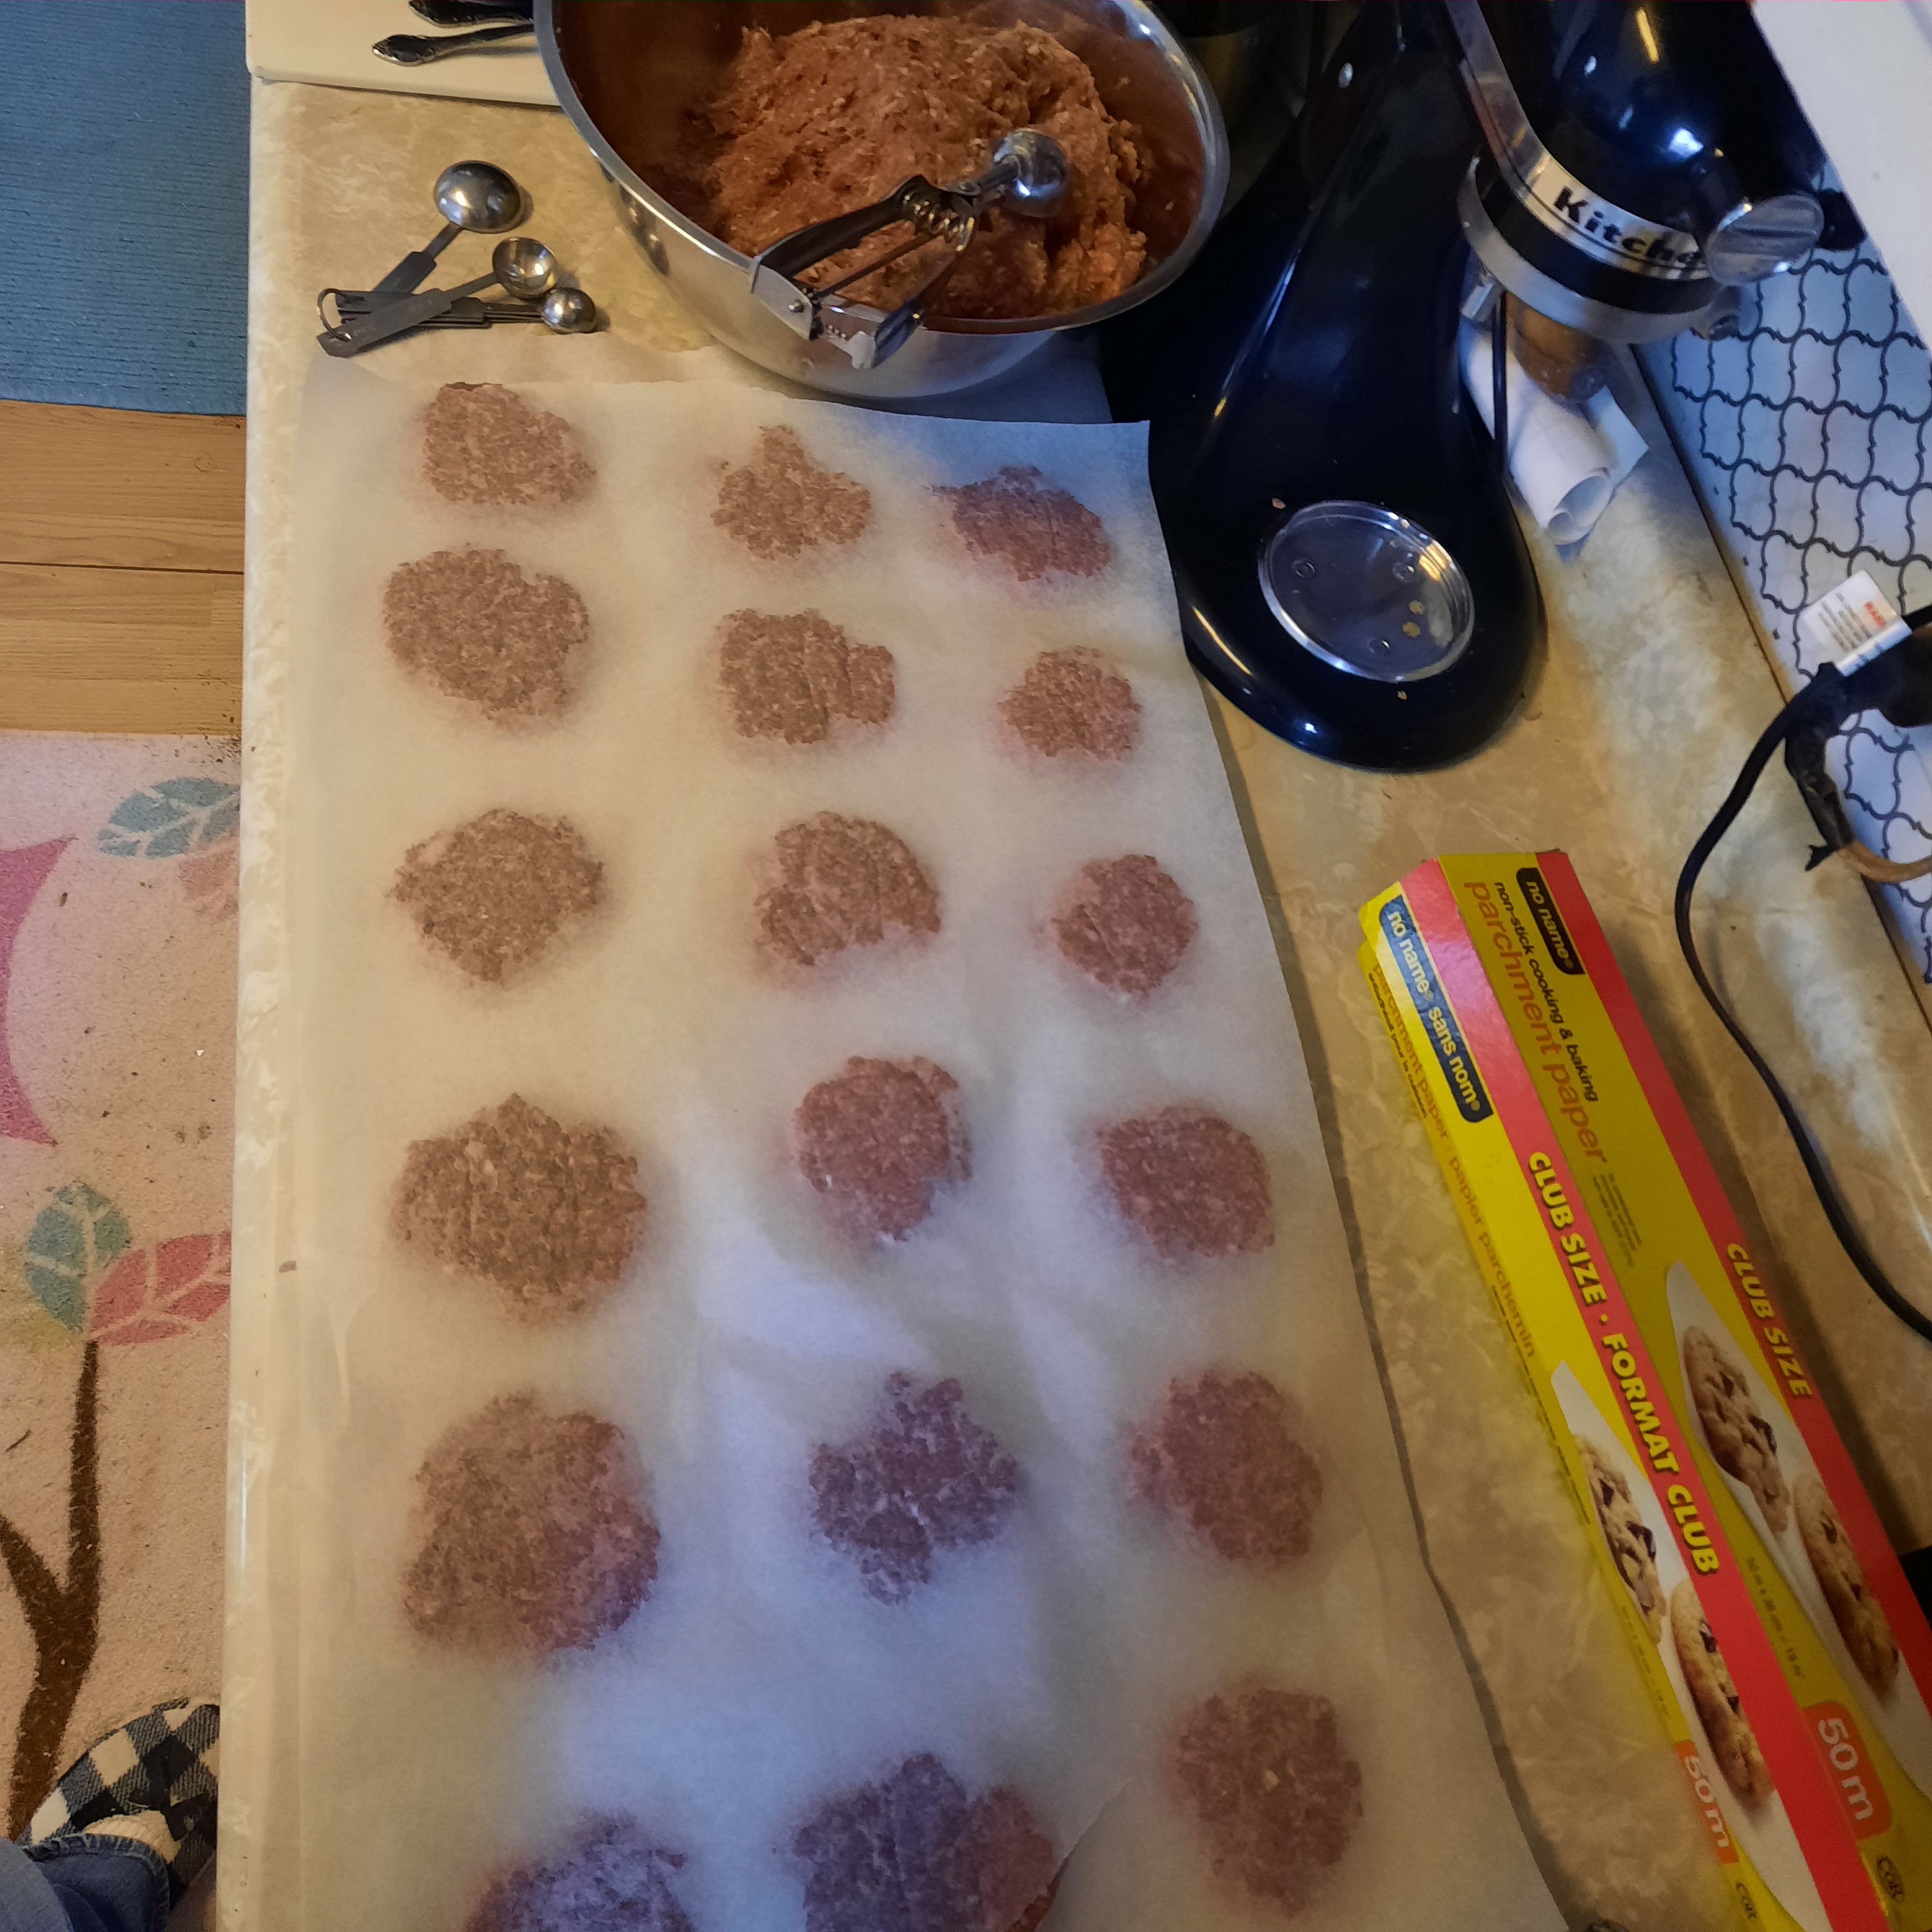
I did do a blog a little while ago about my homemade sausage patties… I had a few questions about so I thought I would revisit the topic with a more detailed post.
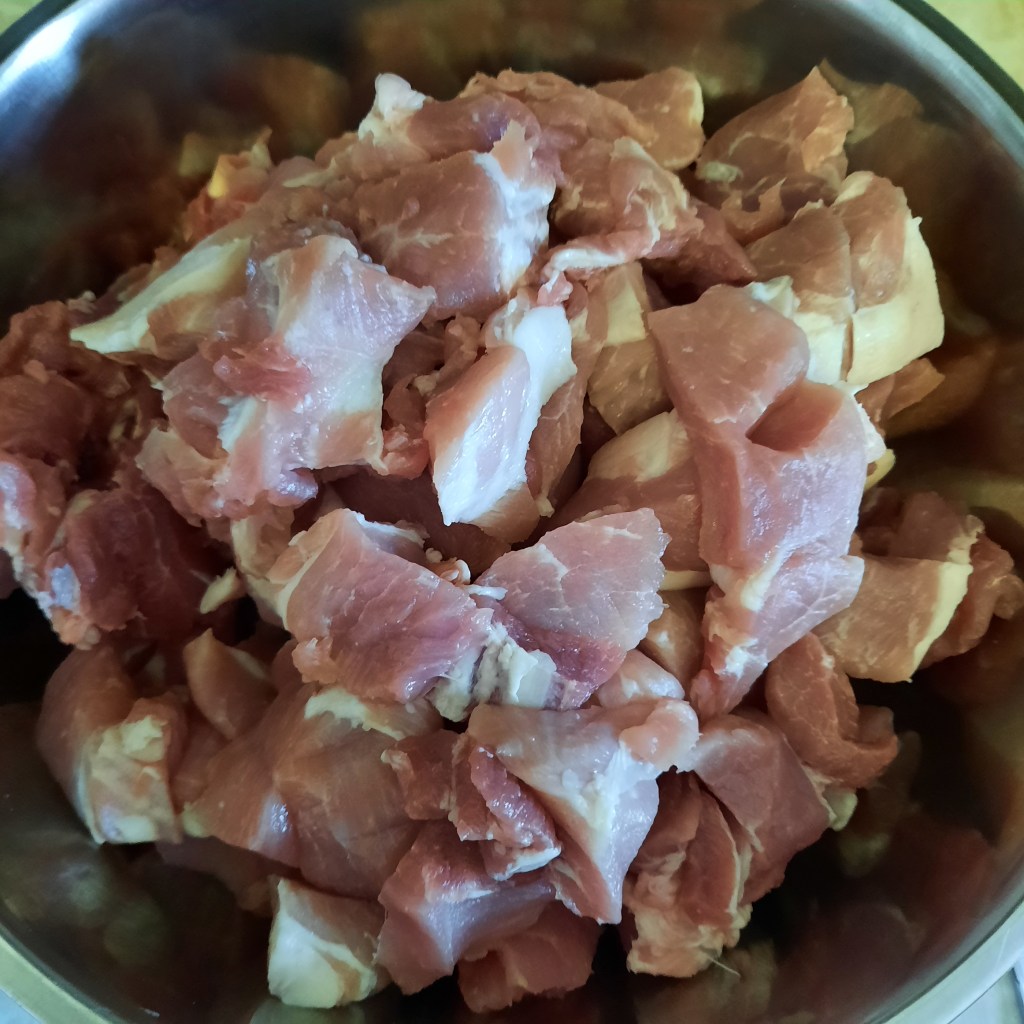
So I bought this around two pork sirloin rib roasts, they were on sale $1.88 a pound…. pretty good price.
I cut off as much of the meat and fat into chunks. Set up my meat grinder attachment with the coarse grinding plate. I fed the chopped pork and fat through the grinder twice which I didn’t do the first time but makes a way better ground pork to make patties with.
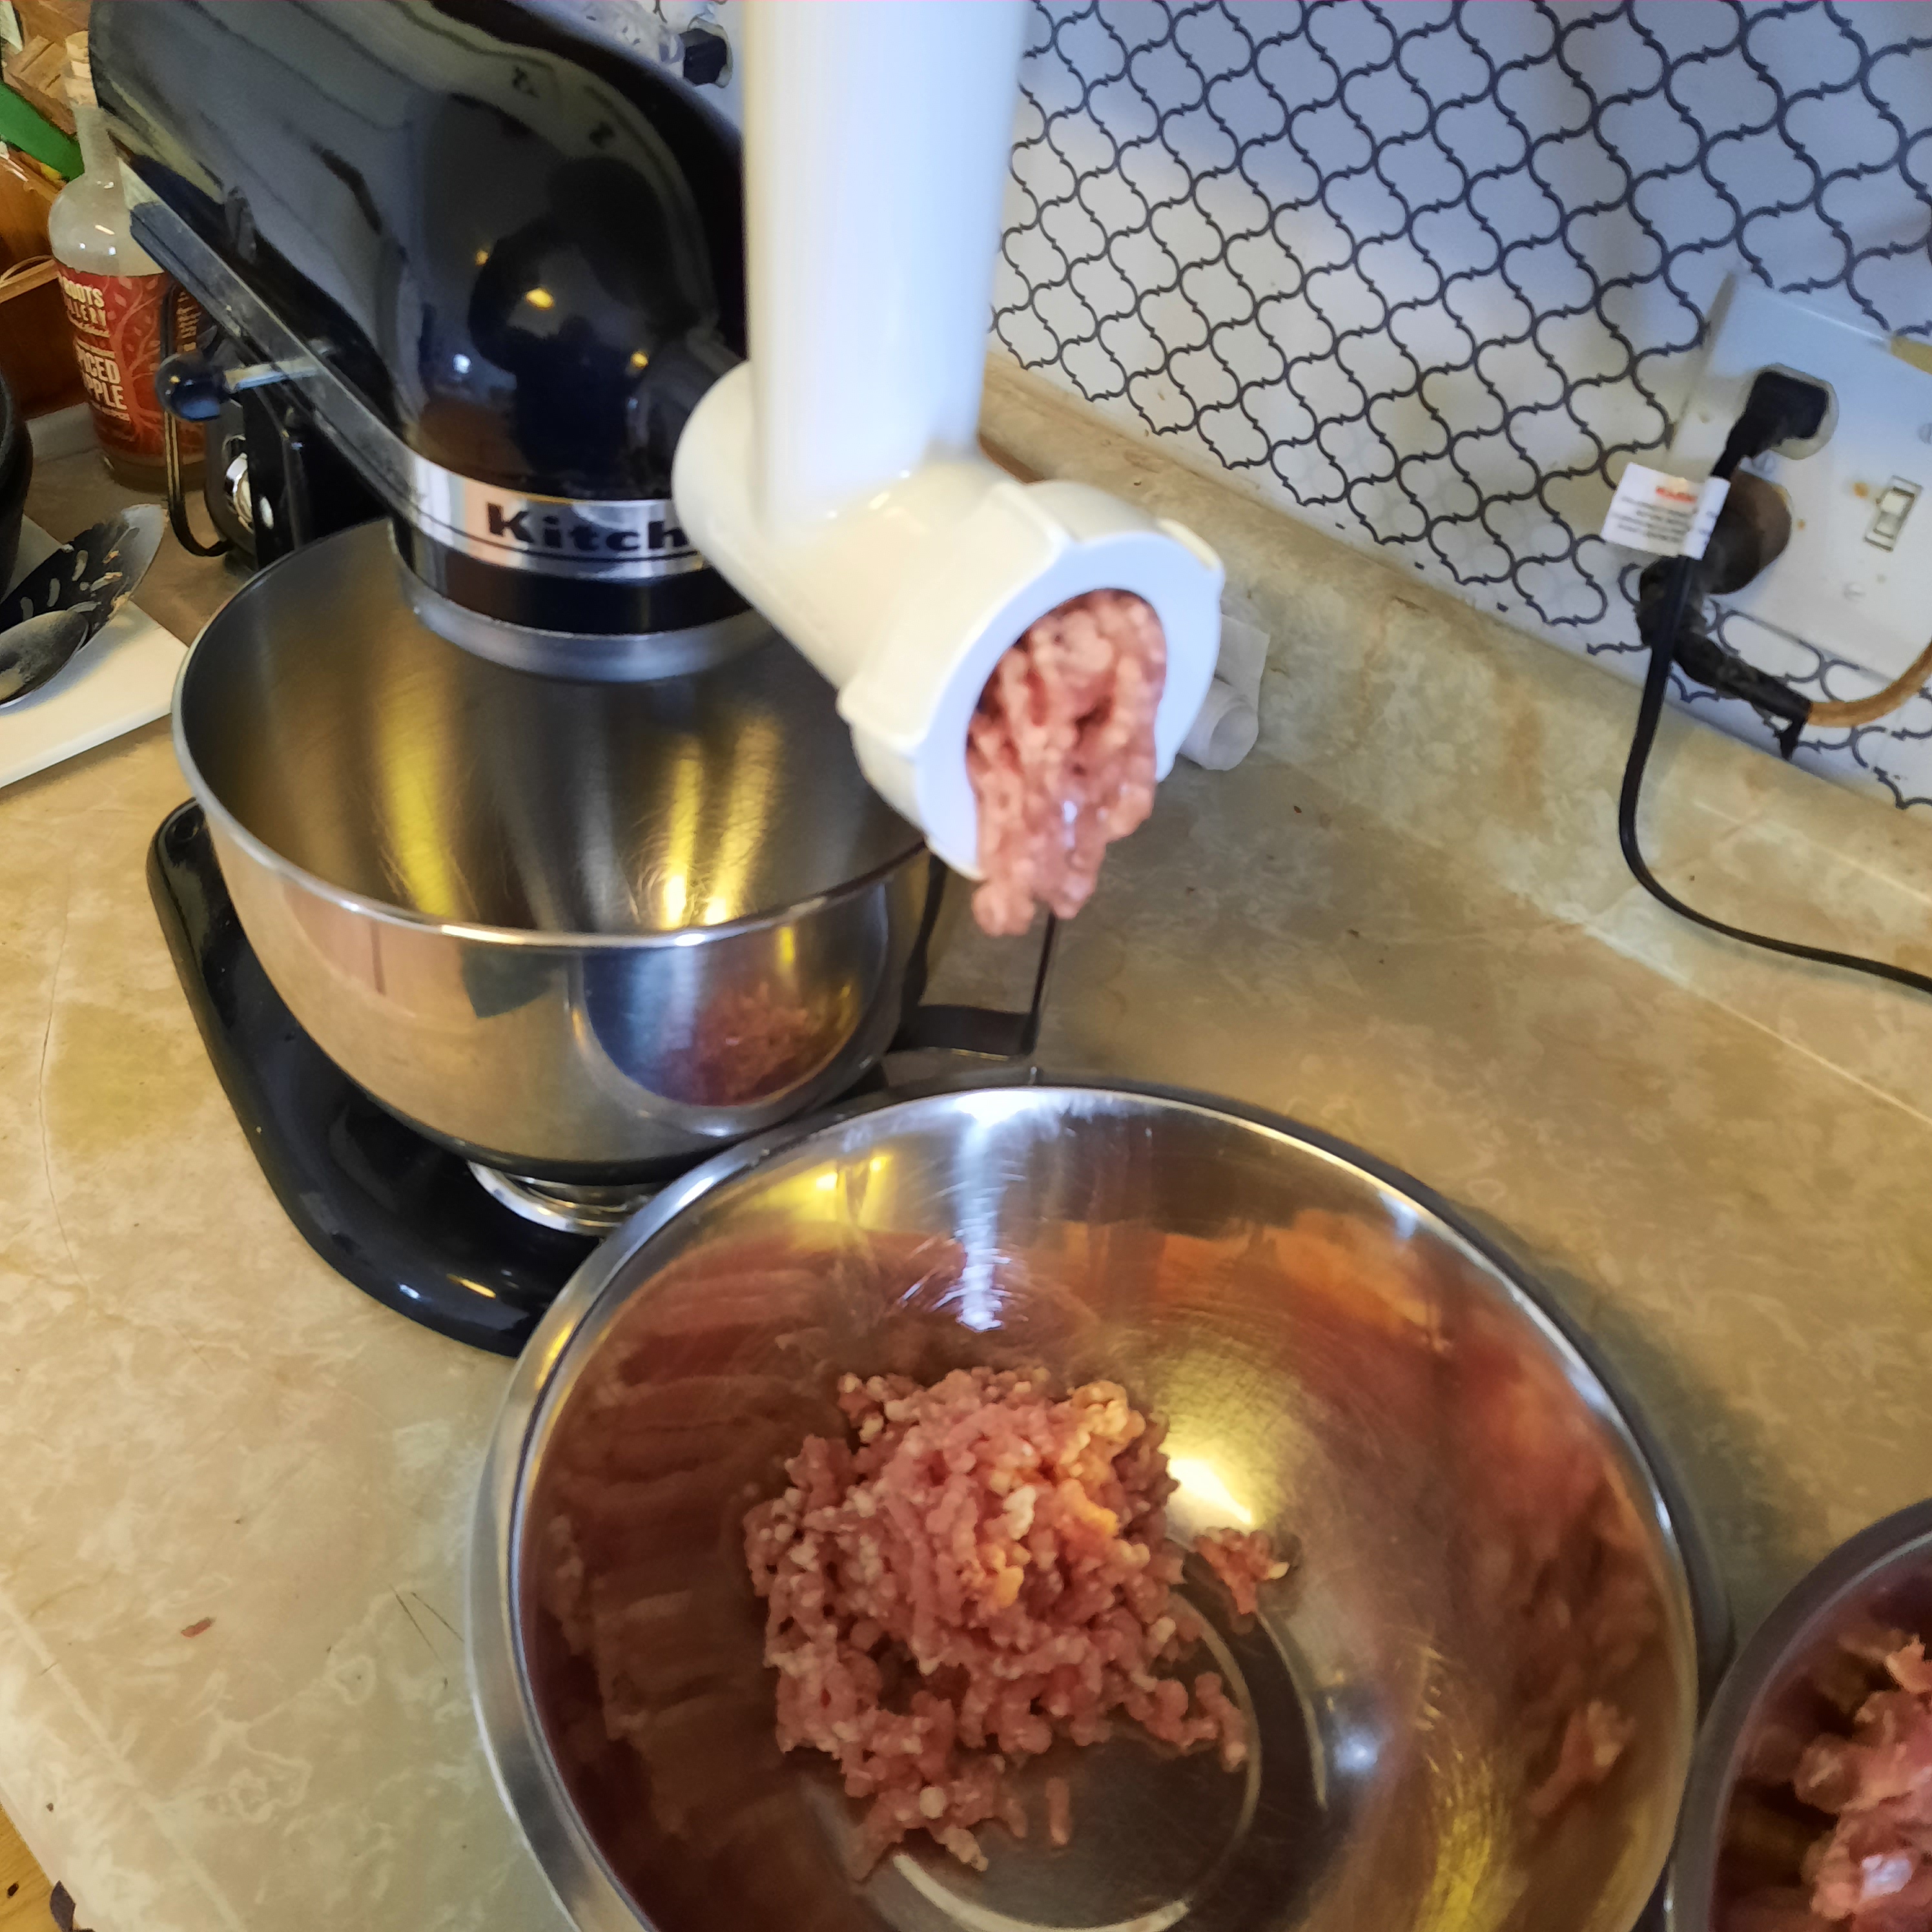
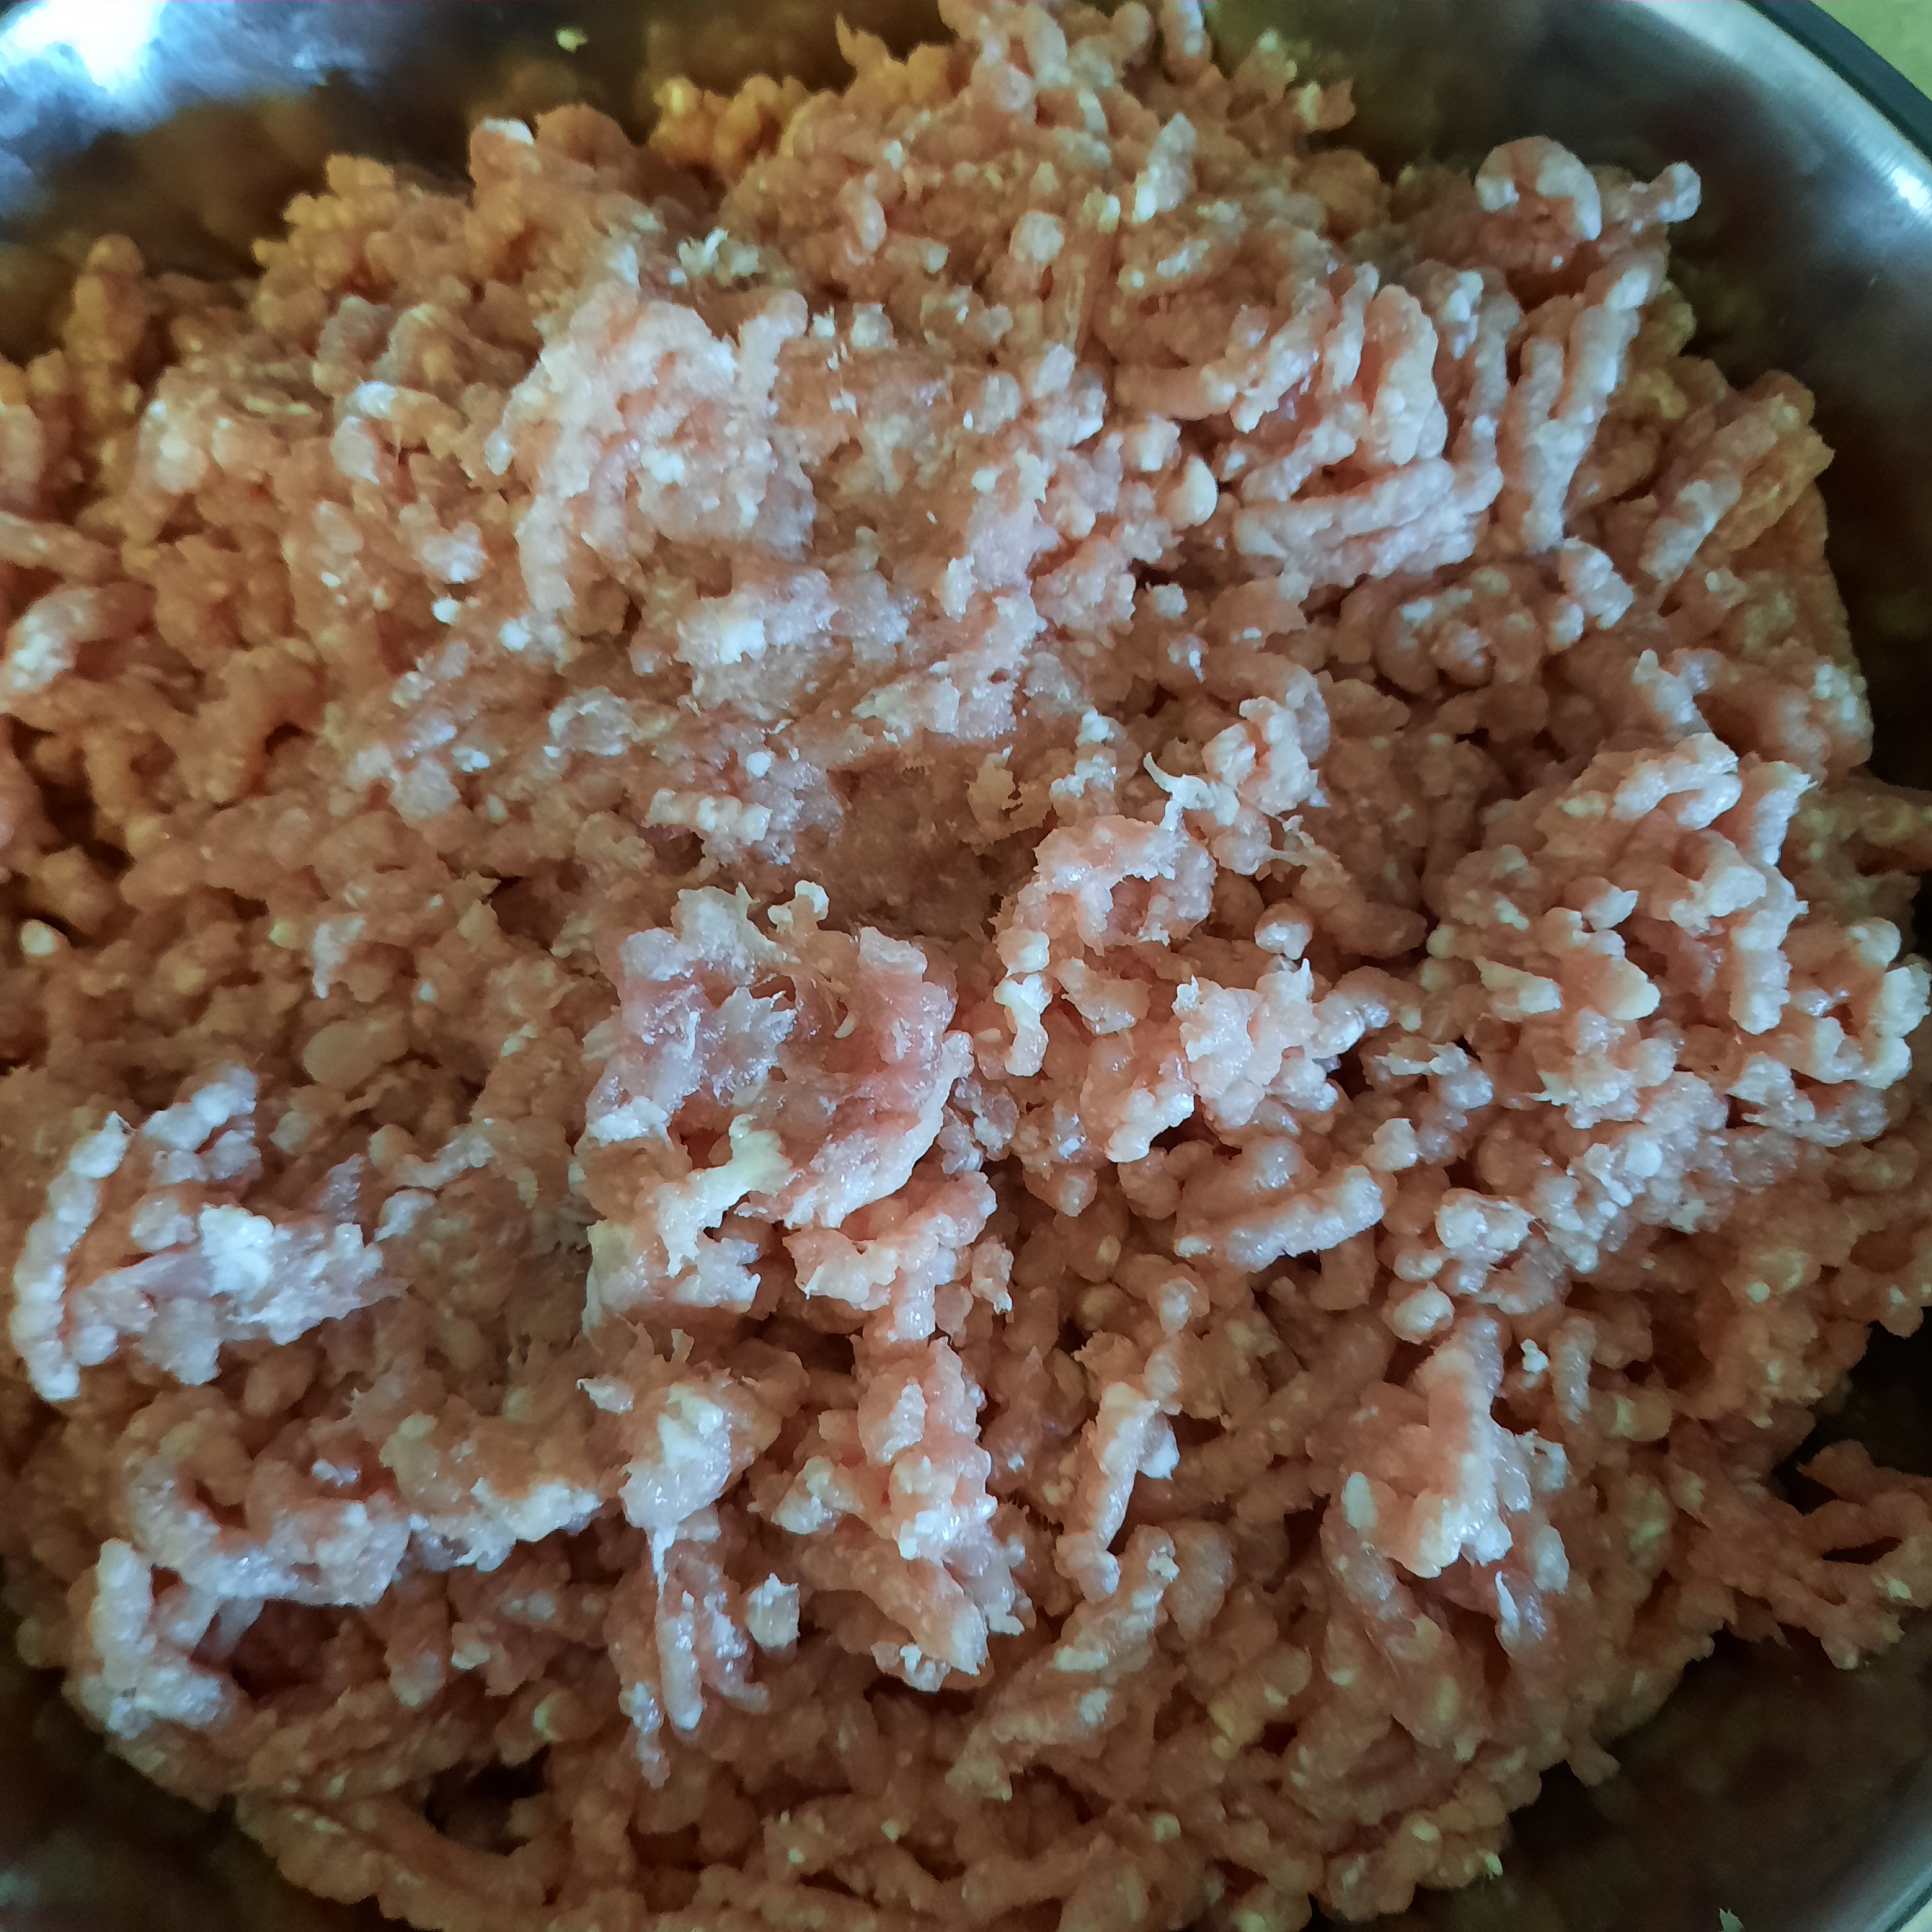
My recipe came from pinterest…. do not remember who posted it. I tweaked the sage, salt and pepper because I felt it was alot. That’s the beauty of old fashioned living…..making your own food from scratch you control what goes into your food. I got 8 pounds of beautiful ground pork.
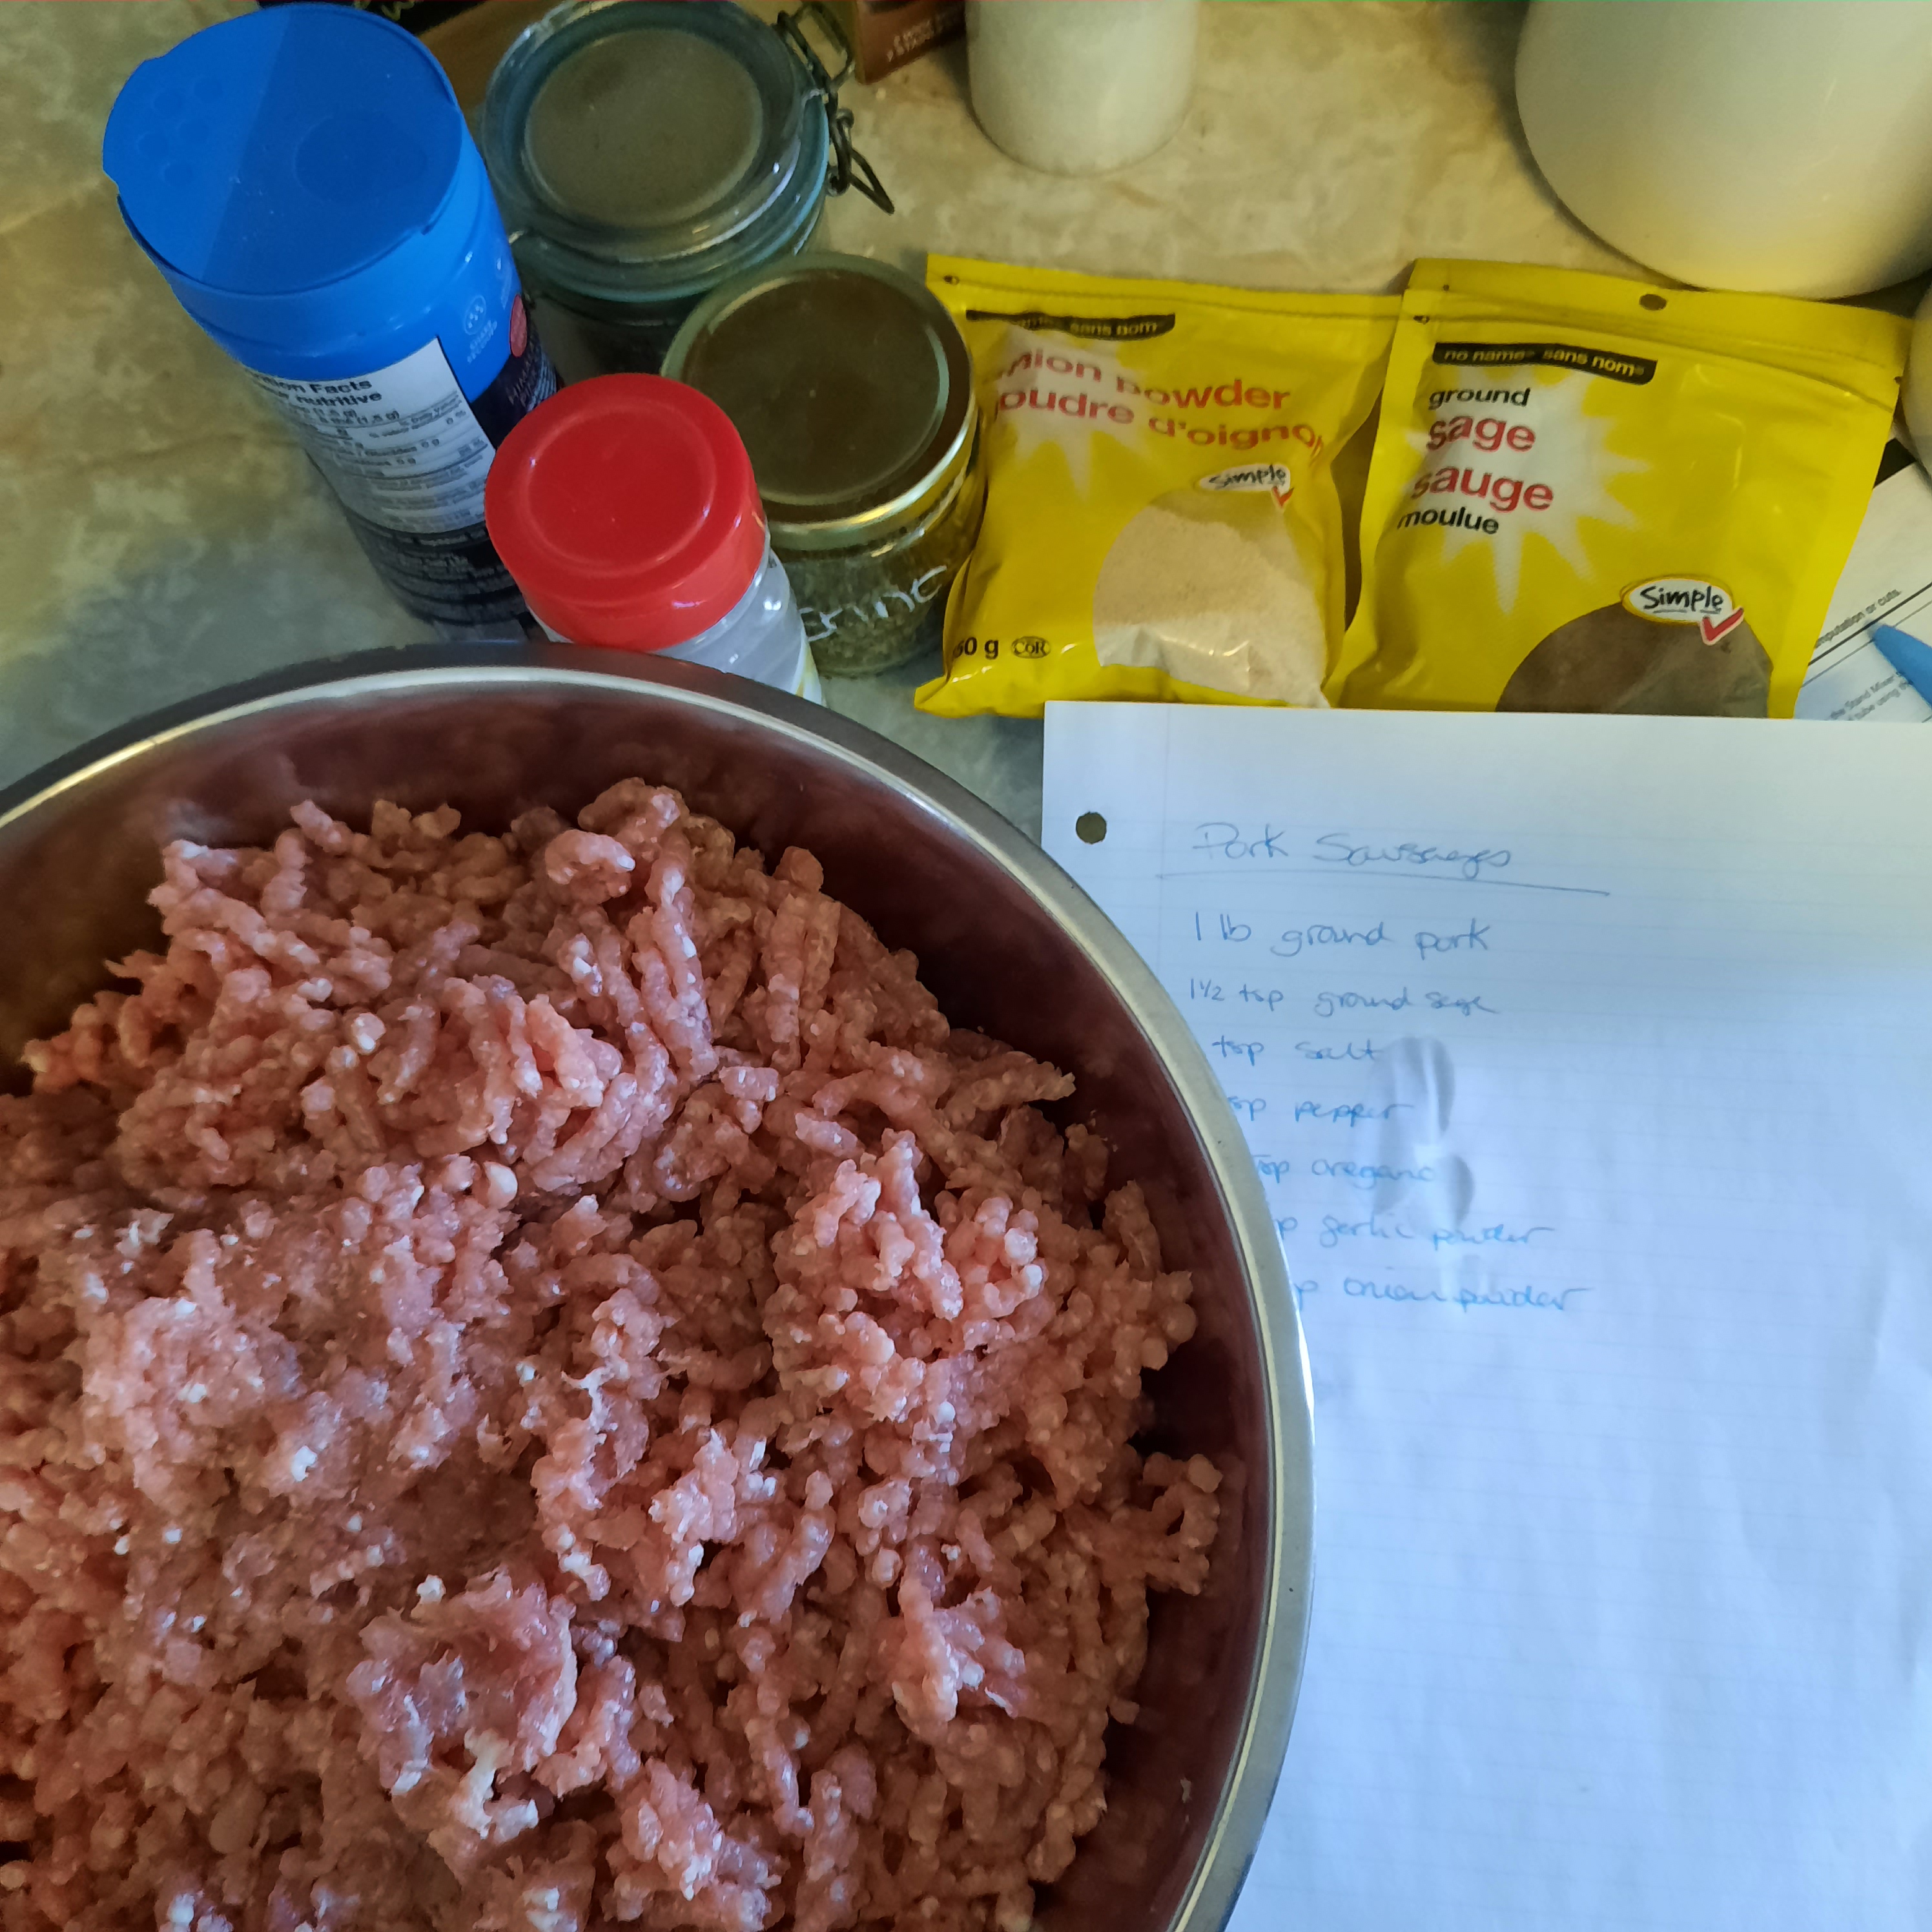
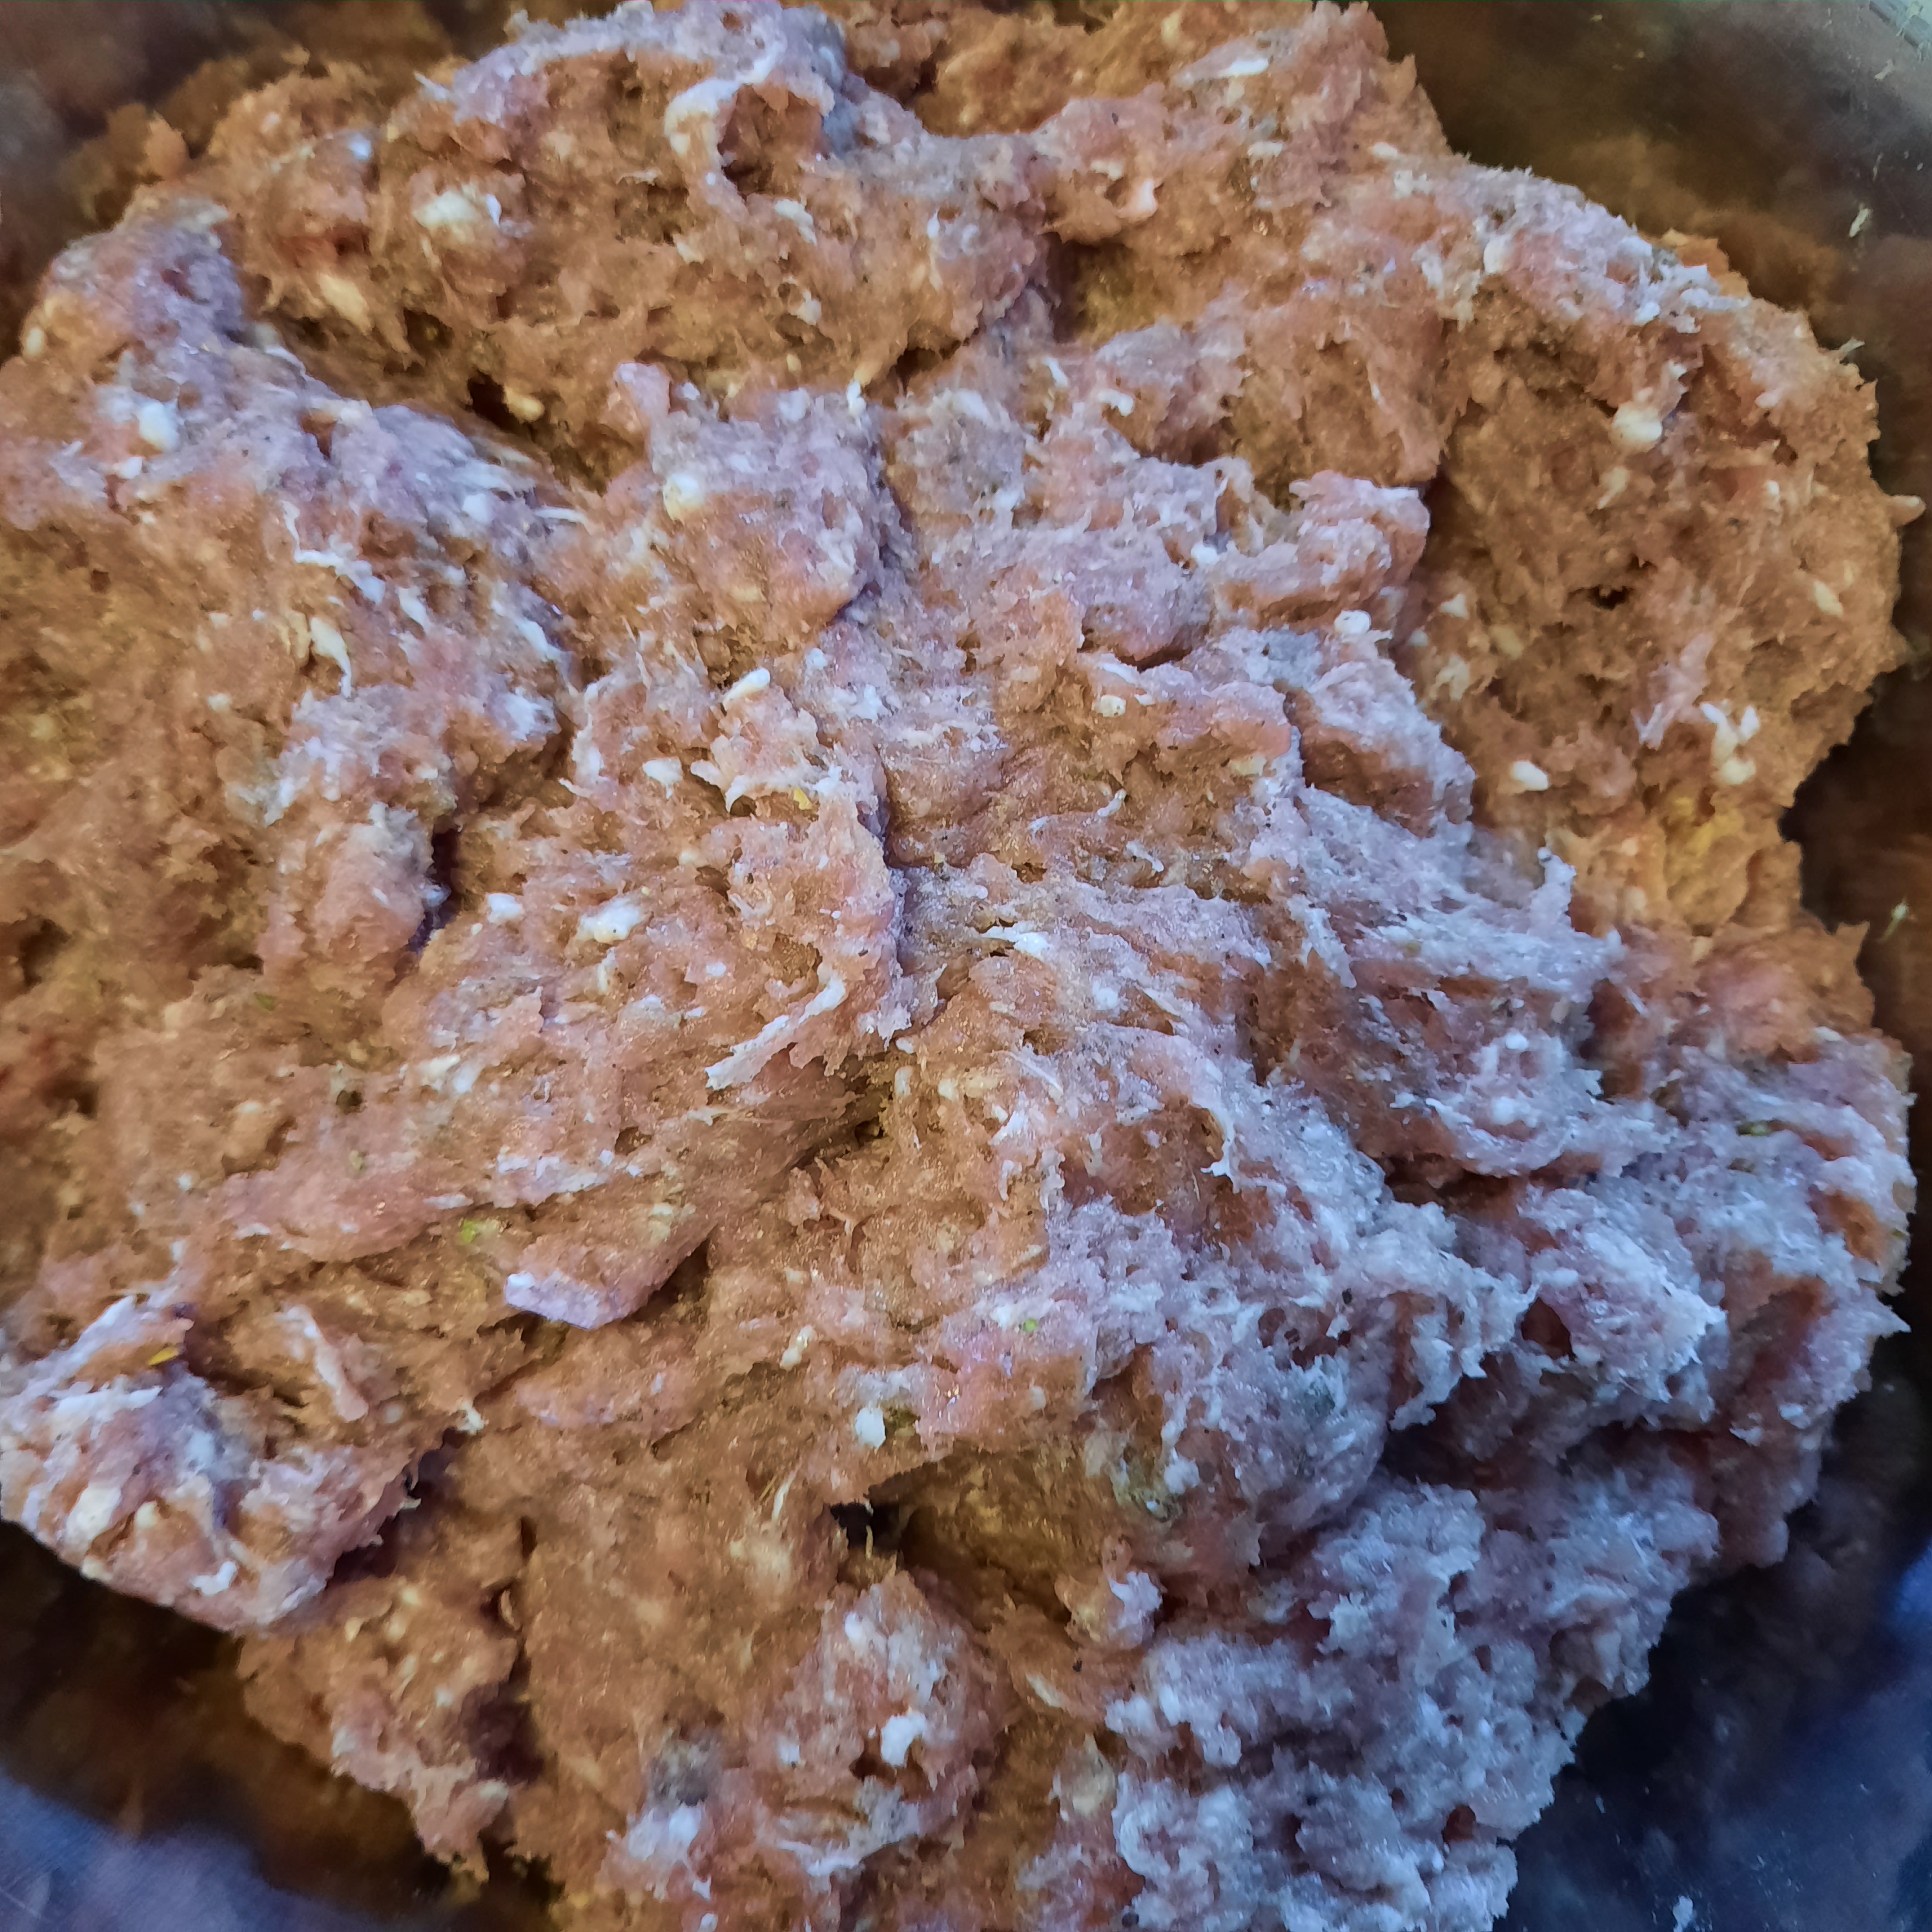
I separated the ground pork into two 4 pound batches and I added the spices accordingly. Only difference was I used half the salt and pepper and 1/3 of the ground sage (2 tsp each of salt and pepper and 4 tsp of ground sage) it smells wonderful.

I used my cookies scooper and placed the scoops onto parchment paper. I use parchment and not wax paper because it freezes well and does not stick to the patties like wax paper does. After the patties are frozen I take them off the paper and they go into a freezer bag popped into the freezer to enjoy for a few weeks♡.
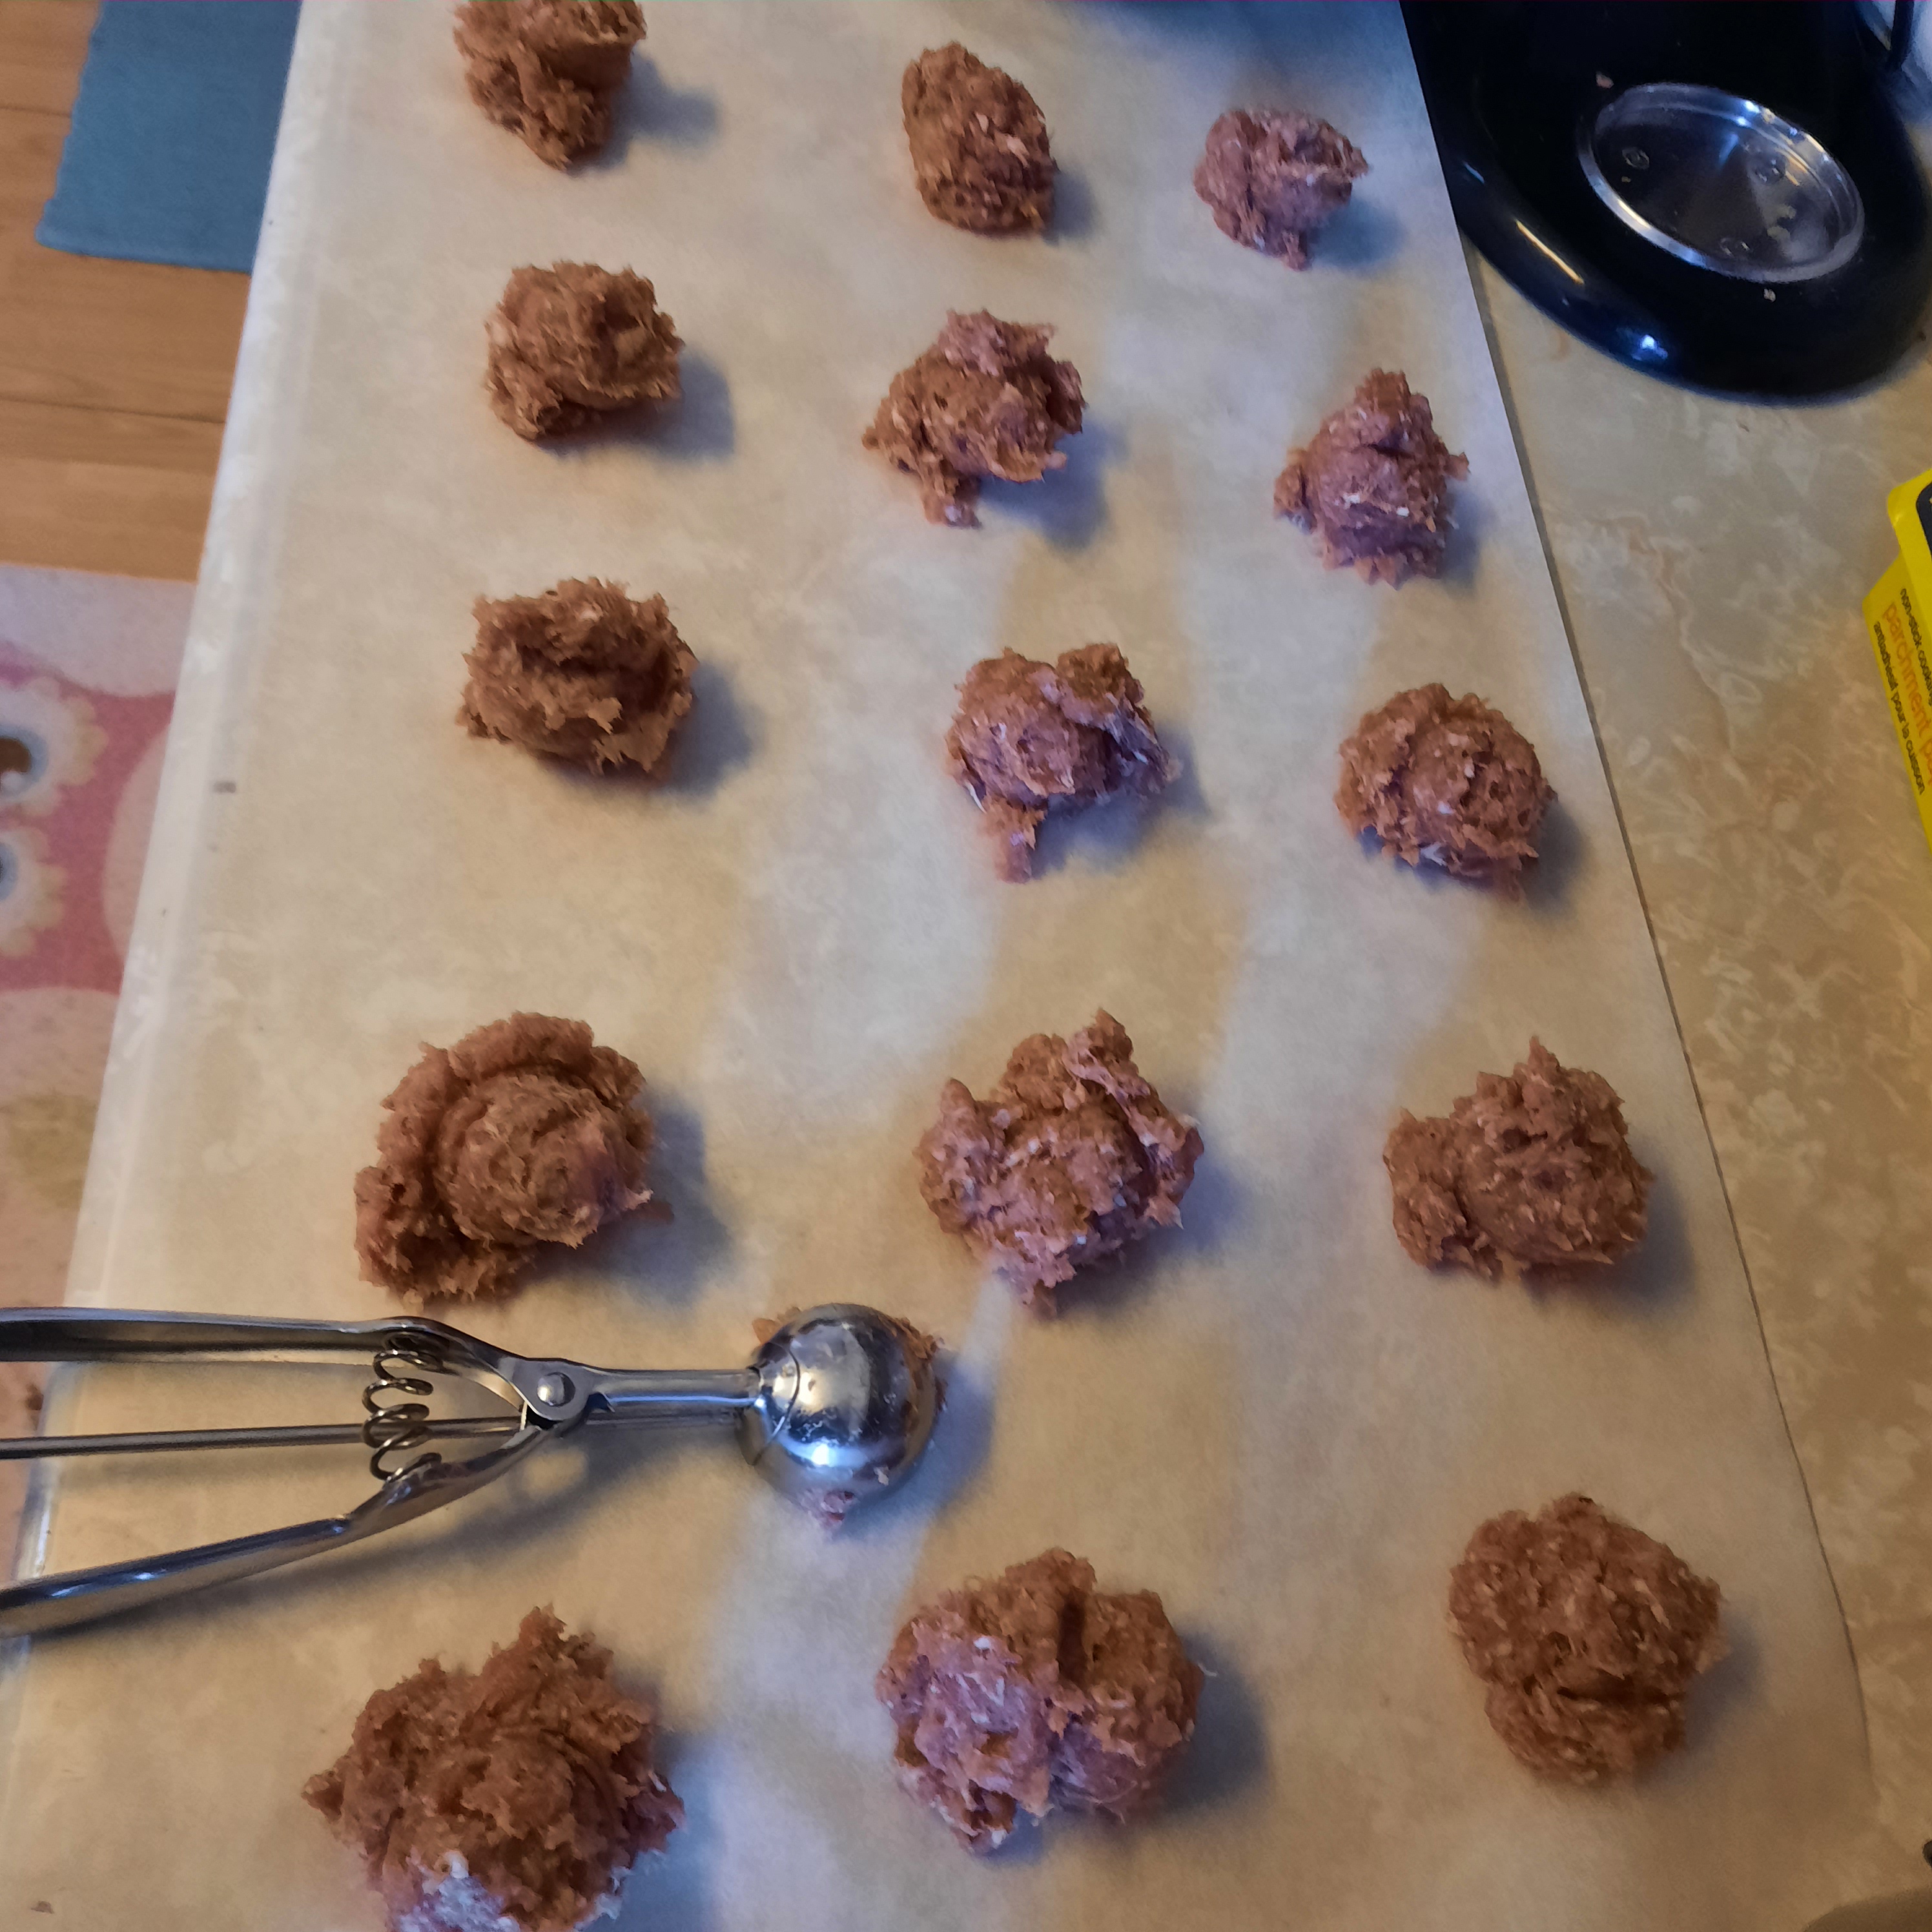
This batch made 60 patties, I apologize now for those with ocd as I do not weigh them out or make them all the same size….. I just eyeball a good clump in the scoop and then they get flatten.:)
A package of pork sausages (8 Links) which is enough for one meal for us is $4.99 and I think it weighs just a smidgen over one half pound… so my $19 roasts went a long way. (There was a bone in each of the roasts)
So not only is it awesome to make your own….. it is so much cheaper too♡
Hope that you enjoy the recipe. Have a great day and God Bless.
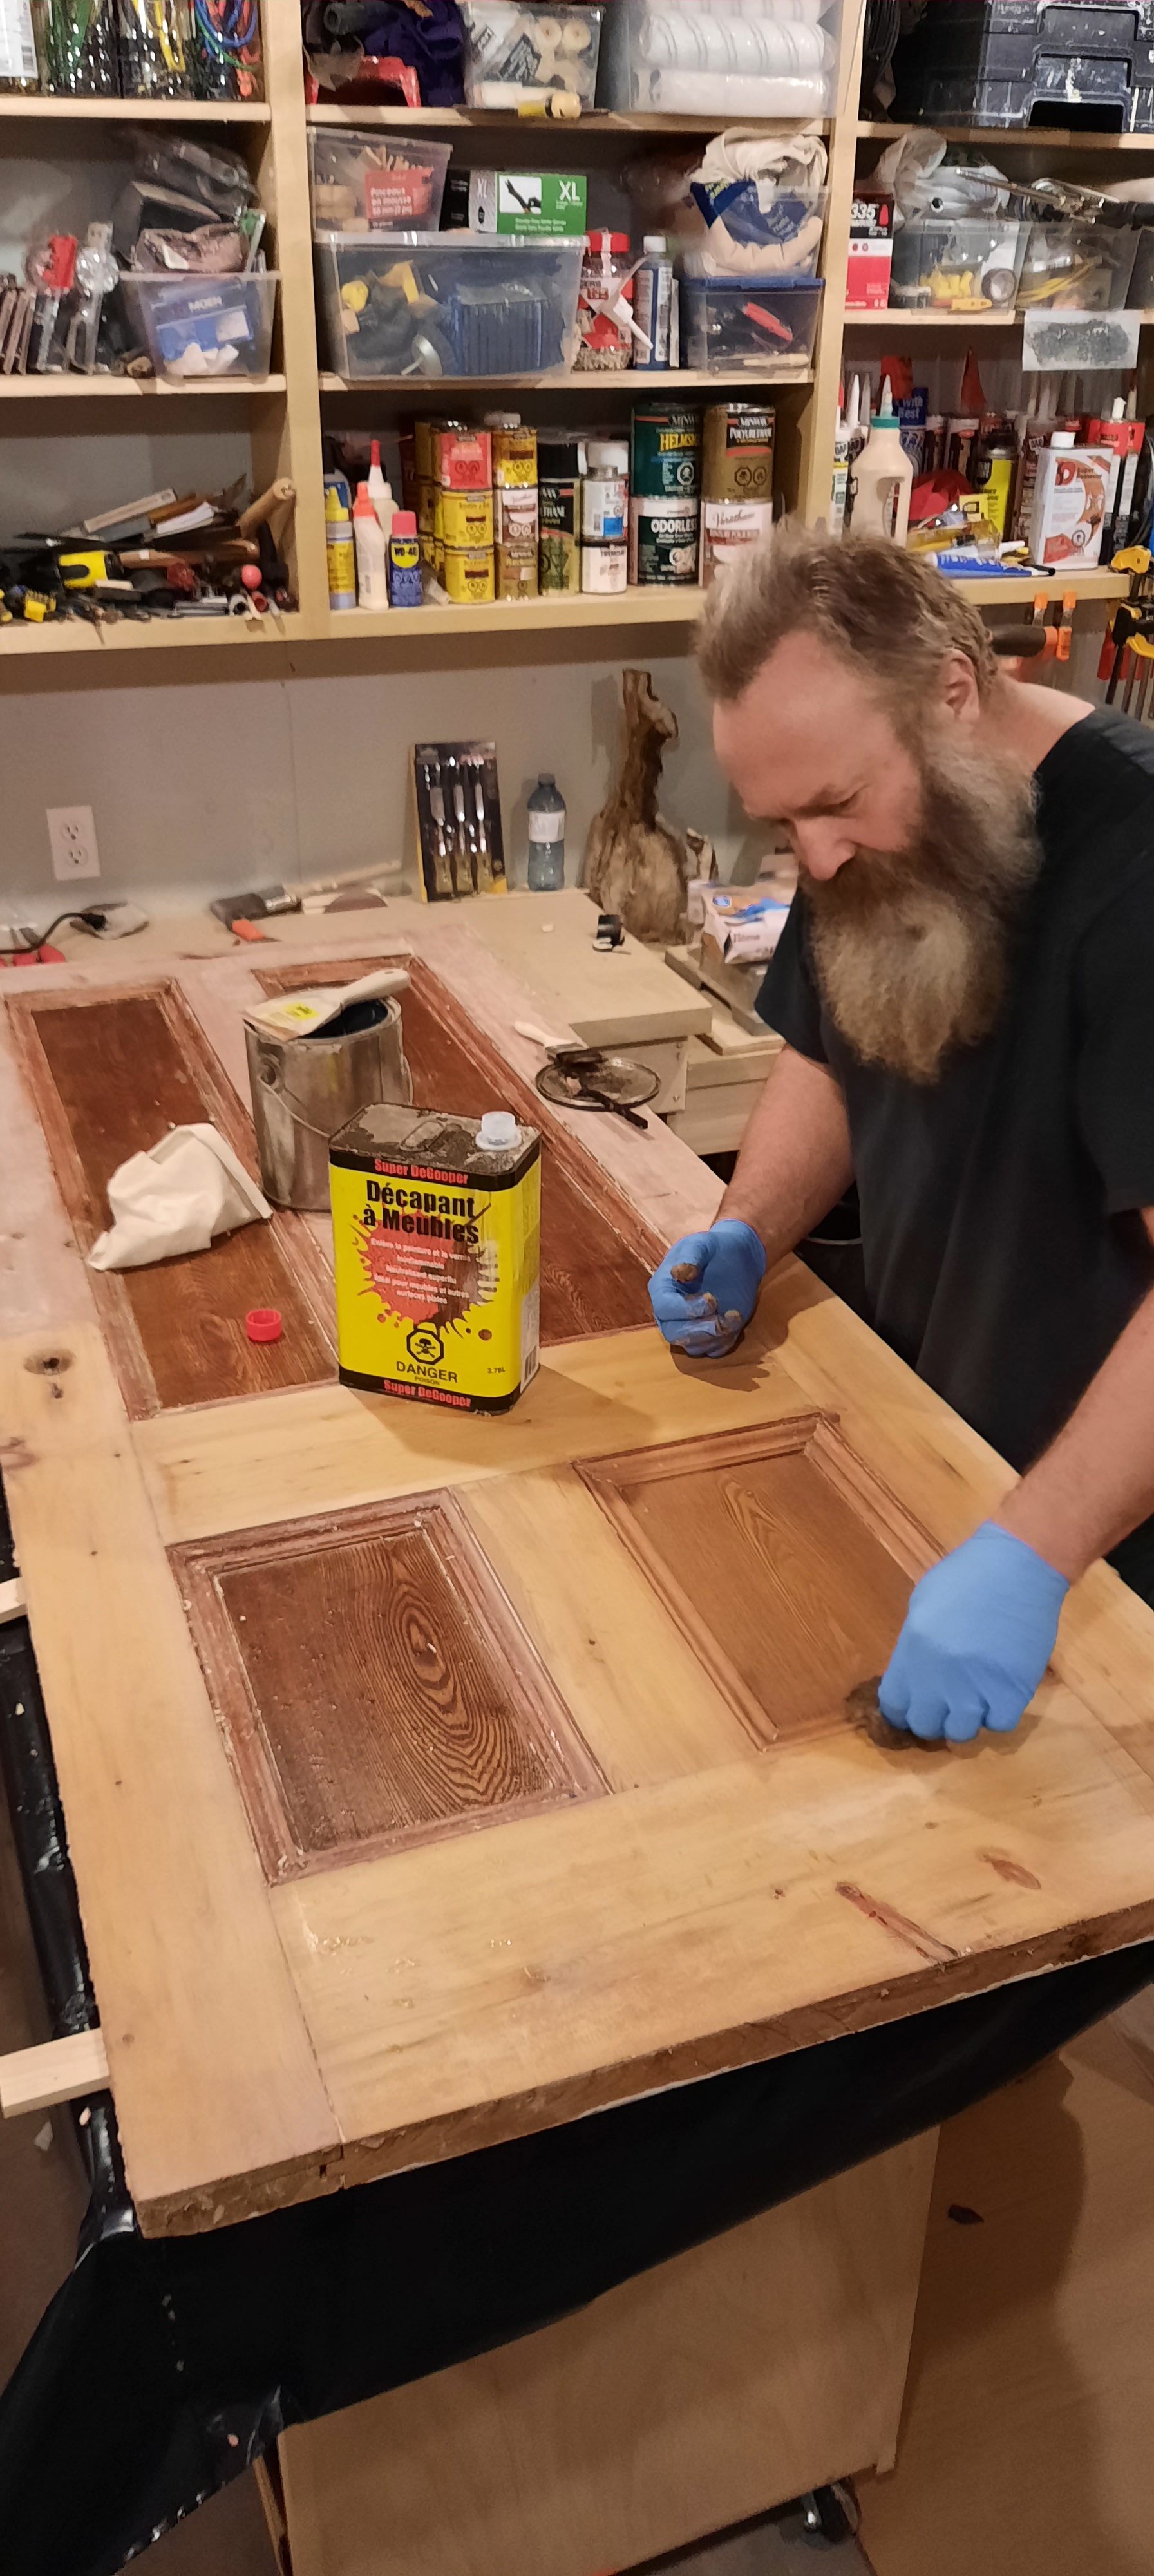
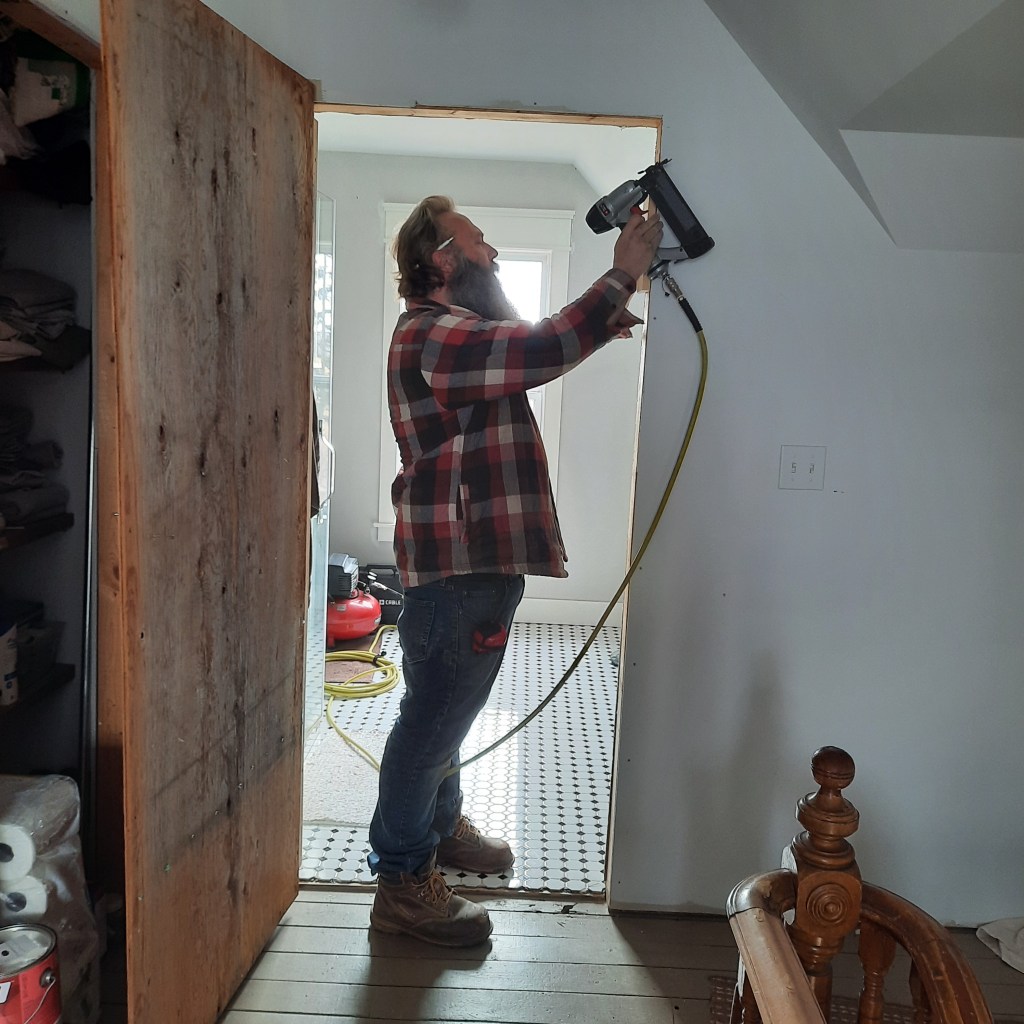
Part of the old house renos is peeling back years of paints and stains on the original doors of the house.
So since we put in the new bathroom upstairs we have had a curtain and rod for a door…. then we graduated to an old used piece of thin plywood….. since it’s just the two of us that’s okay.
But it would be nice to be able to use the facilities without the cats barging in and trying to grab the TP! From your hand!
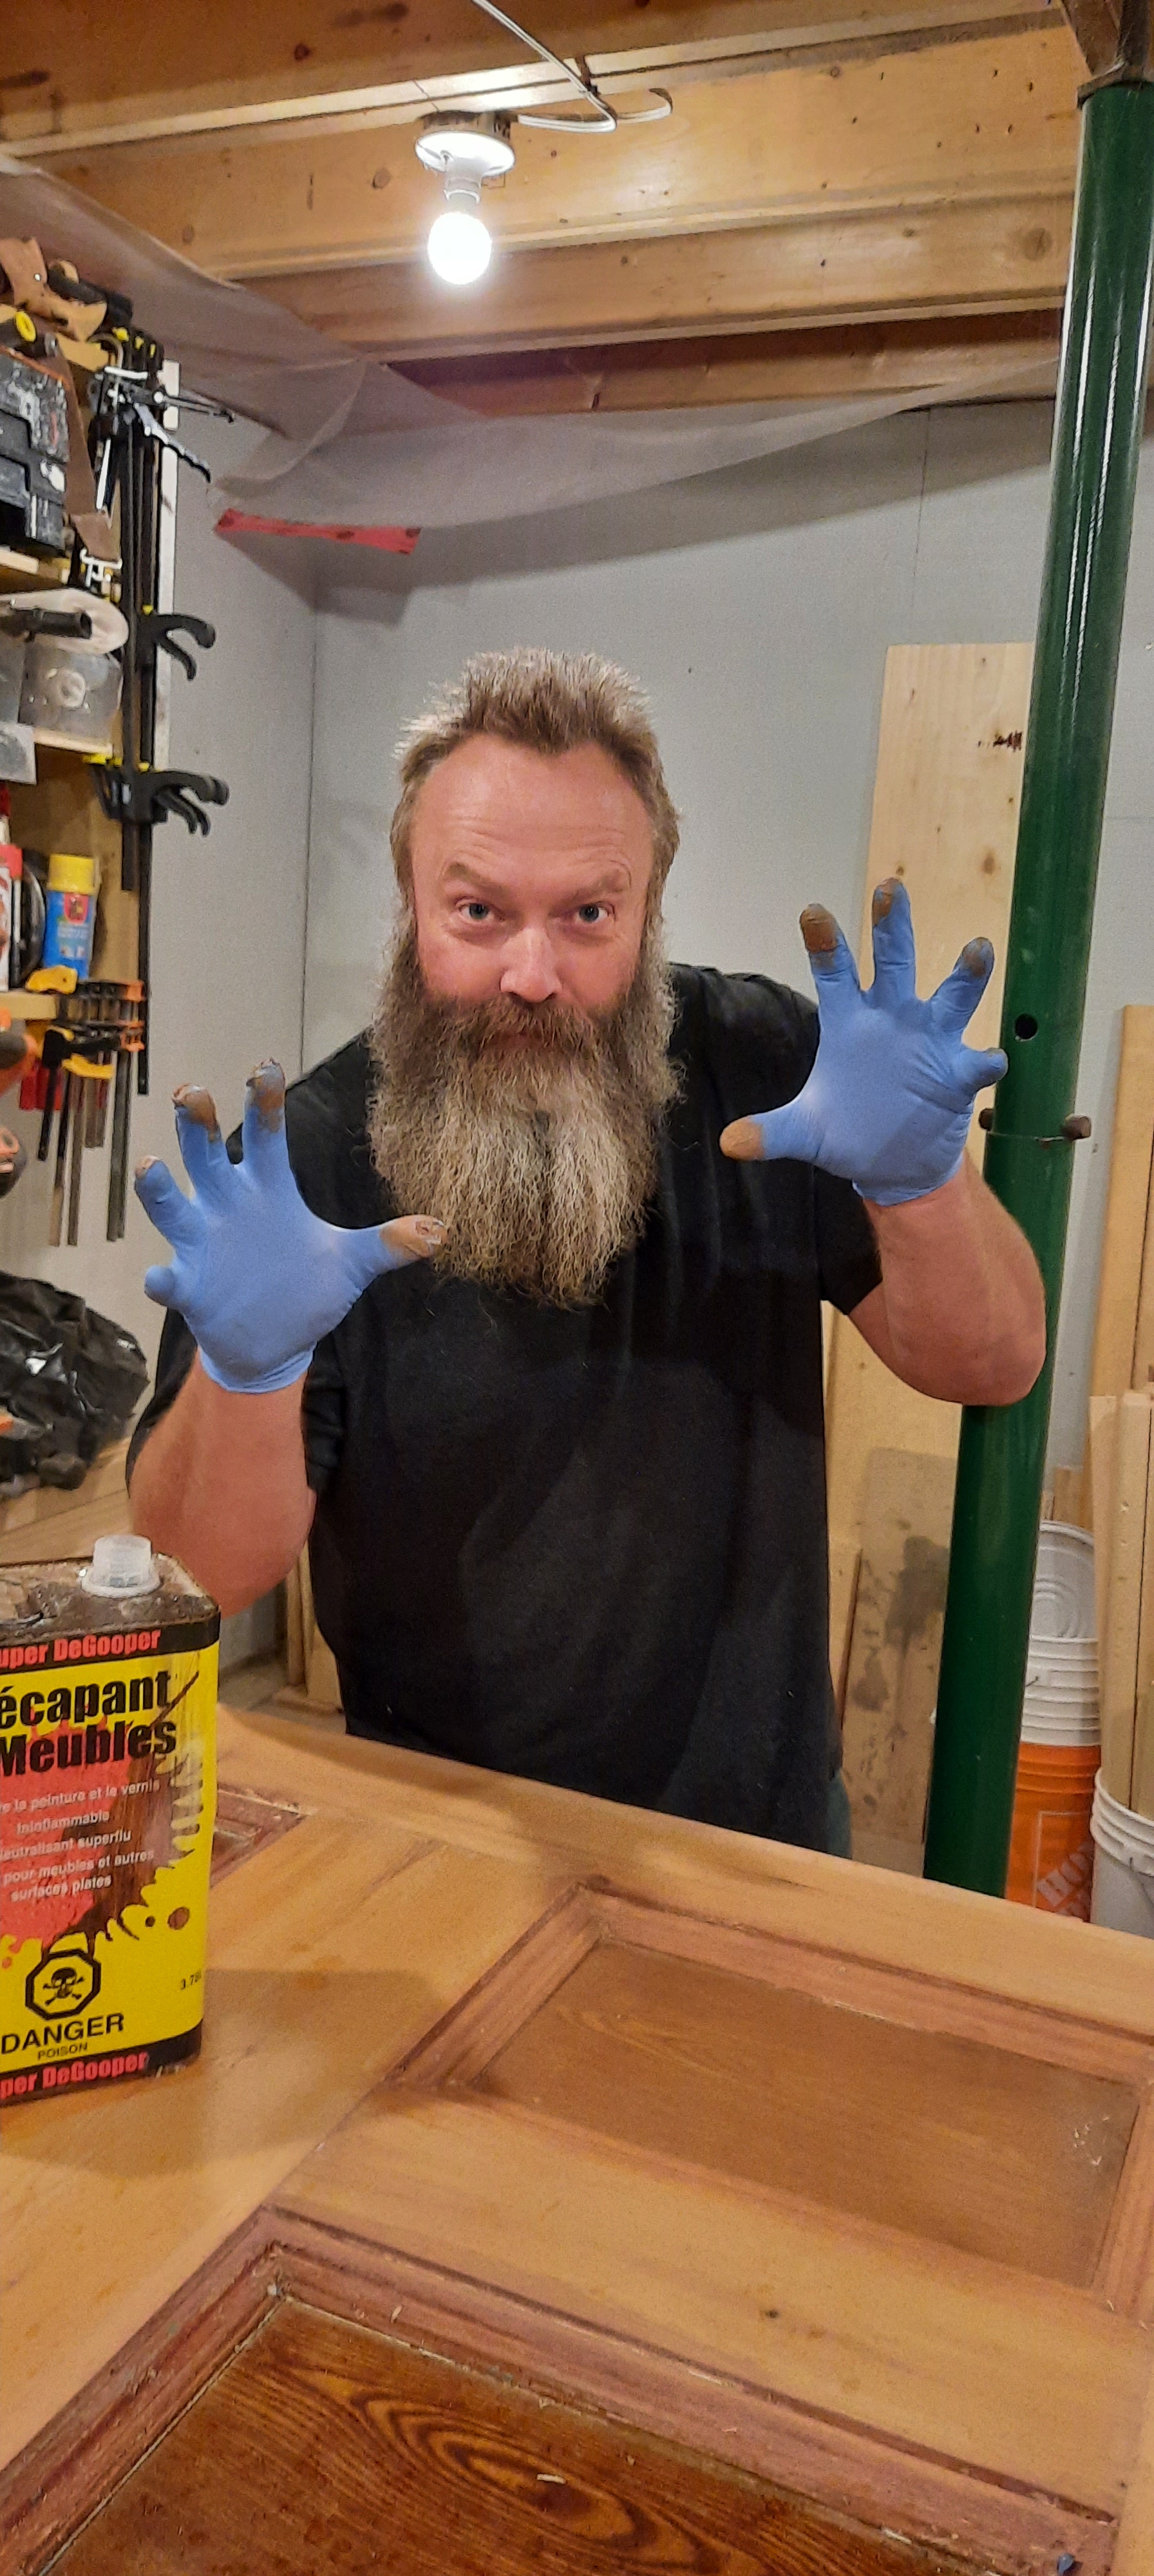
So after pain staking removing all the layers of paint and stain we were down to the basics. We originally thought we would put a clear coat of shellac on the doors and that would be it. But on further inspection the different types of wood used in the production of the doors with the odd wood color combinations just kinda didn’t work for what we thought might look really nice.
So this past week it’s was mutually decided that we would strip the doors and then patch the holes etc…. and then just paint them white. It looks amazing….. we finally have a bathroom door.


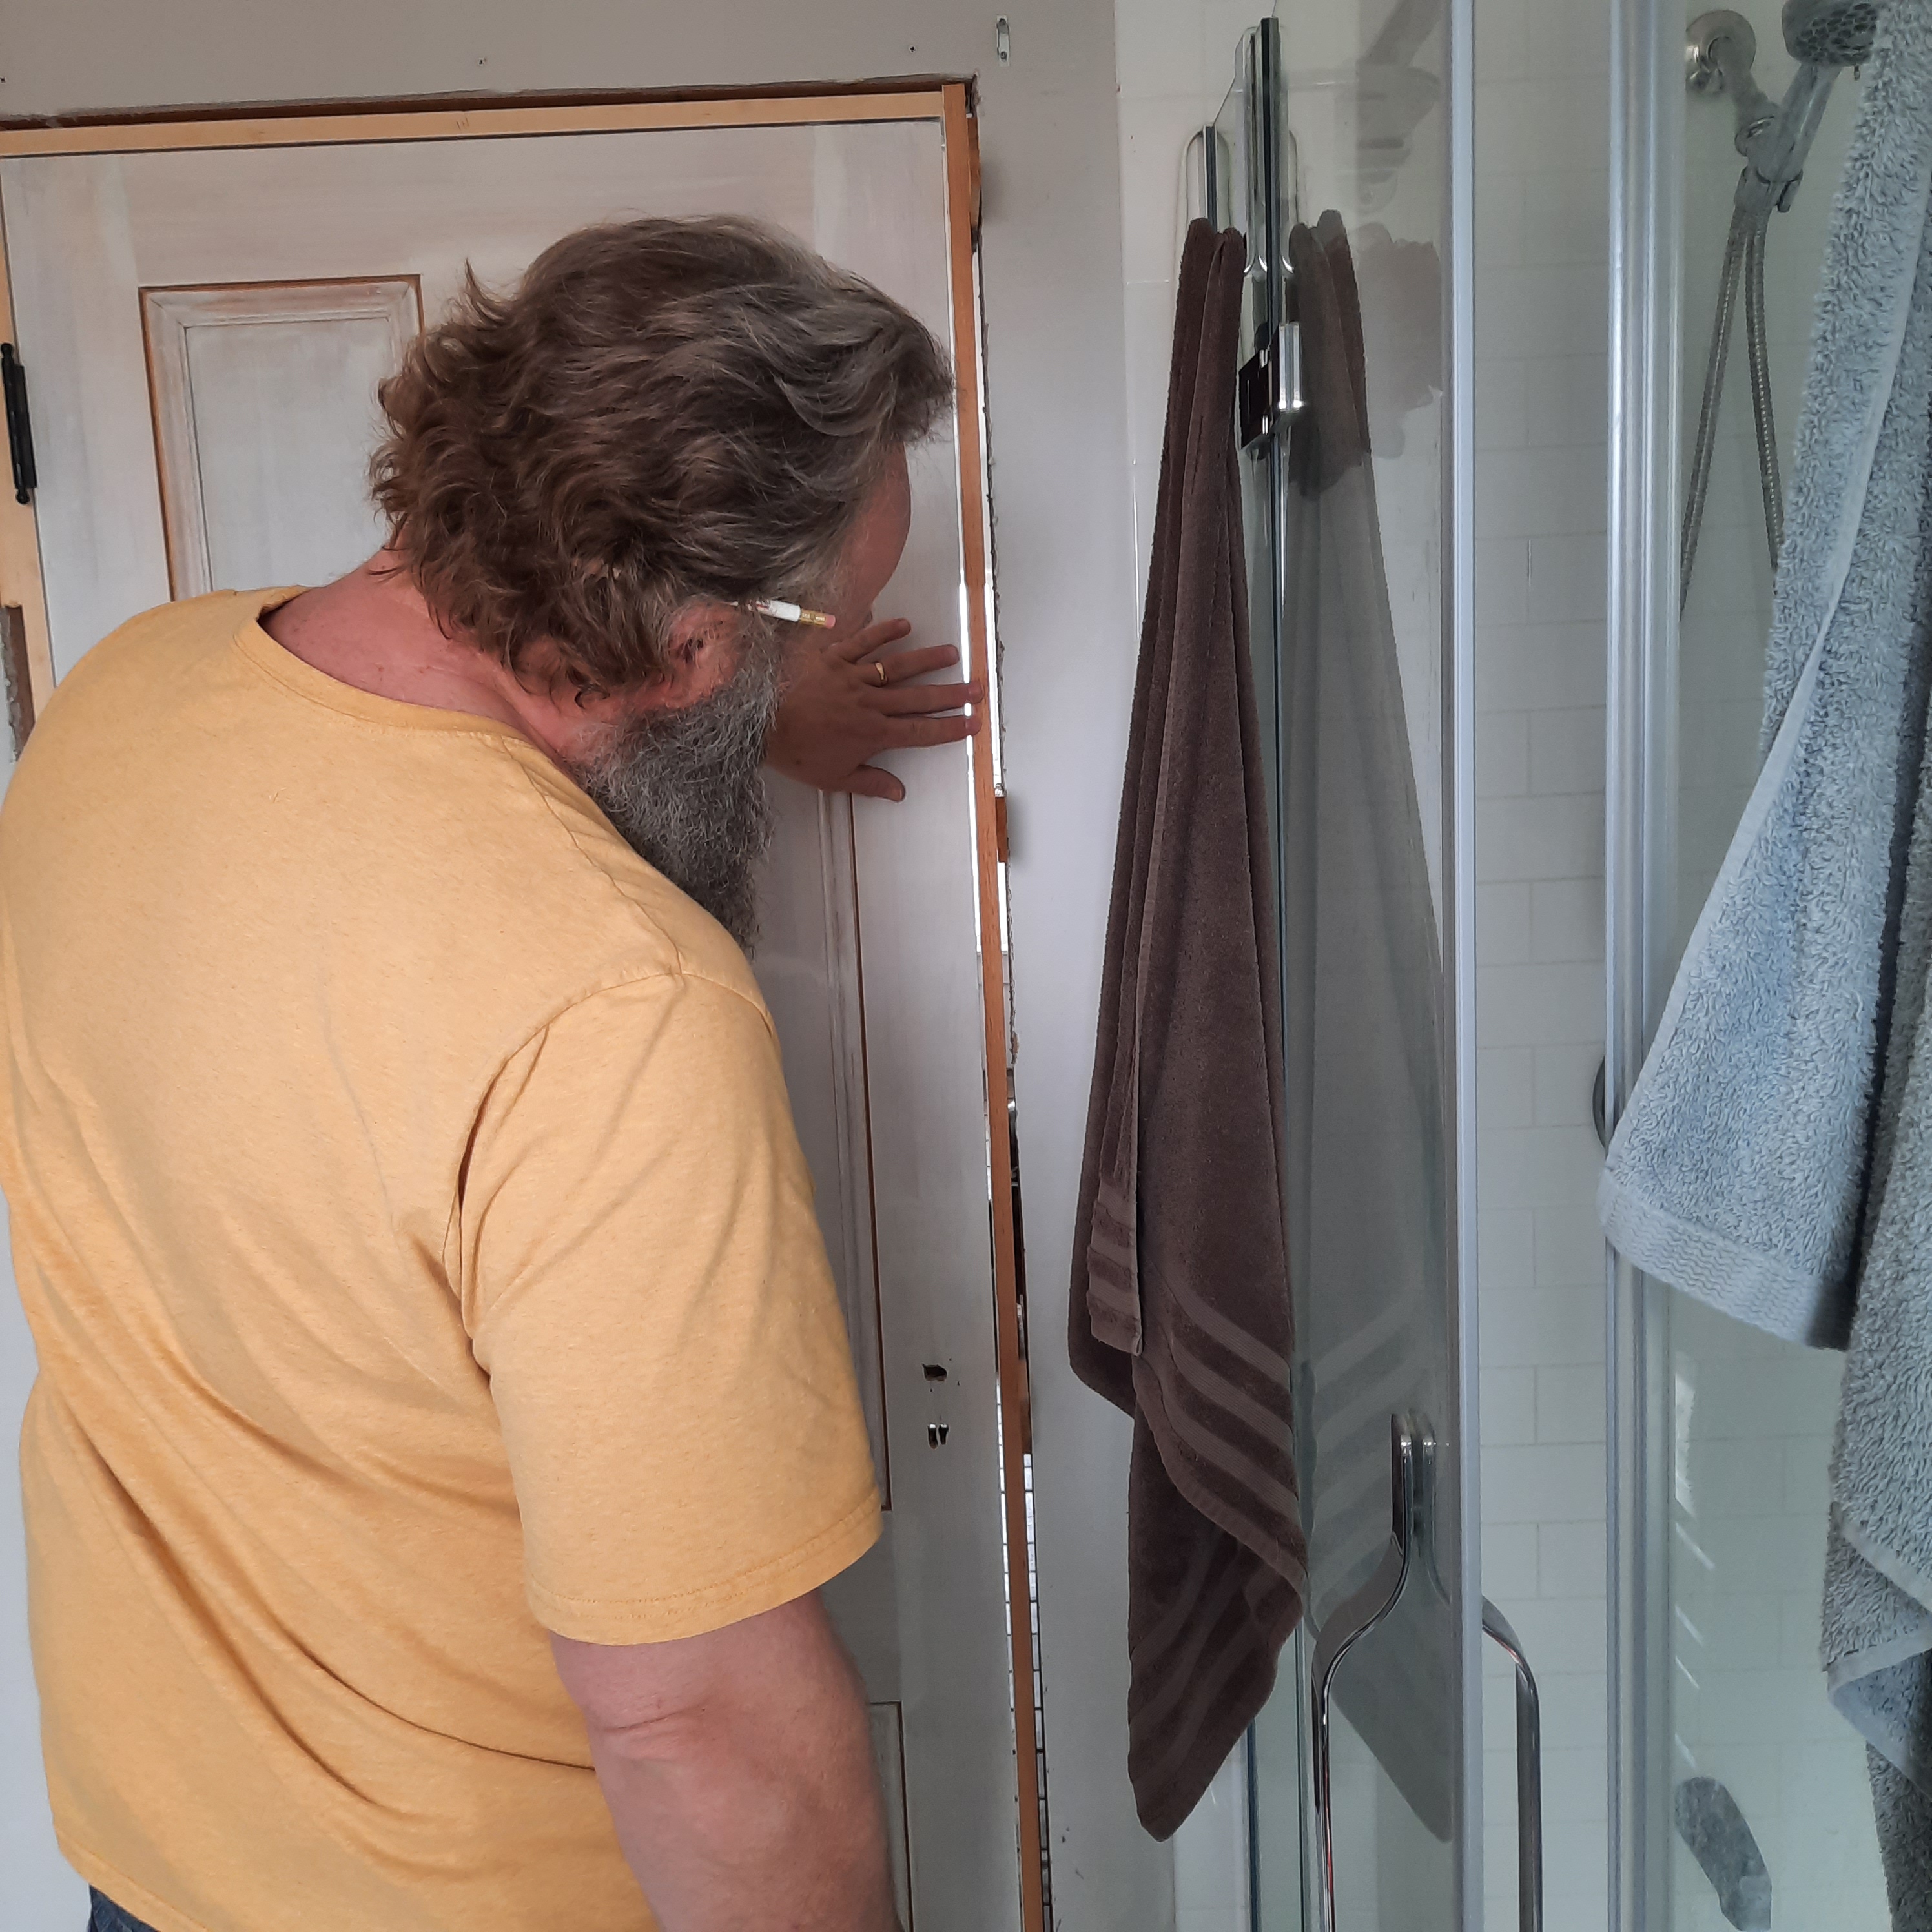
The best part was that Rusty got to use his new plane, the one I got him for christmas♡
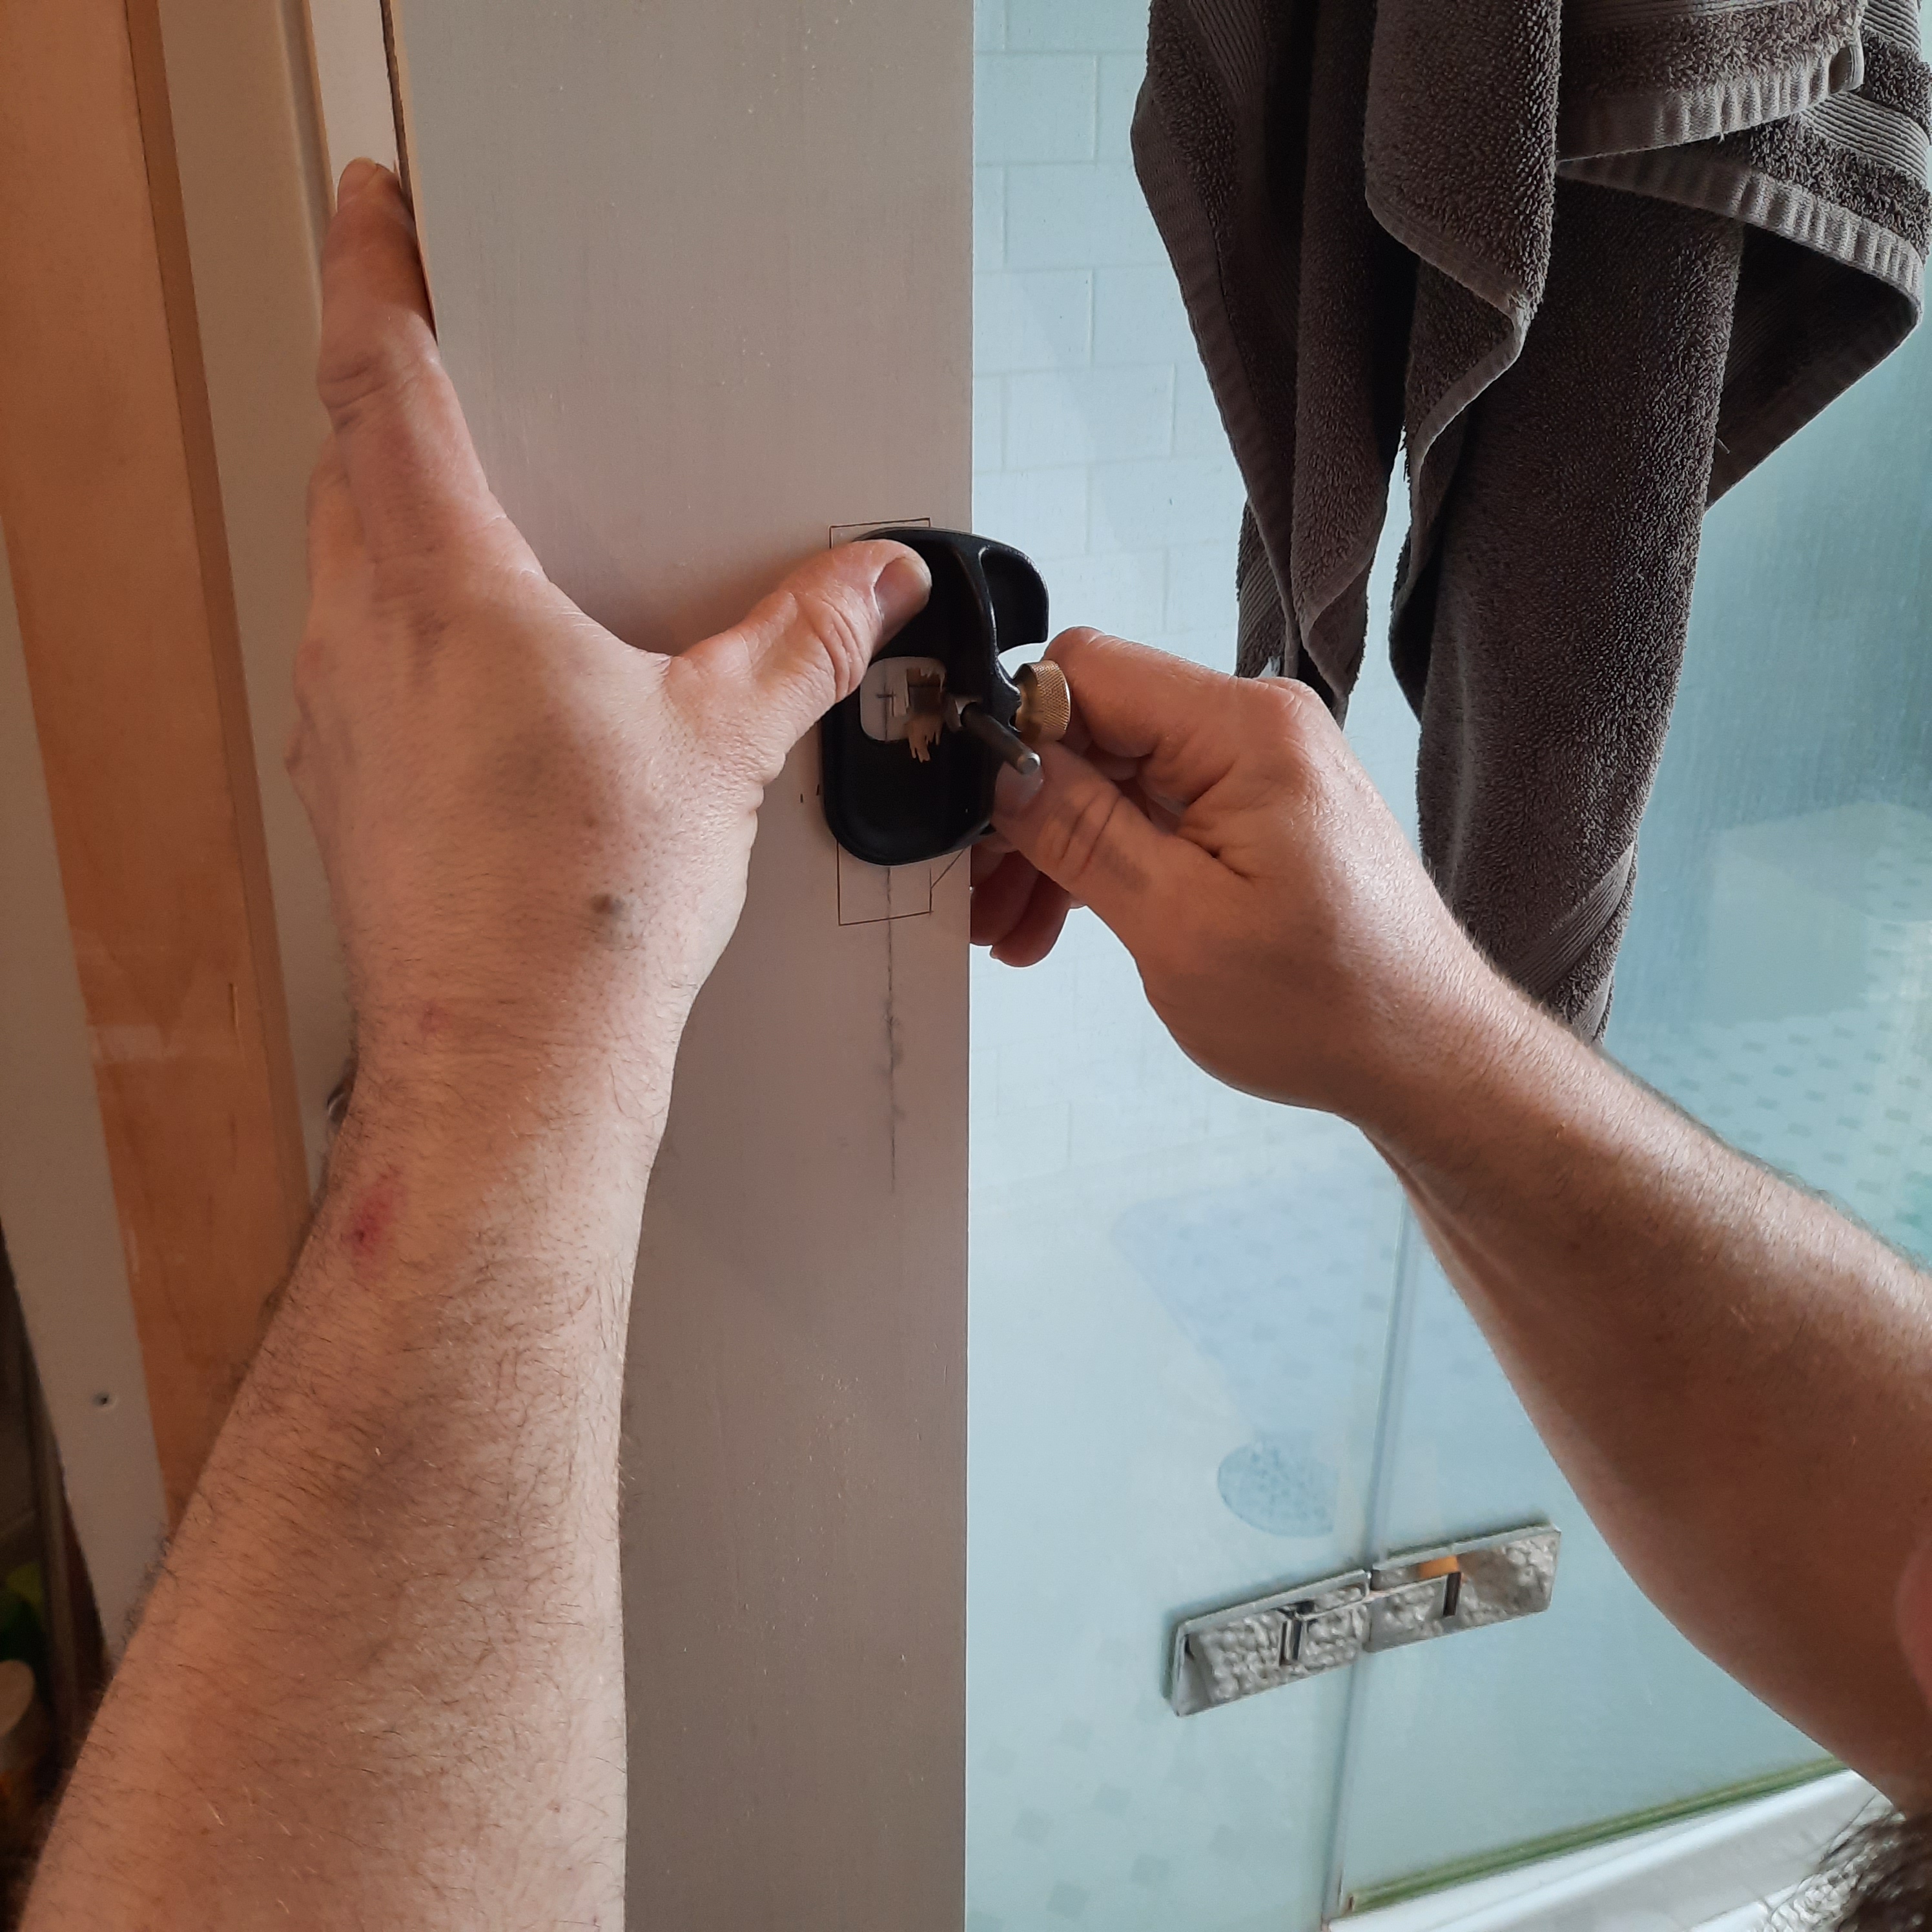
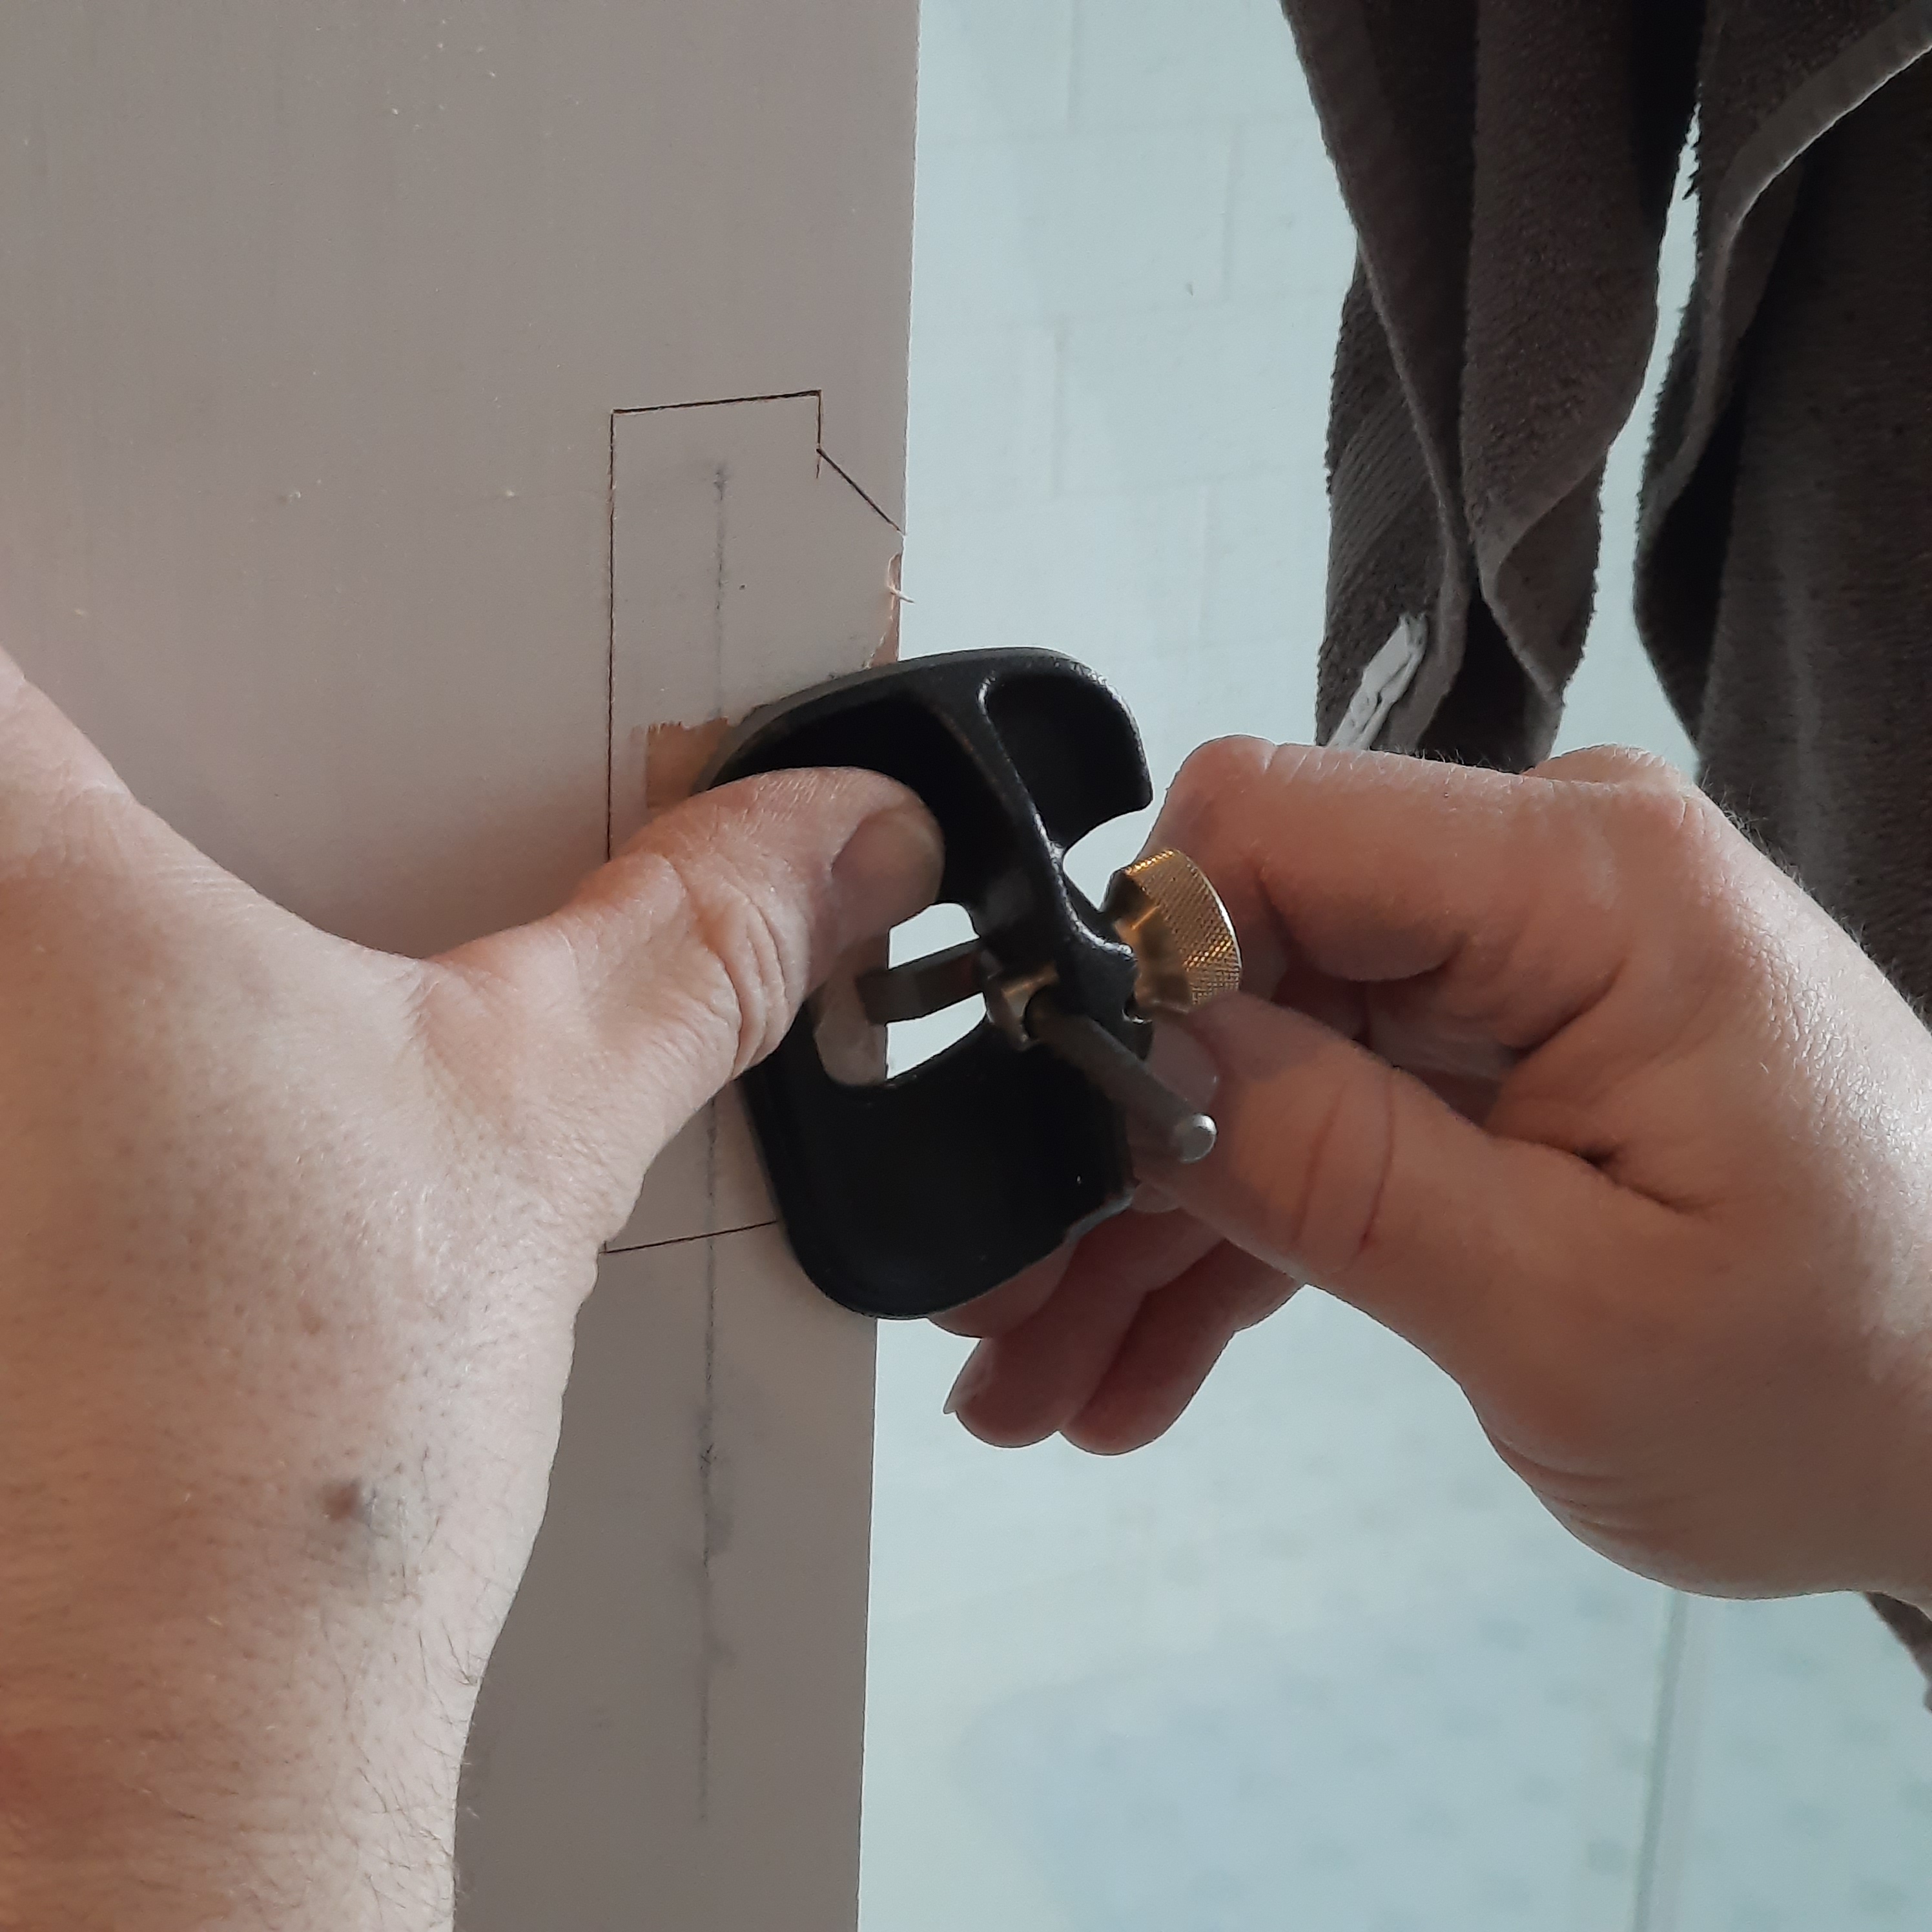
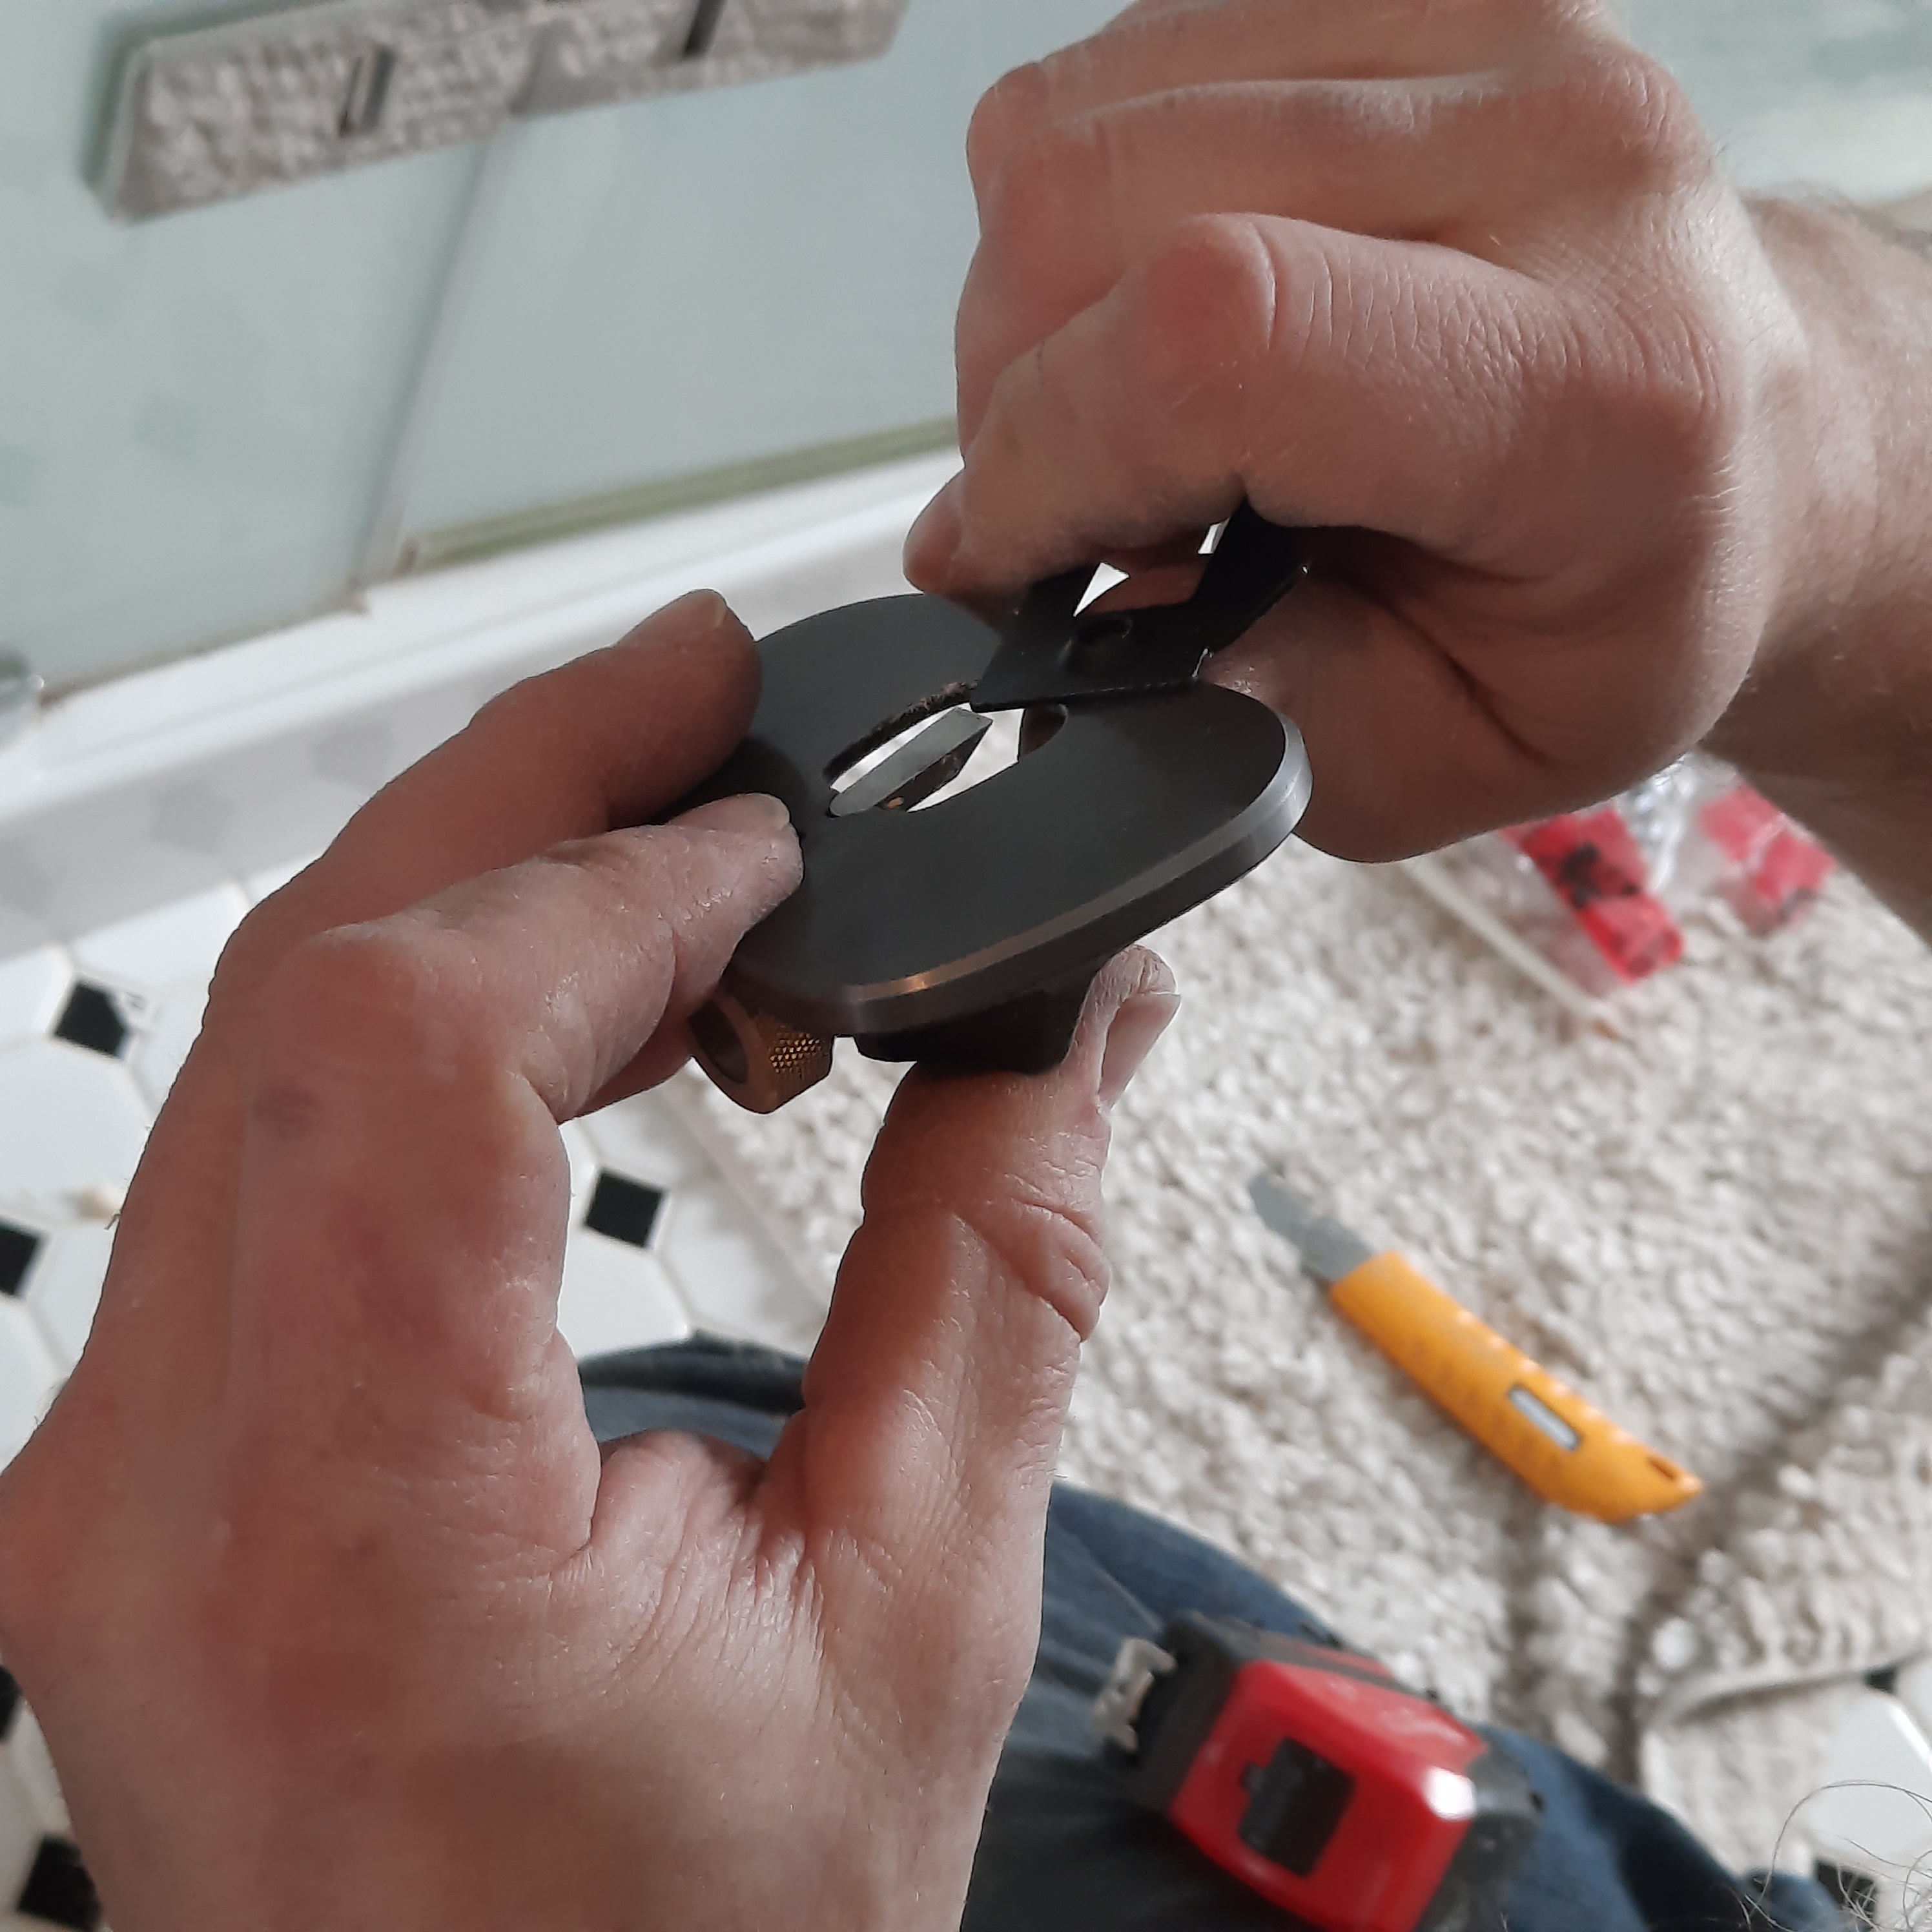
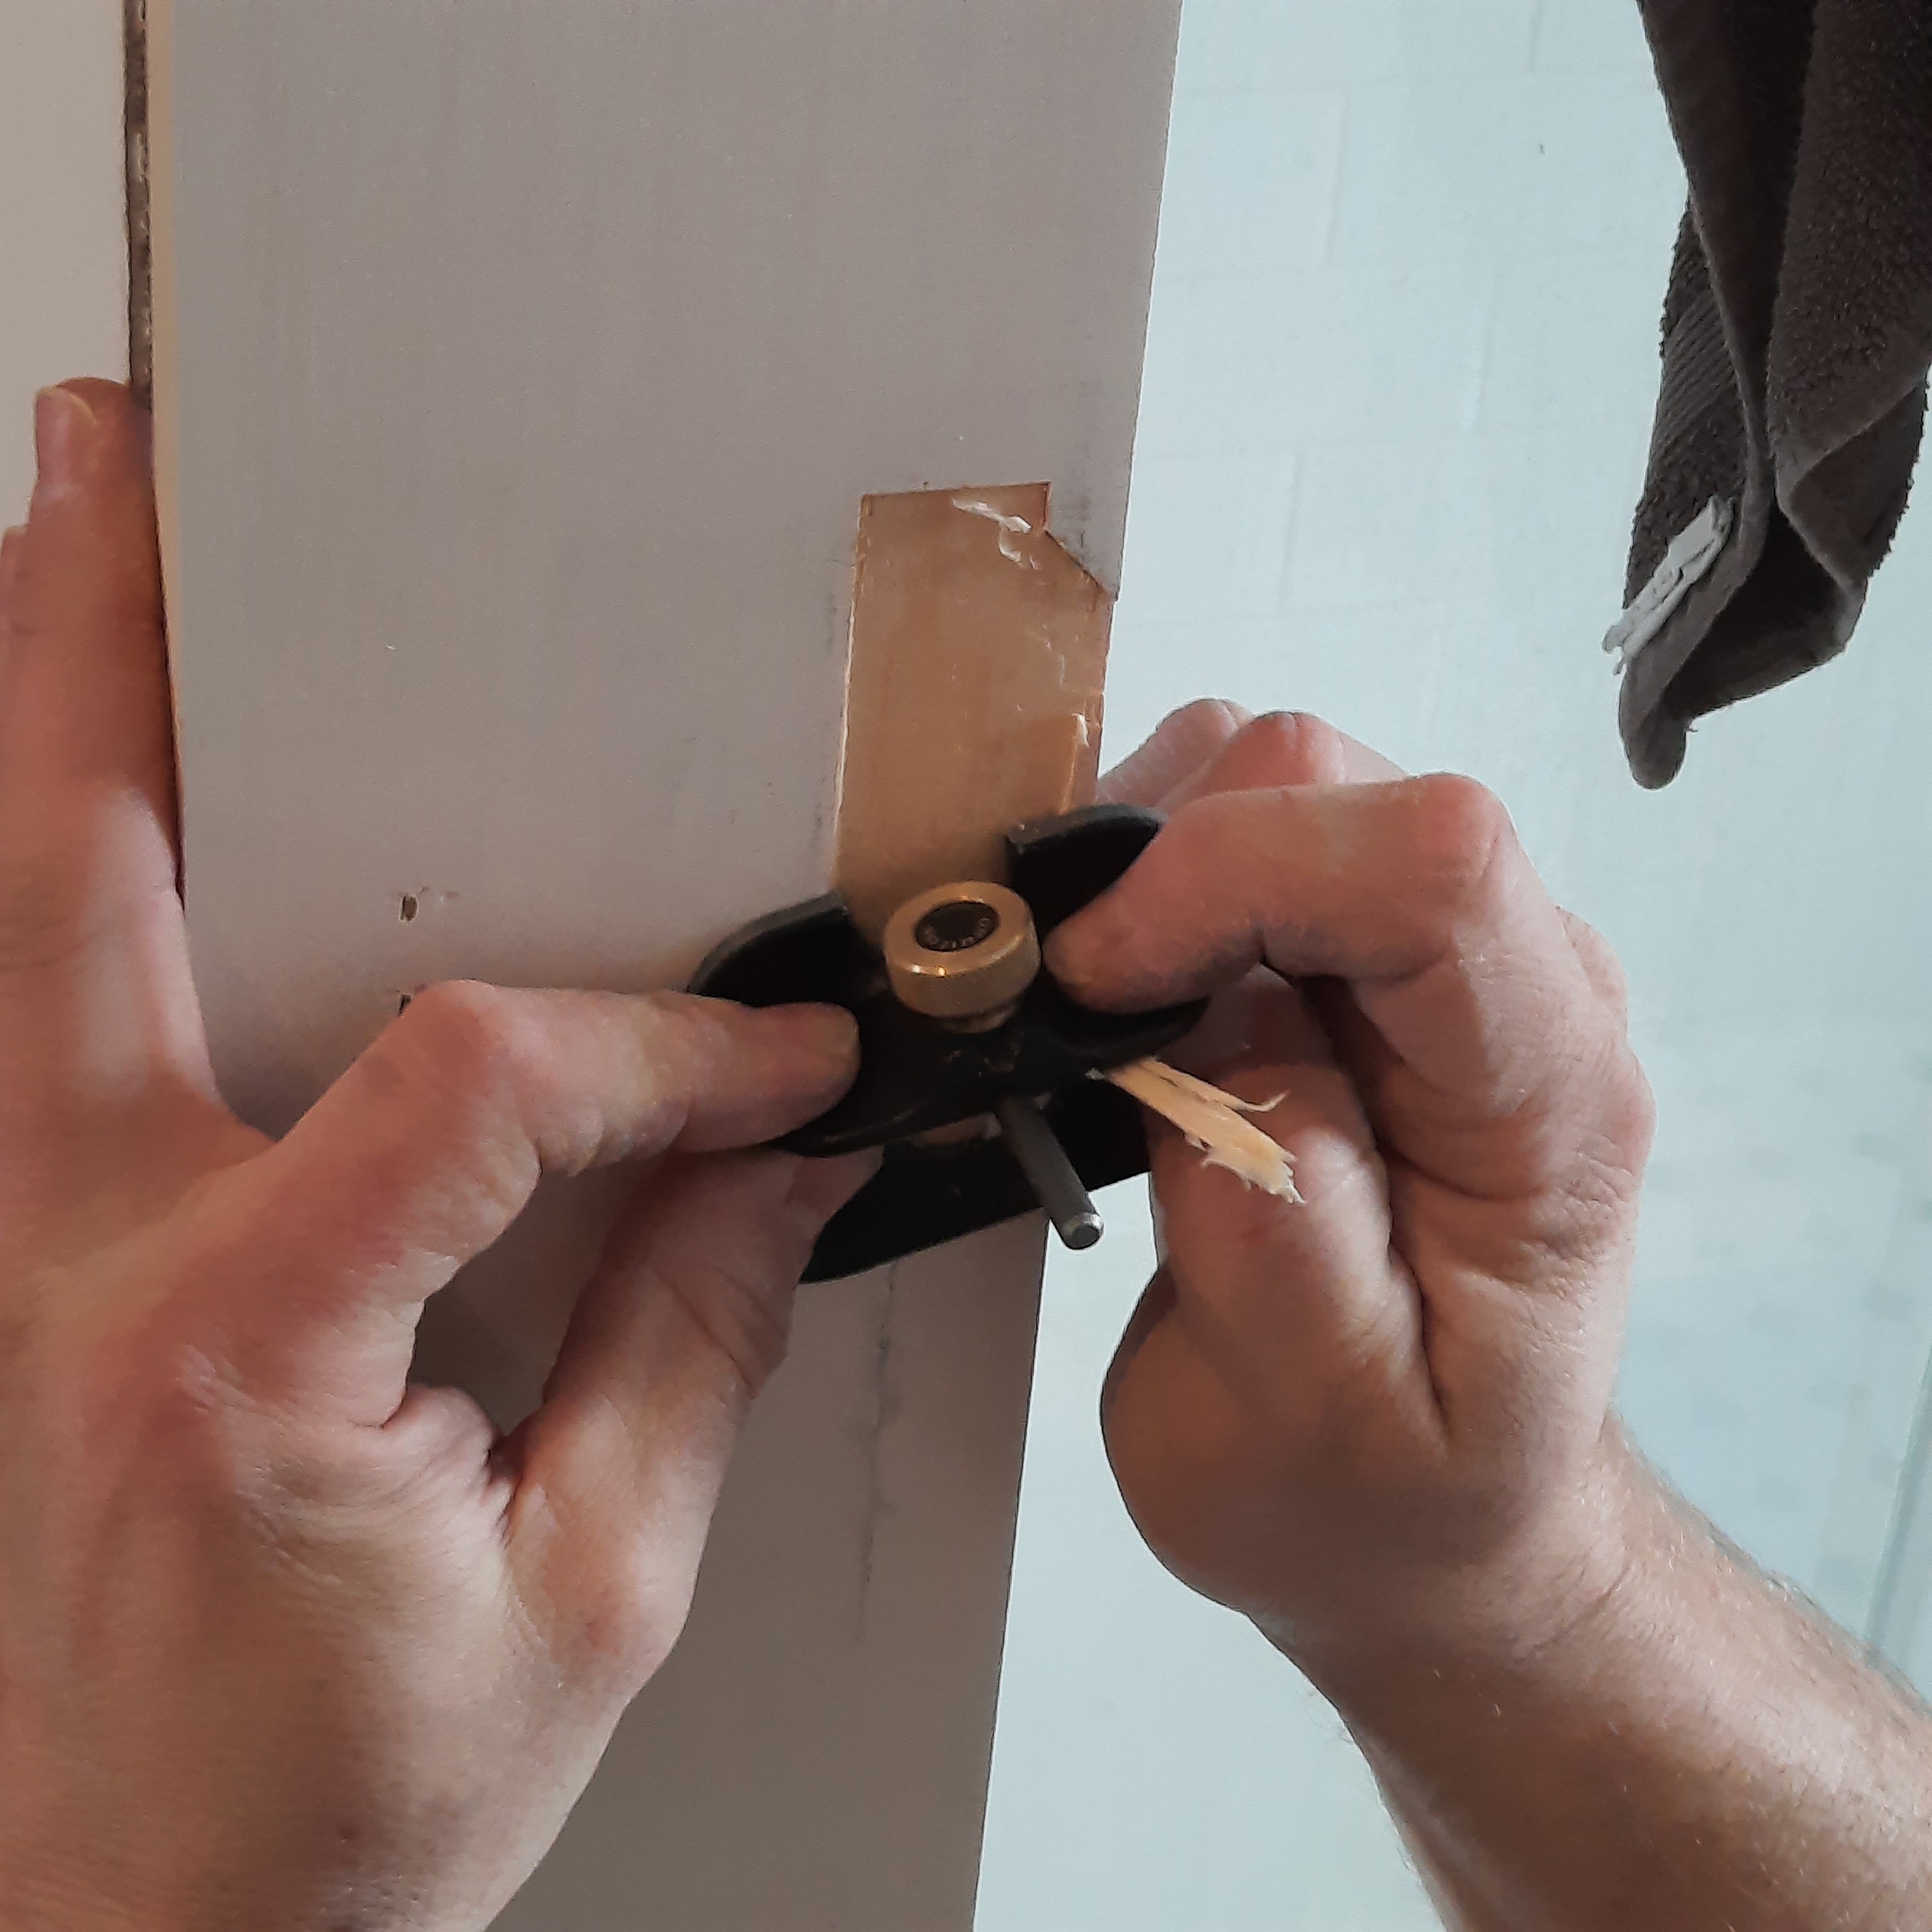
The new “old” looking hardware is gorgeous and the old key to lock the door is amazing…..
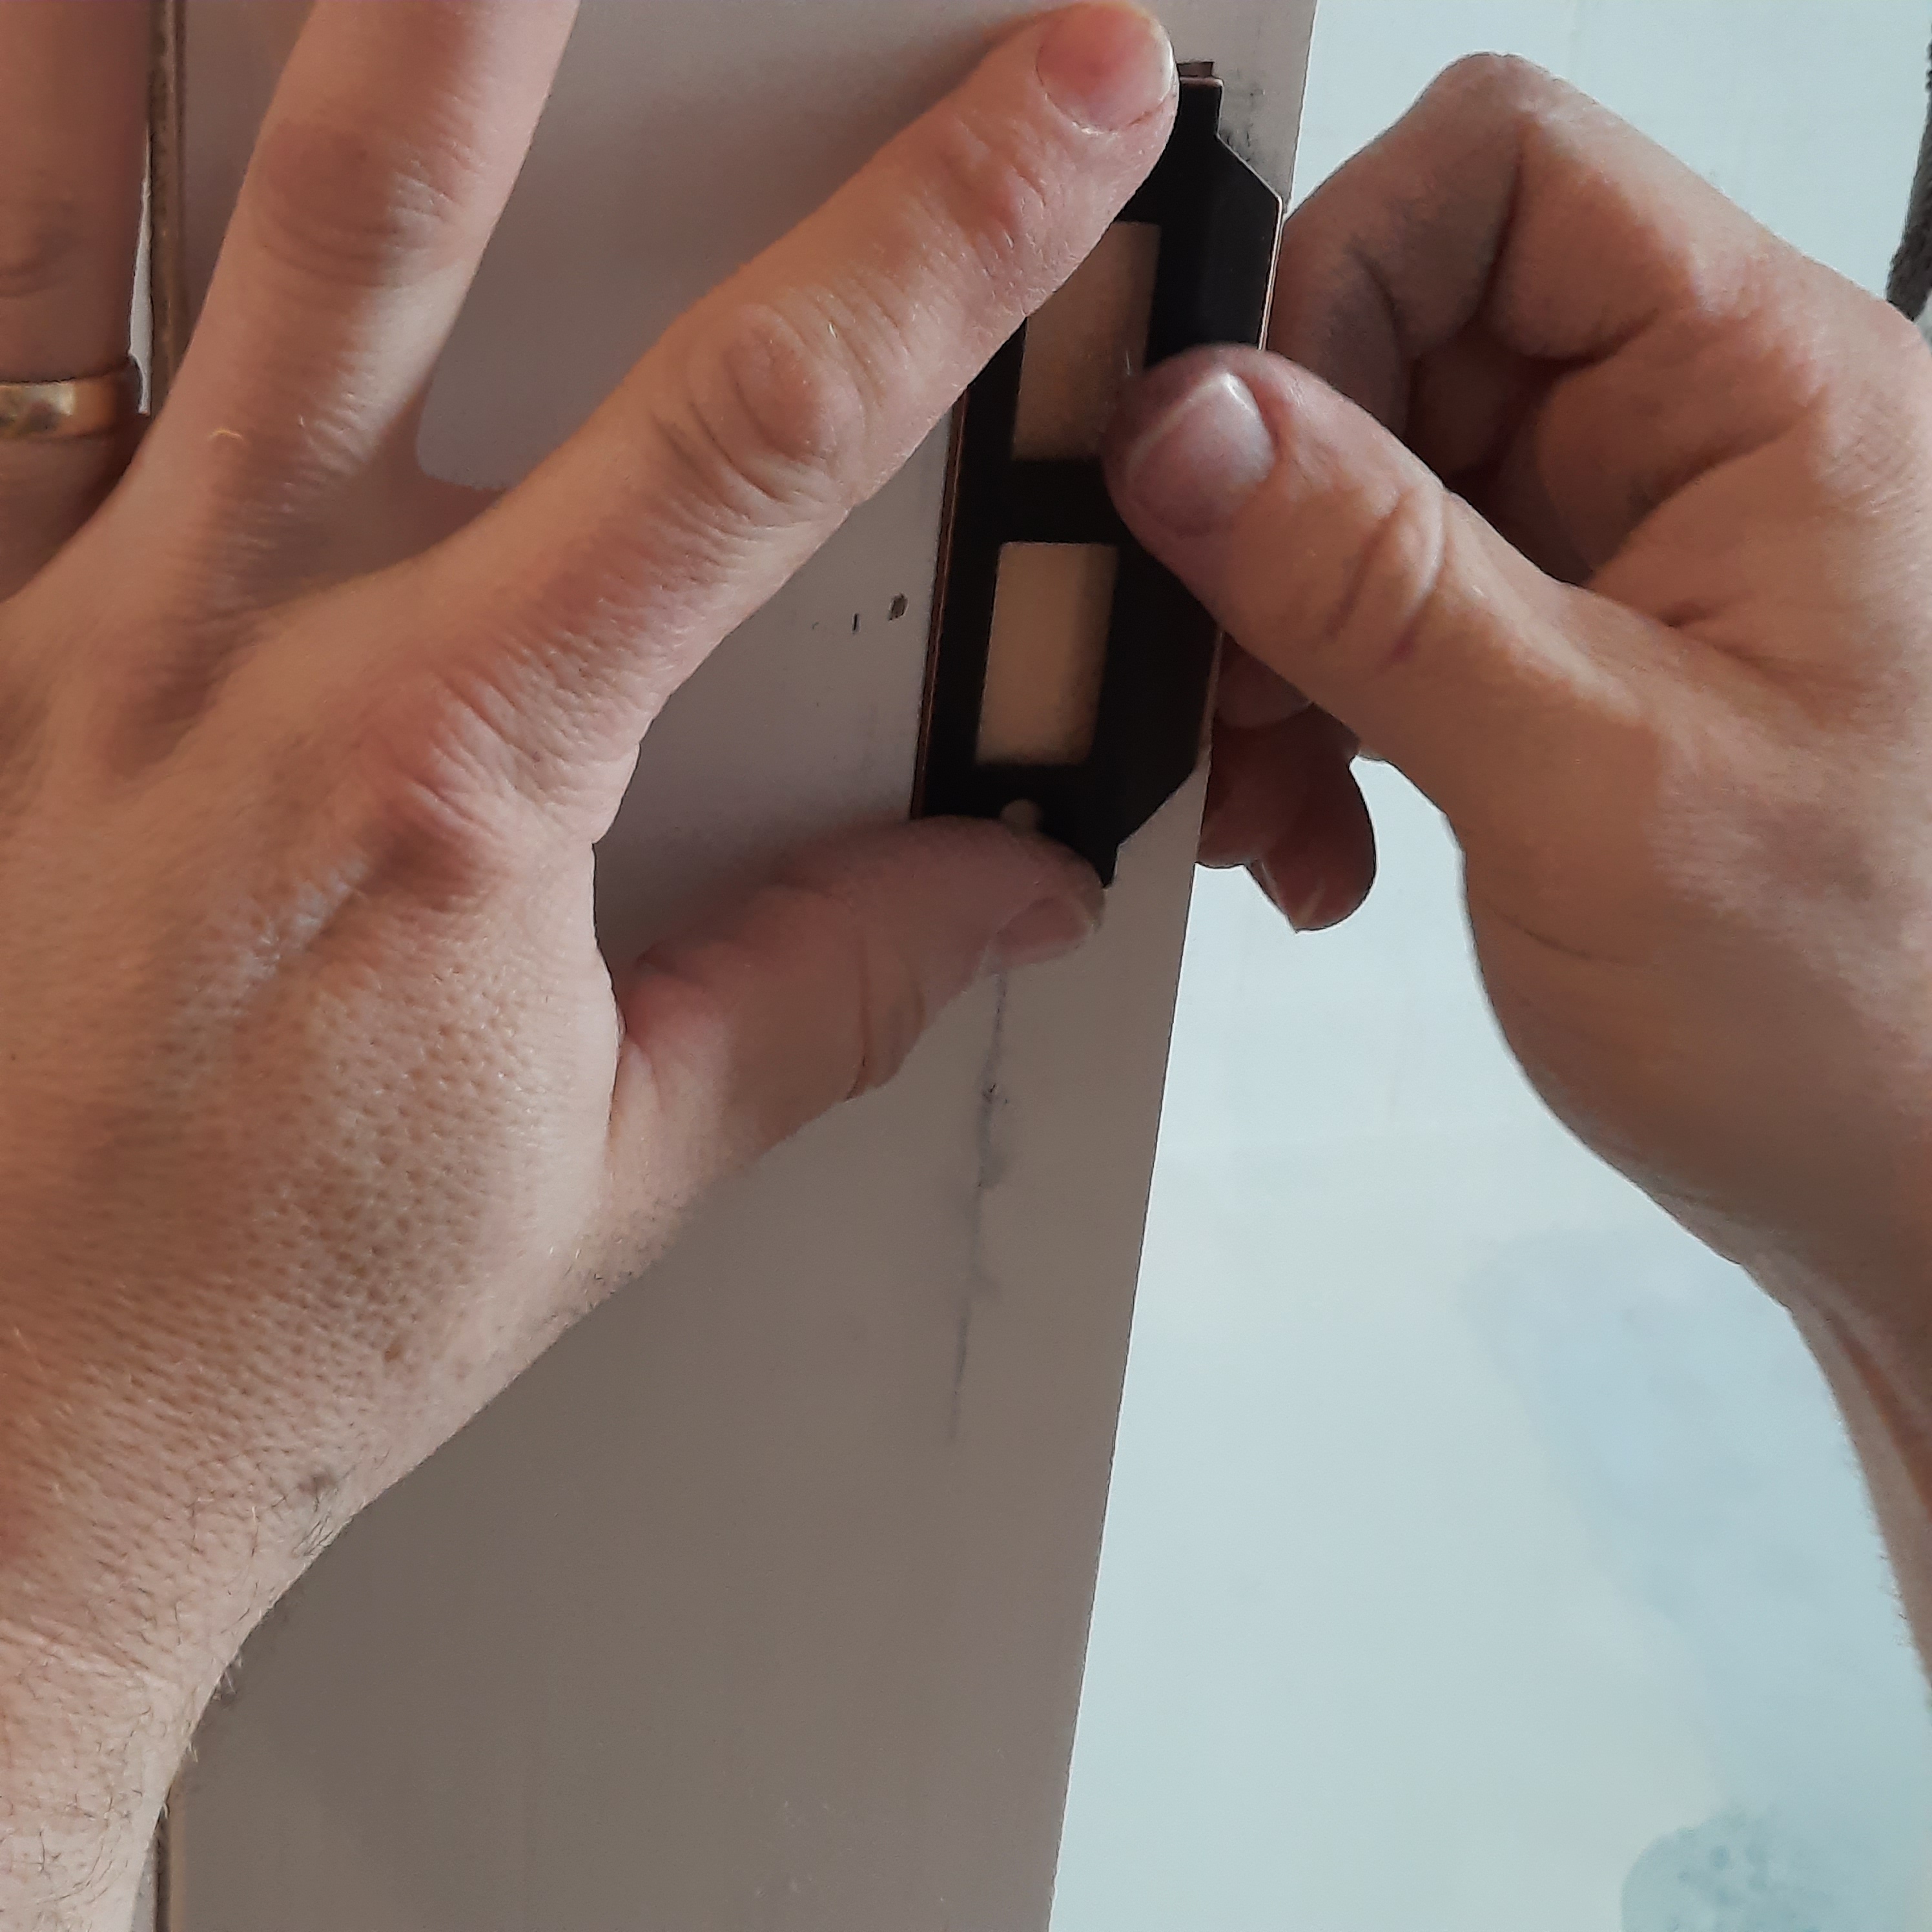
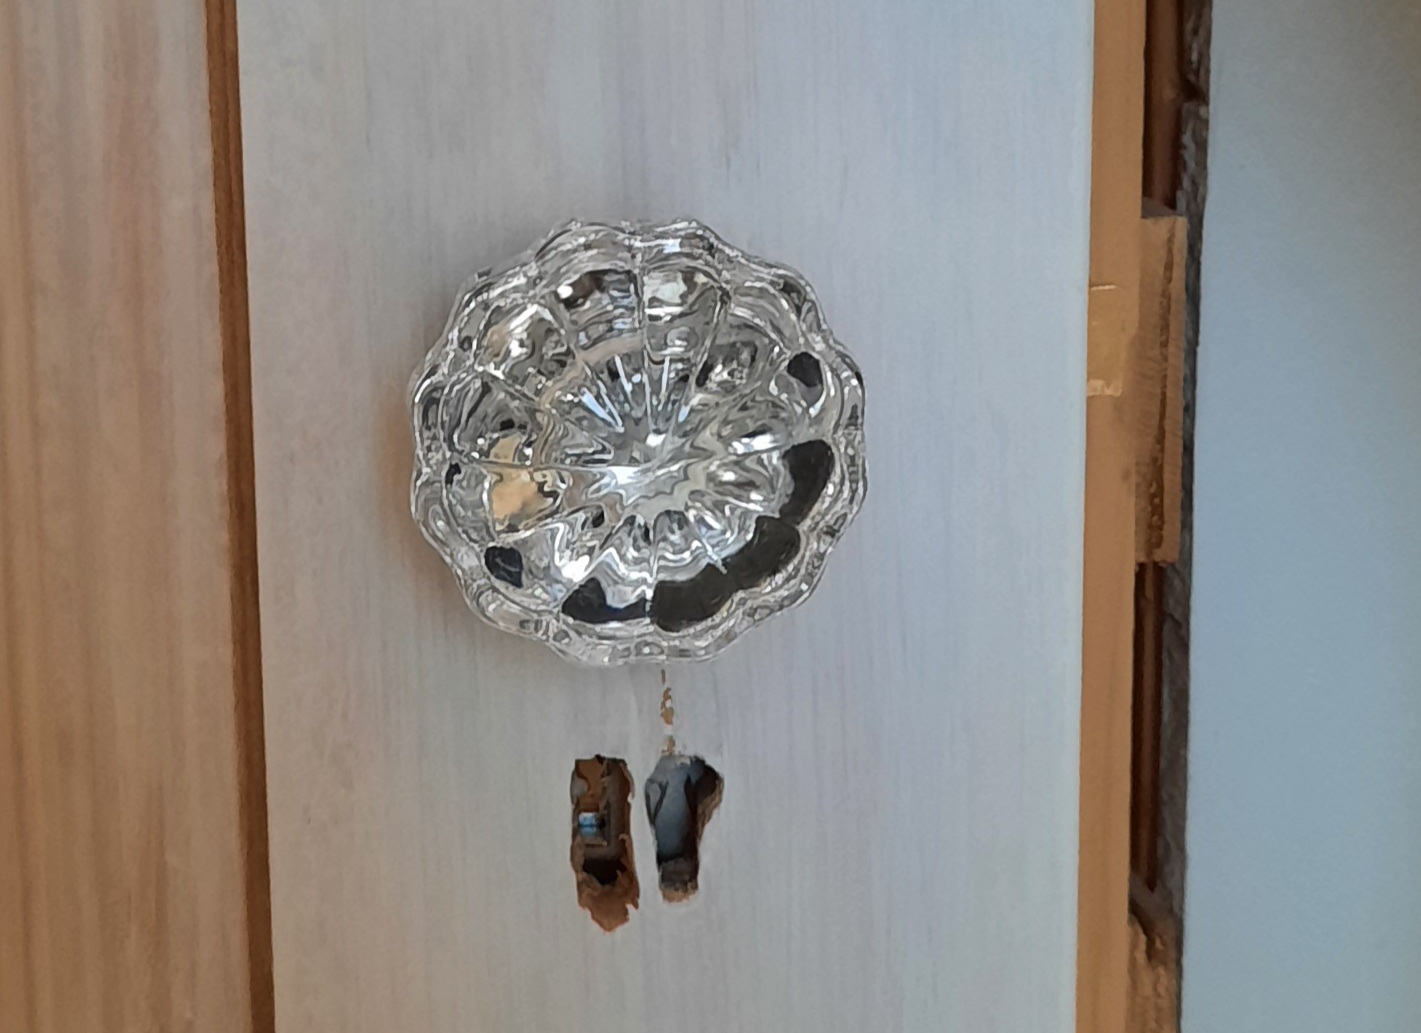


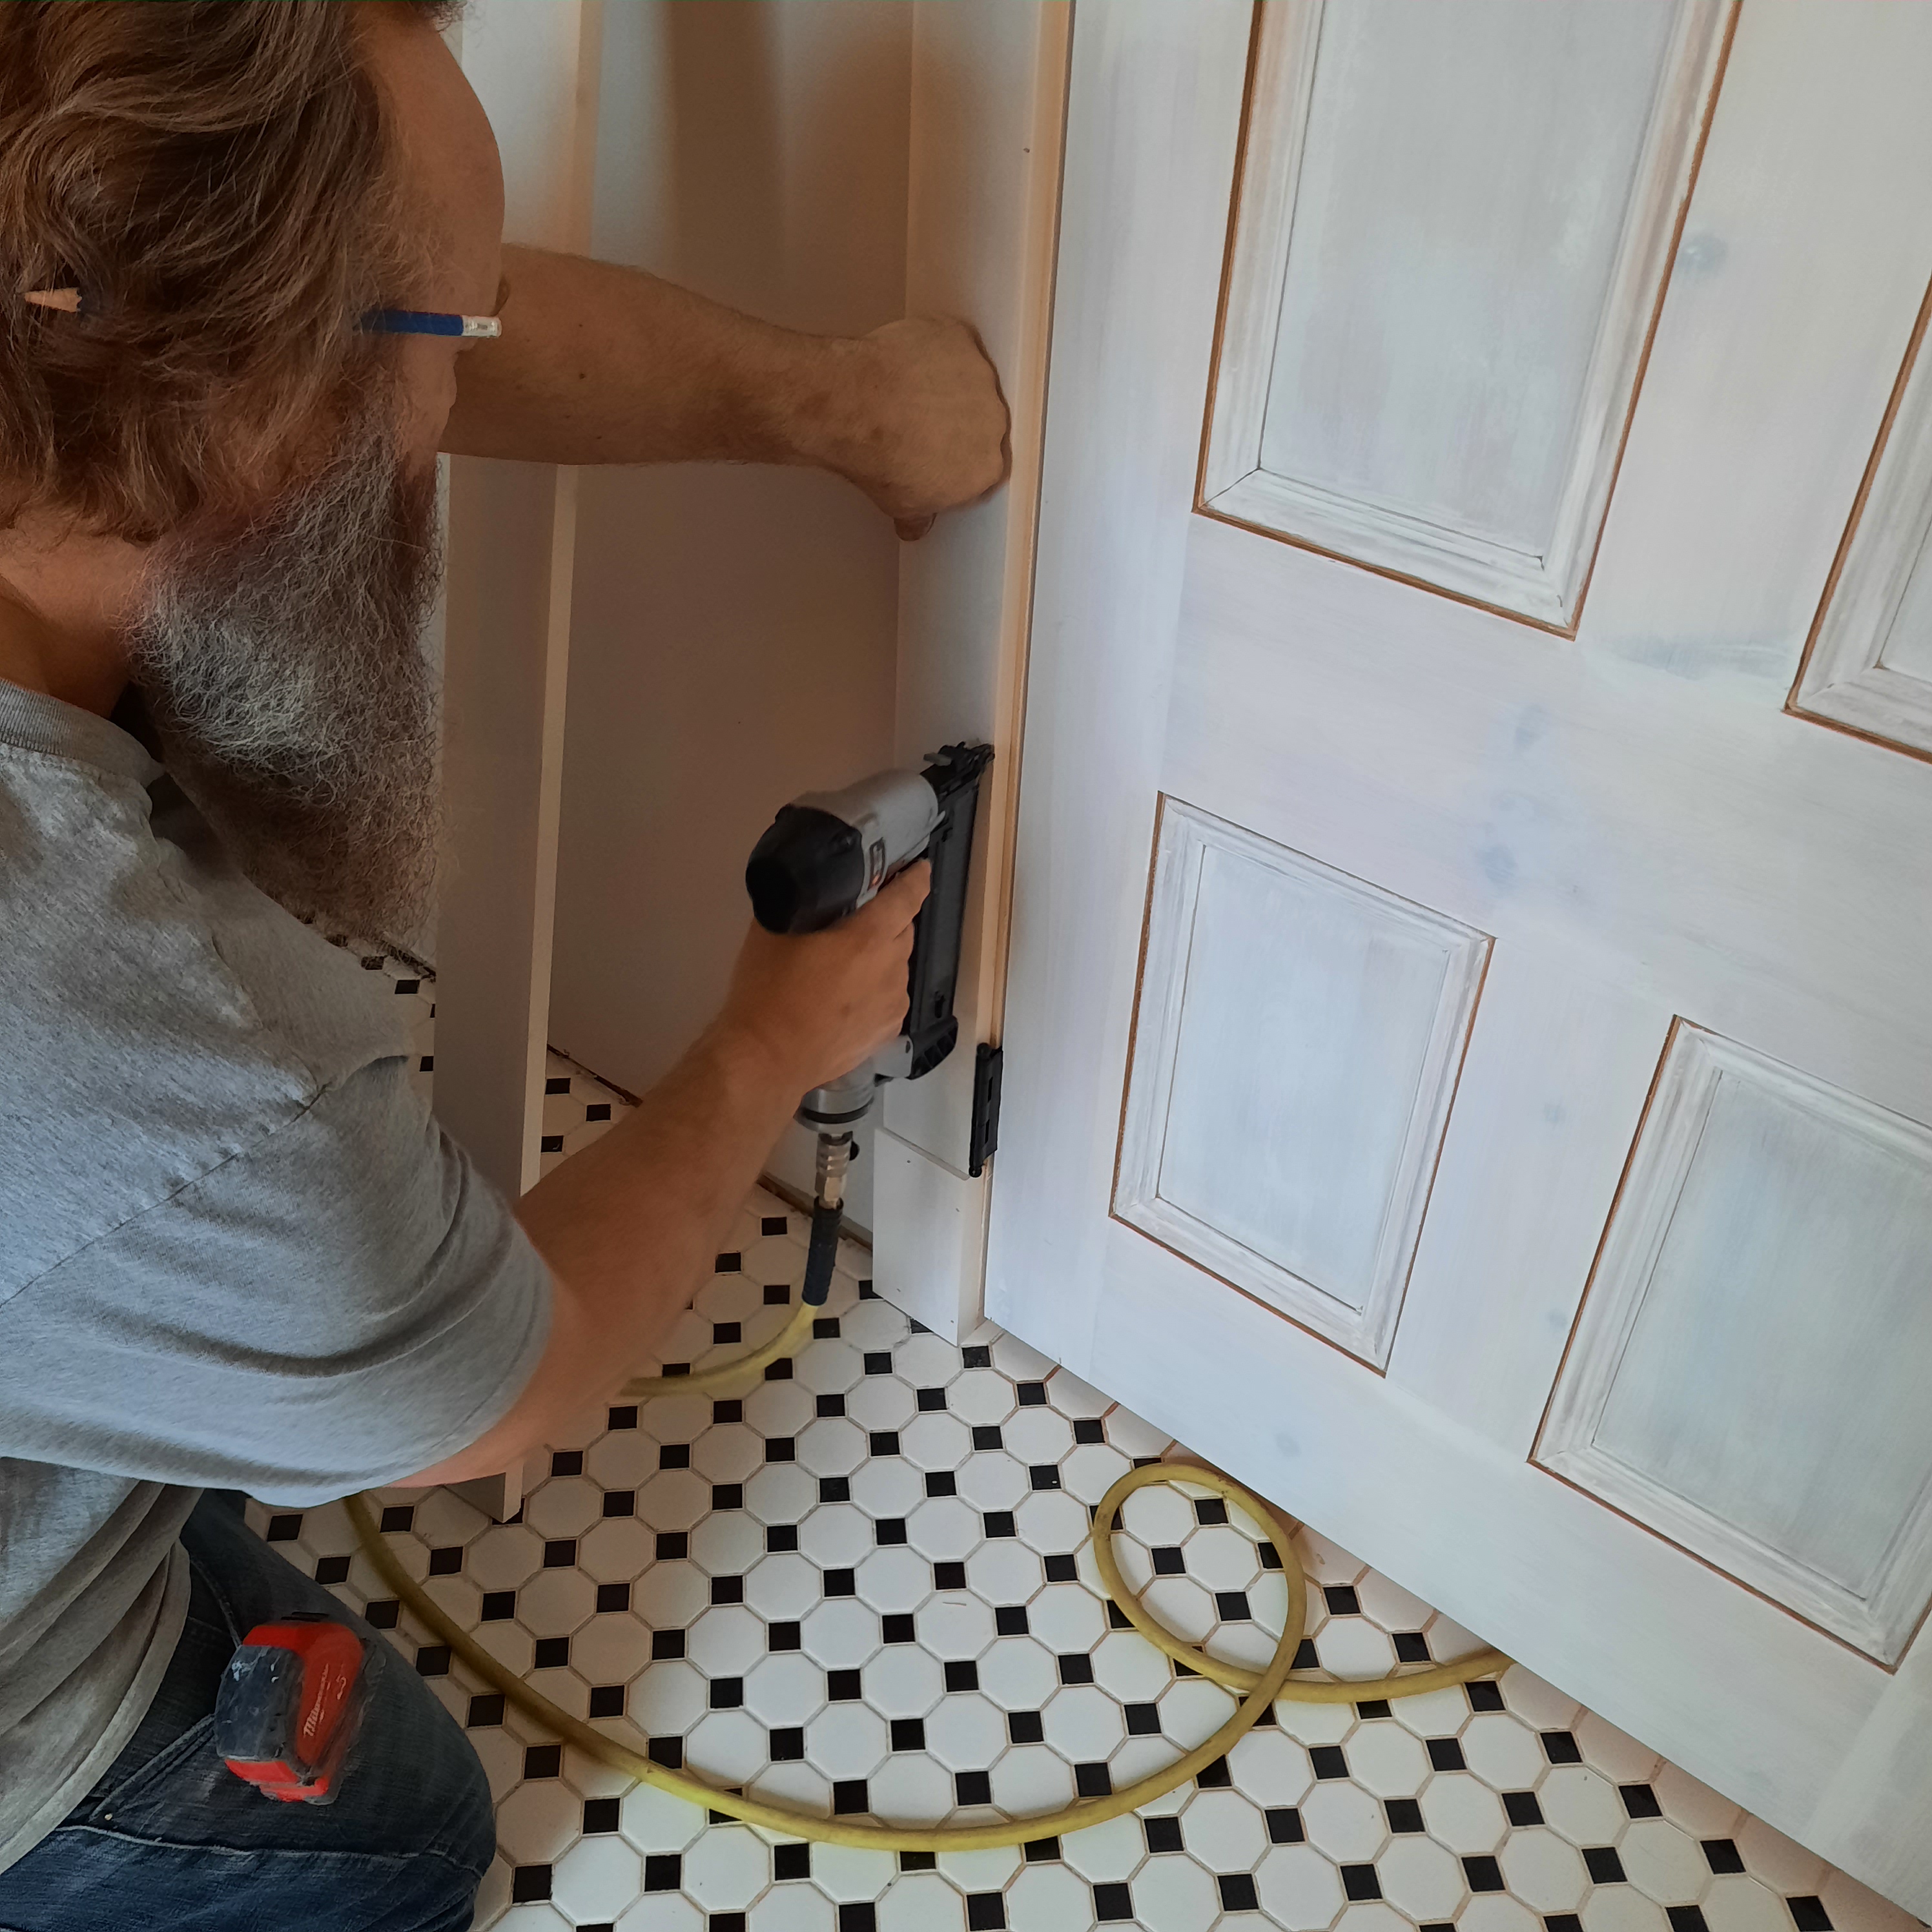
It’s so hard to believe that we are finally getting into some of these finer finish details. The final coat of paint still needs to be put on the door and the frame. The metal plate that goes over over the handle and key hole has to be added but she’s almost done….


All the components of the trim make it so much nicer then the standard stuff you see today.
The old style tiles on the bathroom floor along with the old door and the old-fashioned hardware really set it off well.
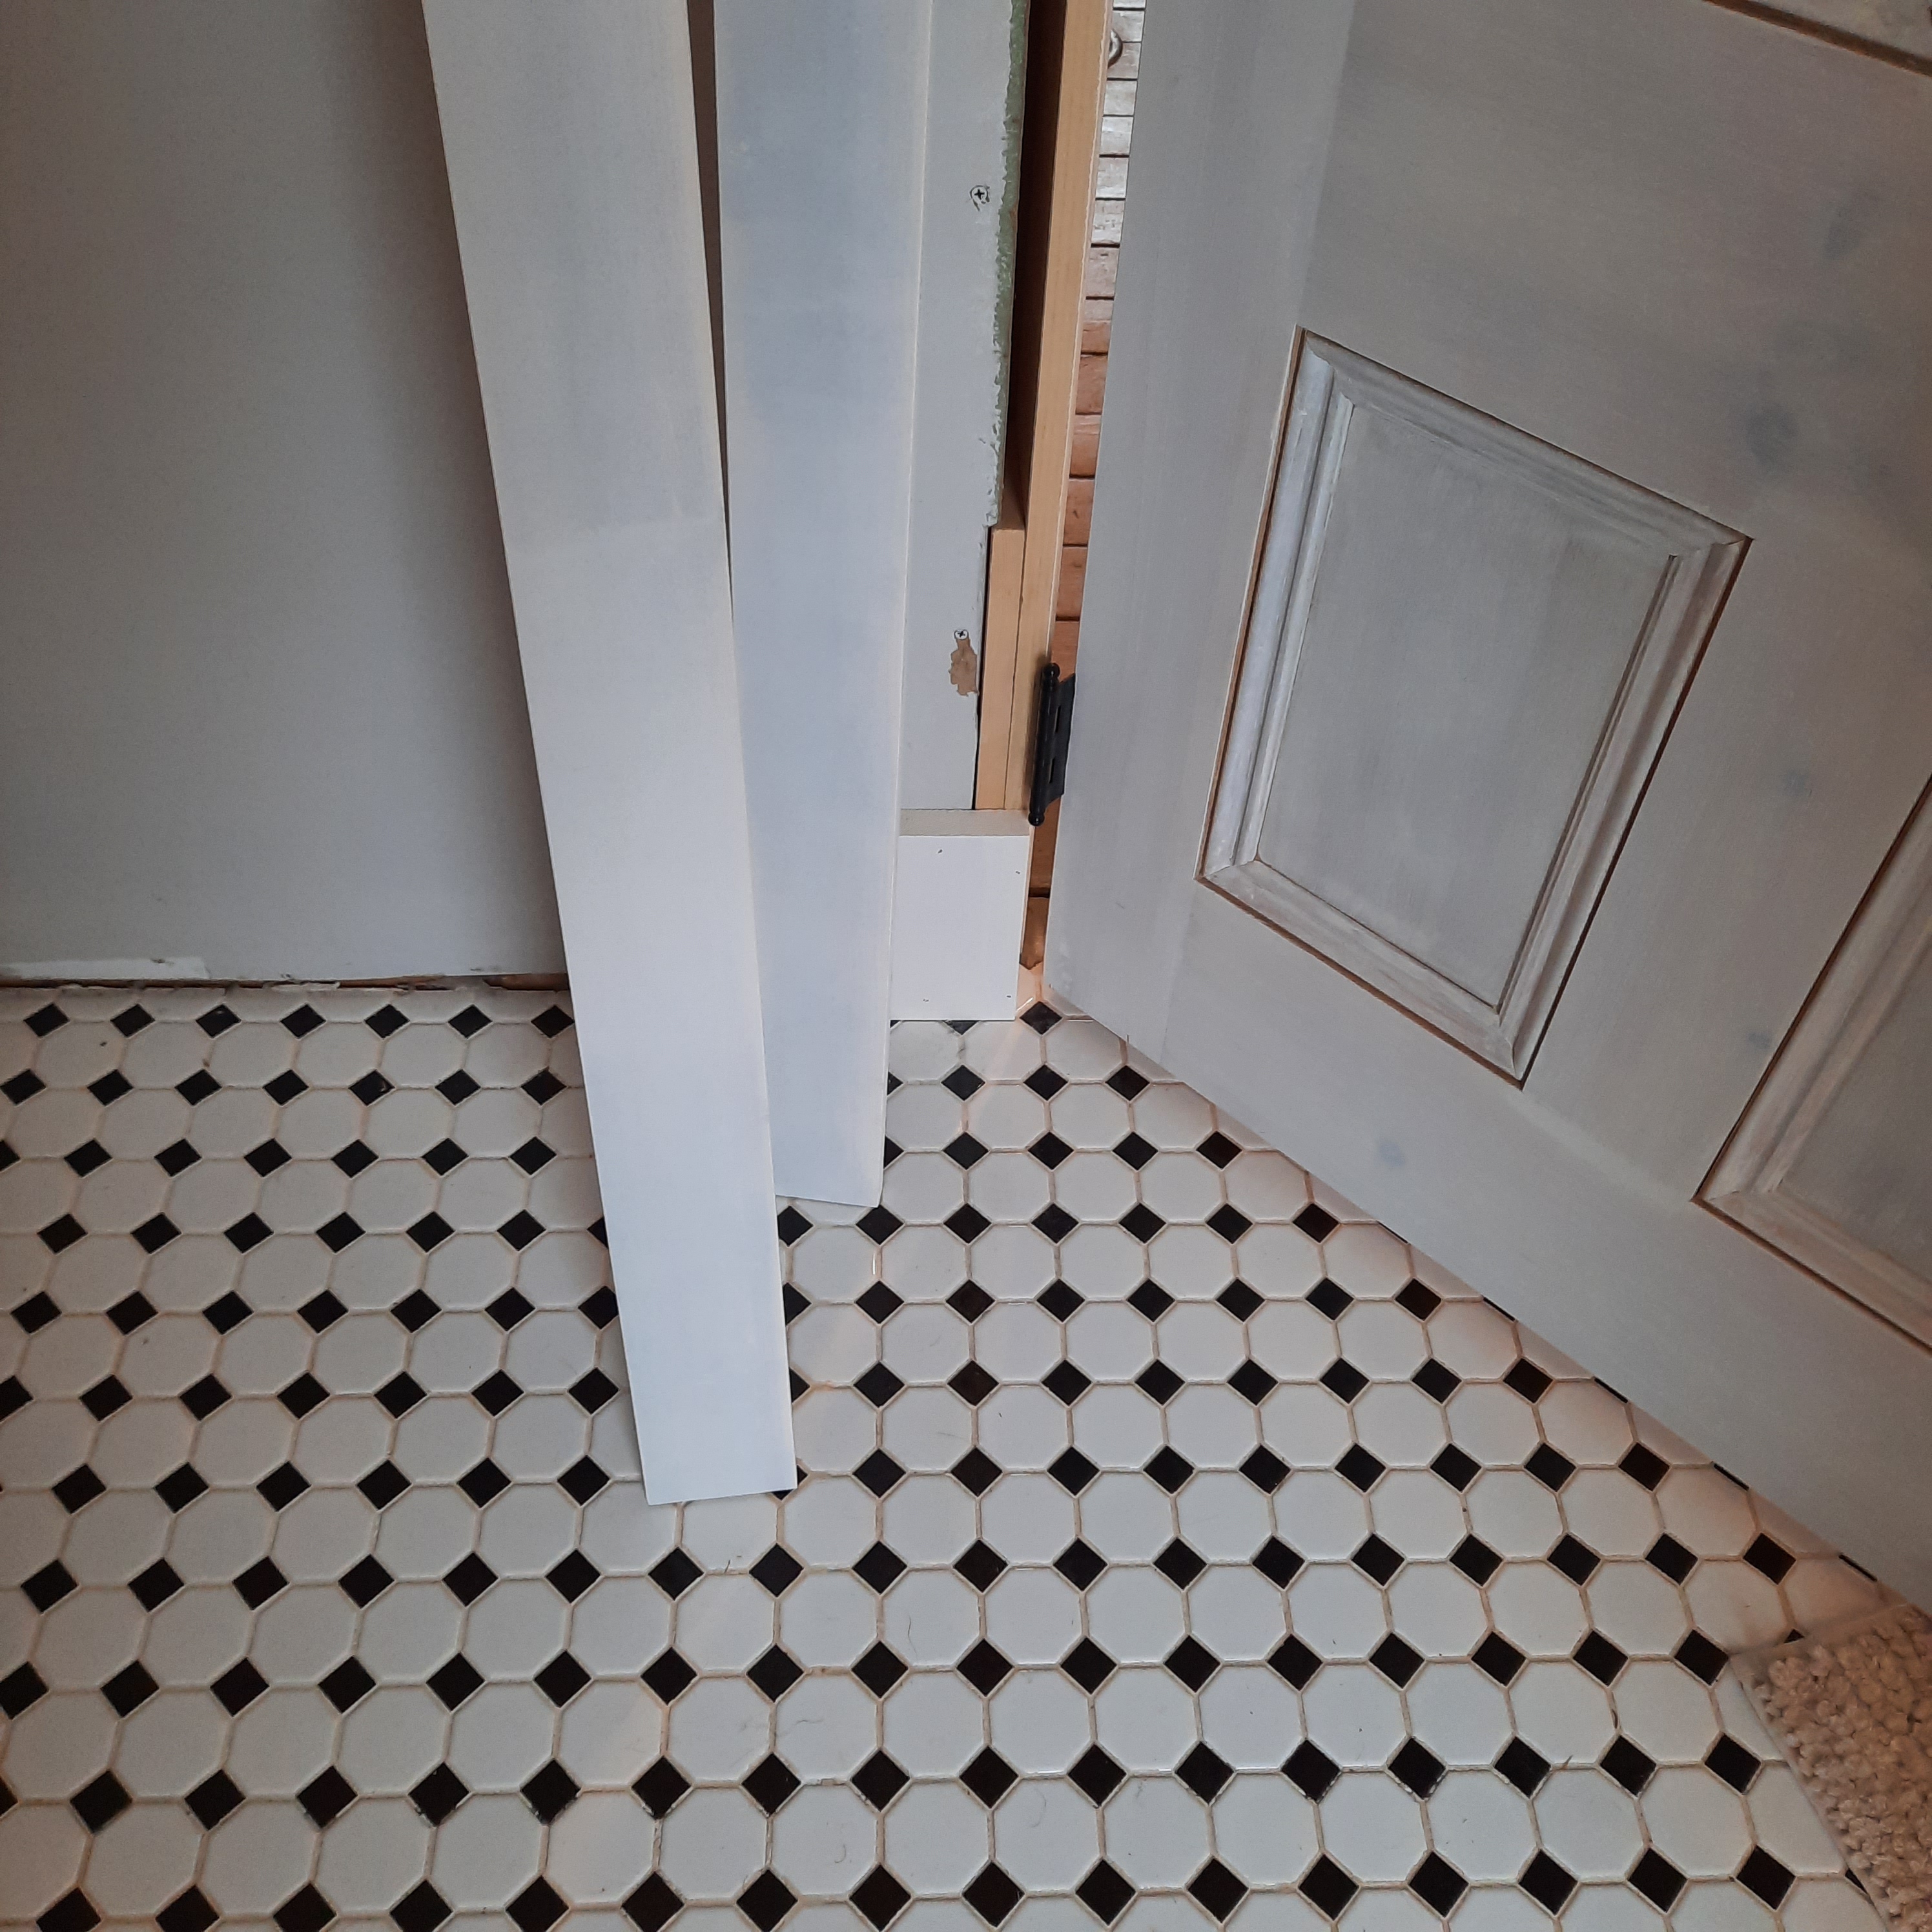
We have to add the final trim finish on the top of the base board….. I can’t remeber what it’s called …. ??? But because it is not something available at your local lumber store Rusty had to buy some milled wood and use a particar rotor bit to make the shape / profile in the wood so that it can set of the tall based boards♡♡♡

I cannot tell you how extremely blessed I feel….and that I am. Hubby is so talented….. he can do plumbing, electrical, framing, flooring, drywall, seam filling, painting and fine wood carpentry….. that last one is a talent….lots of practice, patience, ability and creativity.
Of course I help out and have also learned alot but I certianly don’t measure up to his standards….. I guess that is why he and Bob work so well together as they are true Master Craftsmen♡
Looking forward to the flooring that we will craft as well….we have some awesome ideas on how to create the effect we are looking for…. that won’t be for a while yet. We have a bunch more stuff to do yet but the new bathroom vanity will be pretty cool when it’s finished. Oh ya he is also making all of our kitchen cabinets…..
Here is to more house updates♡
Take care everyone and God Bless♡
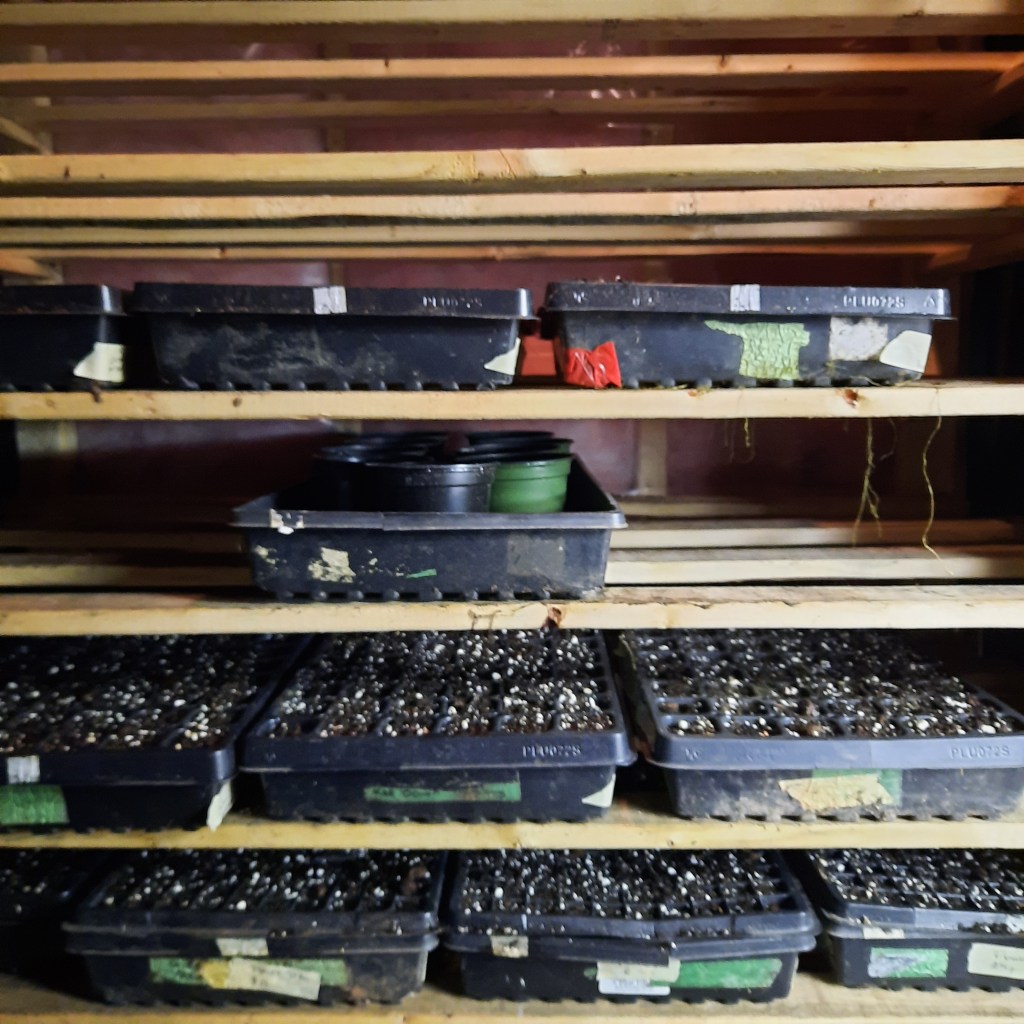
I was able to sit down again and start more seeds. It has been a very difficult week but we are trying to press forward.
Seeds need to be planted so veggies and flowers will grow.
I sat down…. and I started… I got my heart into it. So I got 2 flats of early start flowers going…… a bunch of perennials and annuals….. I can’t wait. Then I got some new veggie seeds in soil. Some stuff that I have never grown before. I am going to try celtuce, sapphire, anise, wild leeks, and celeriac as some new things plus a few new greens too. Oh yes I planted 9 paw paw seeds….. I hope they pop up like the last time. At least the rats and mice won’t feast on them this time around.
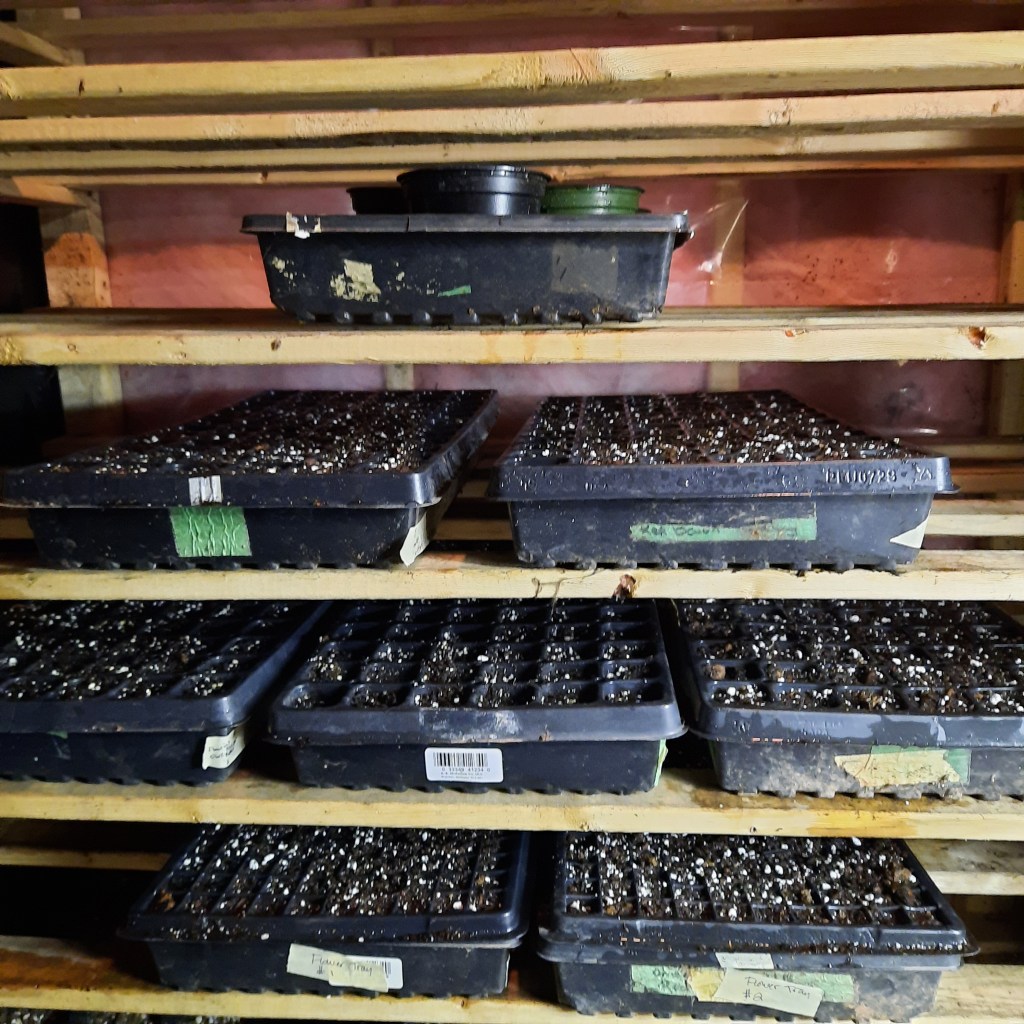
We had freezing rains and winds today which when you look out makes it seem like warmer weather will never come. But then again that is why you start some seeds early.
I am revamping the beds out back and I have to sit down and draw out the beds so that the new garden plan can be realized. It’s gonna be very different but I think the changes will really represent my whimsical, free spirited approach to the garden.
There will be several new changes coming this summer and I think it will be cool.
I will post the new plans in the next couple days with a description of what I’m gonna do♡
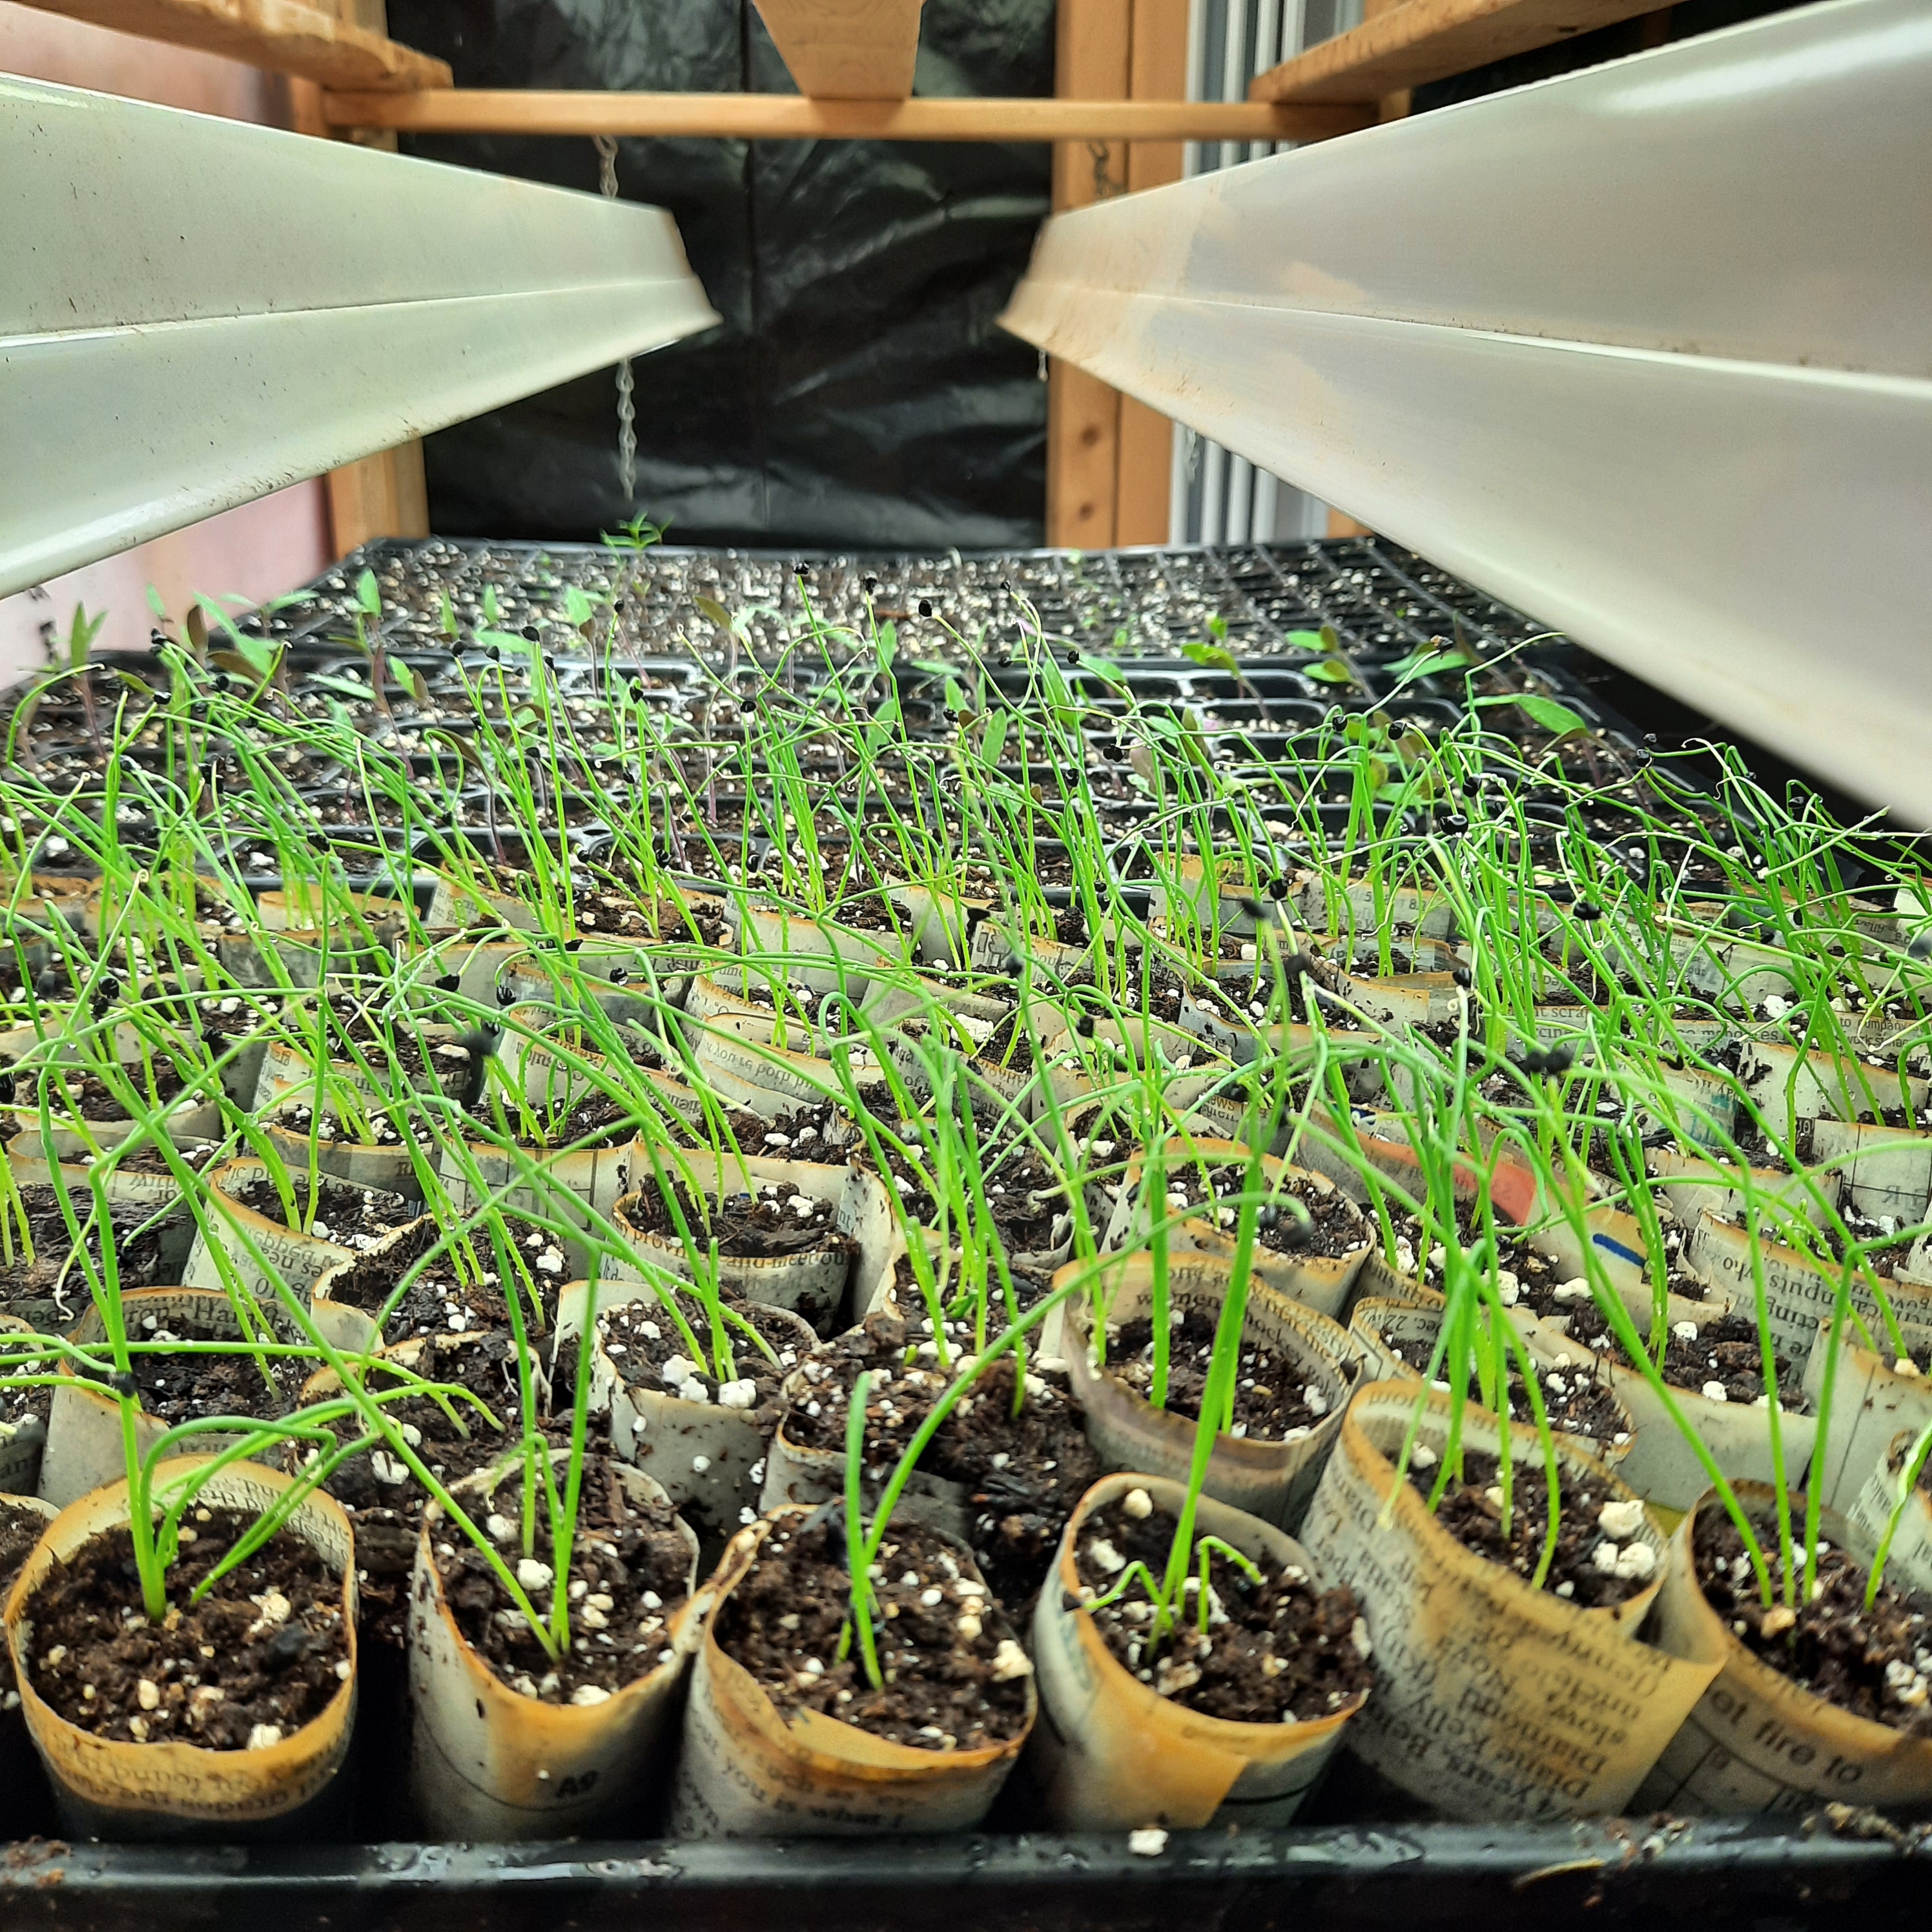
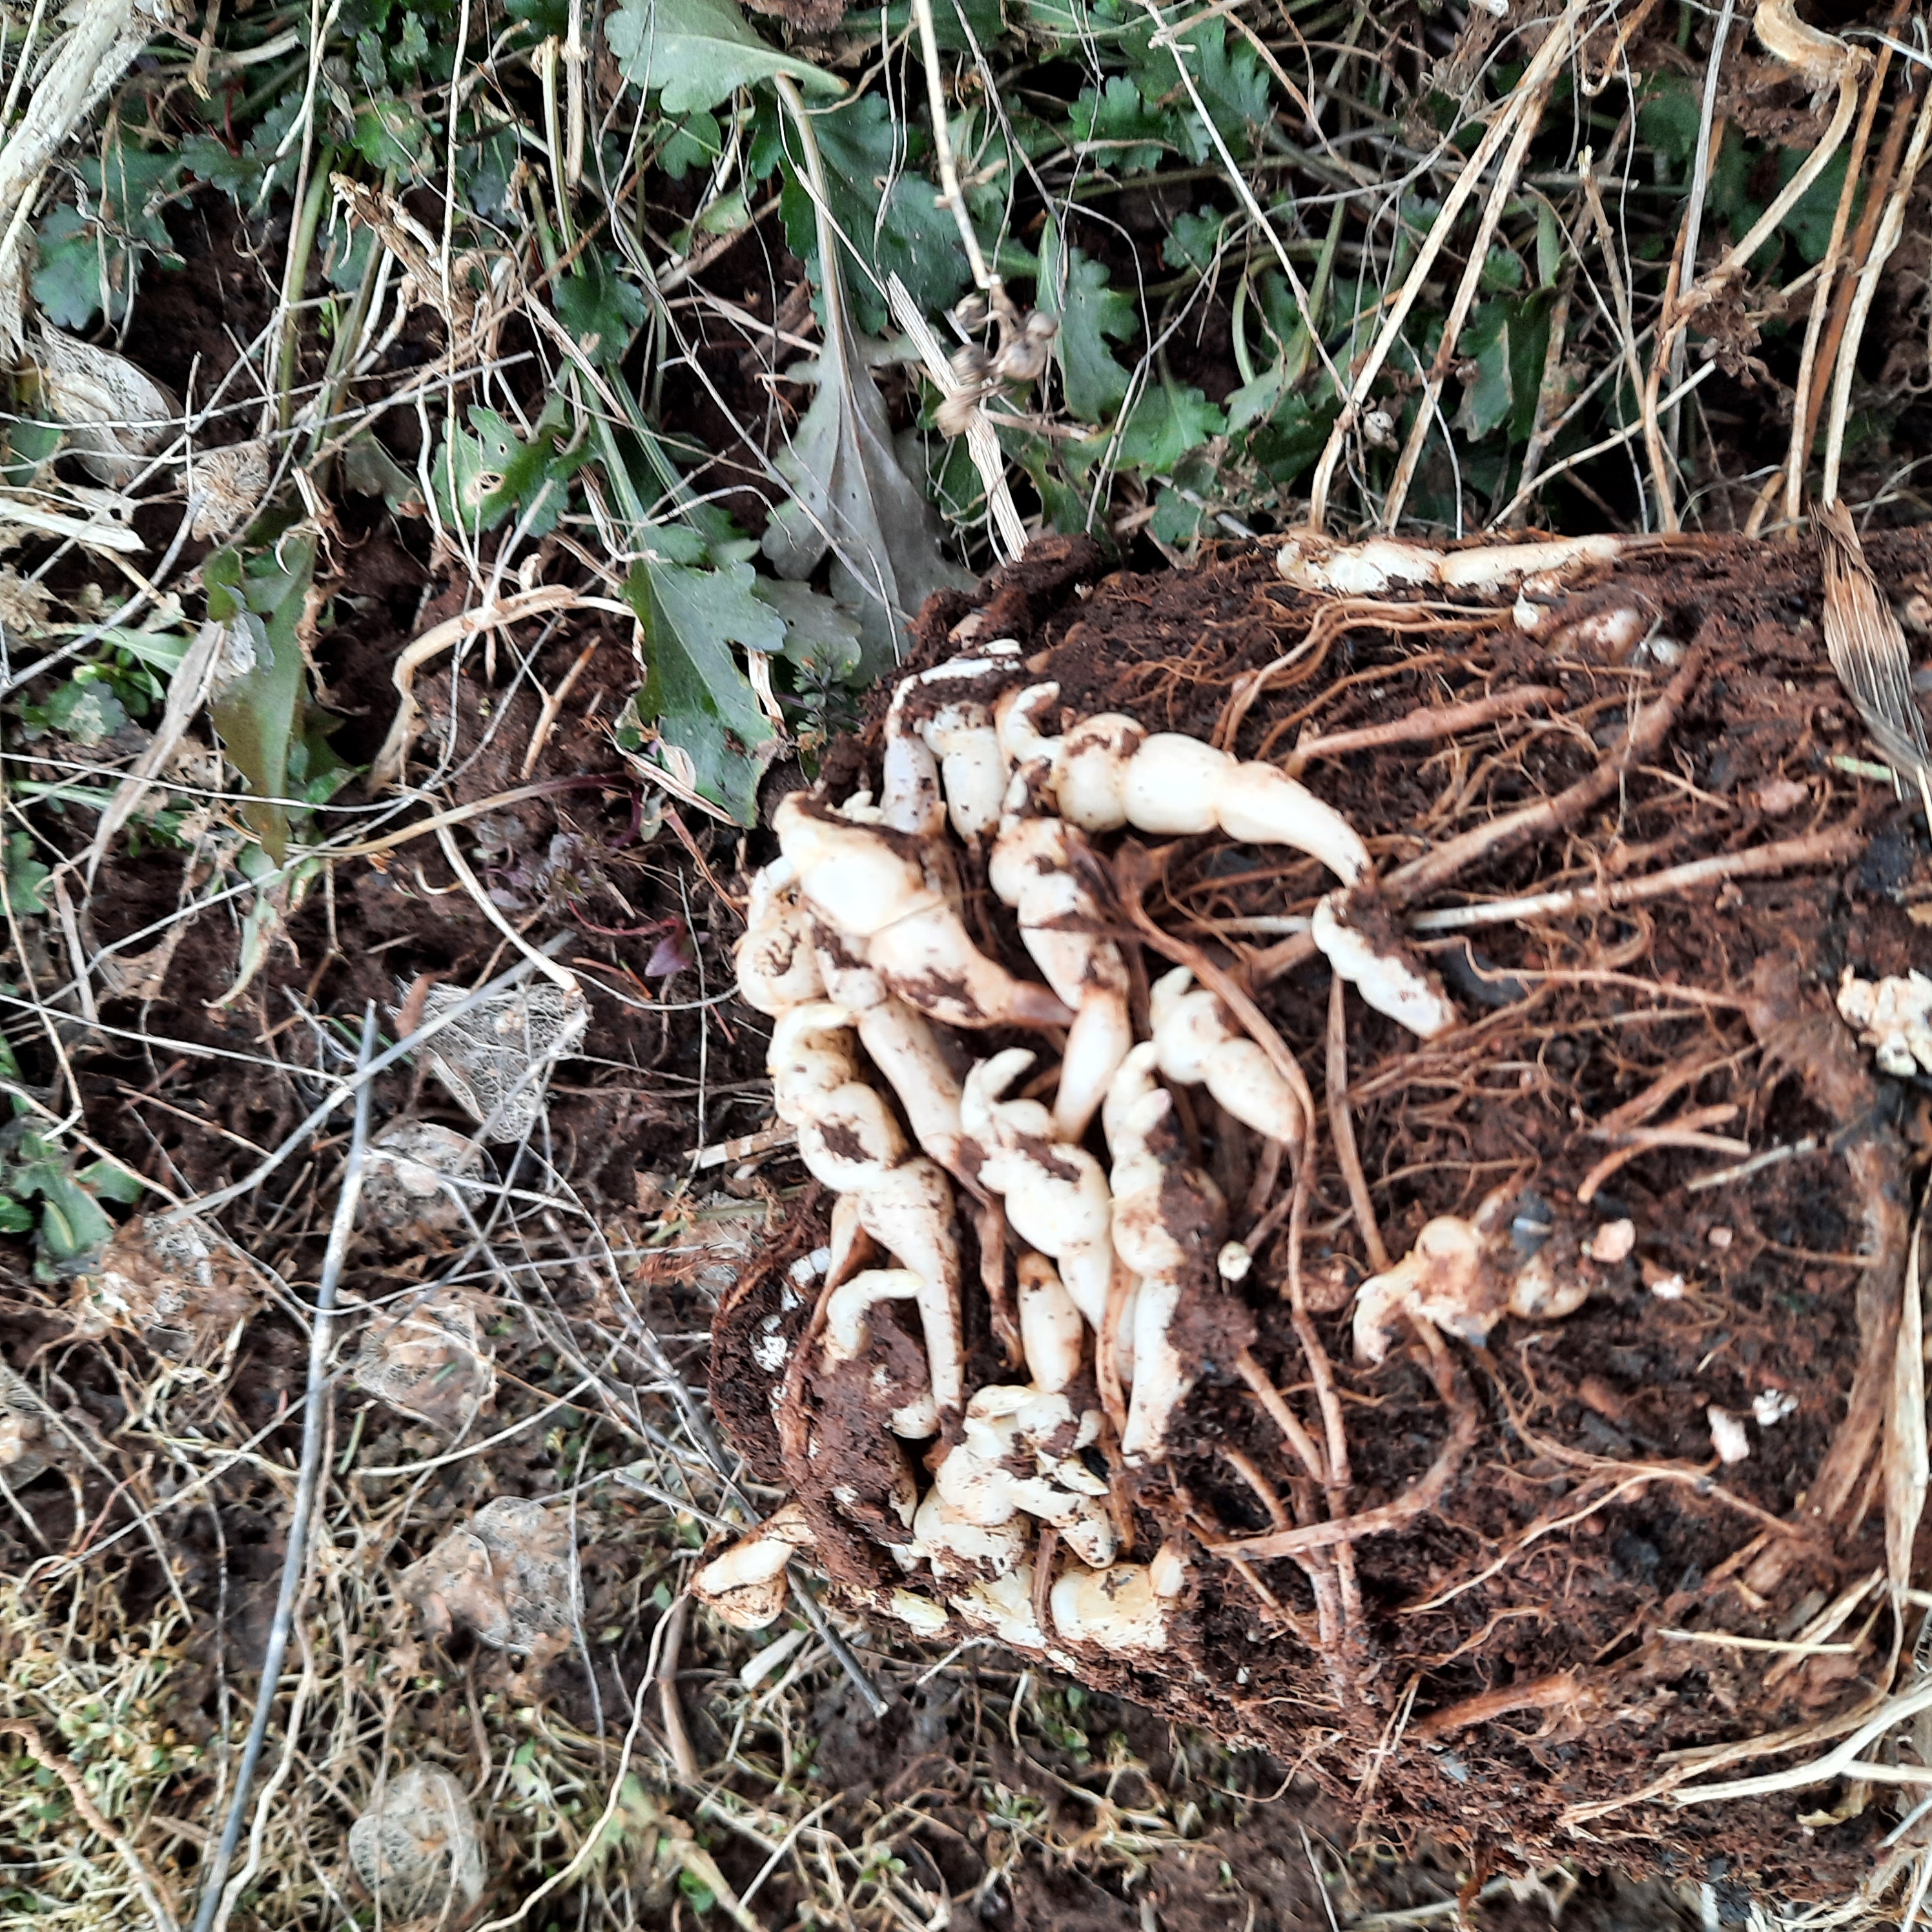
The onions look awesome I think 100% germination….. wow. Tomatoes did well too I think only 1 or 2 out of 72 cells didn’t start….

The herbs are starting to pop up that’s the first tray…… but you can’t see it all well in this picture:( but we have basil, lemon grass, thyme and dill coming up.
Have a great weekend y’all and God Bless.
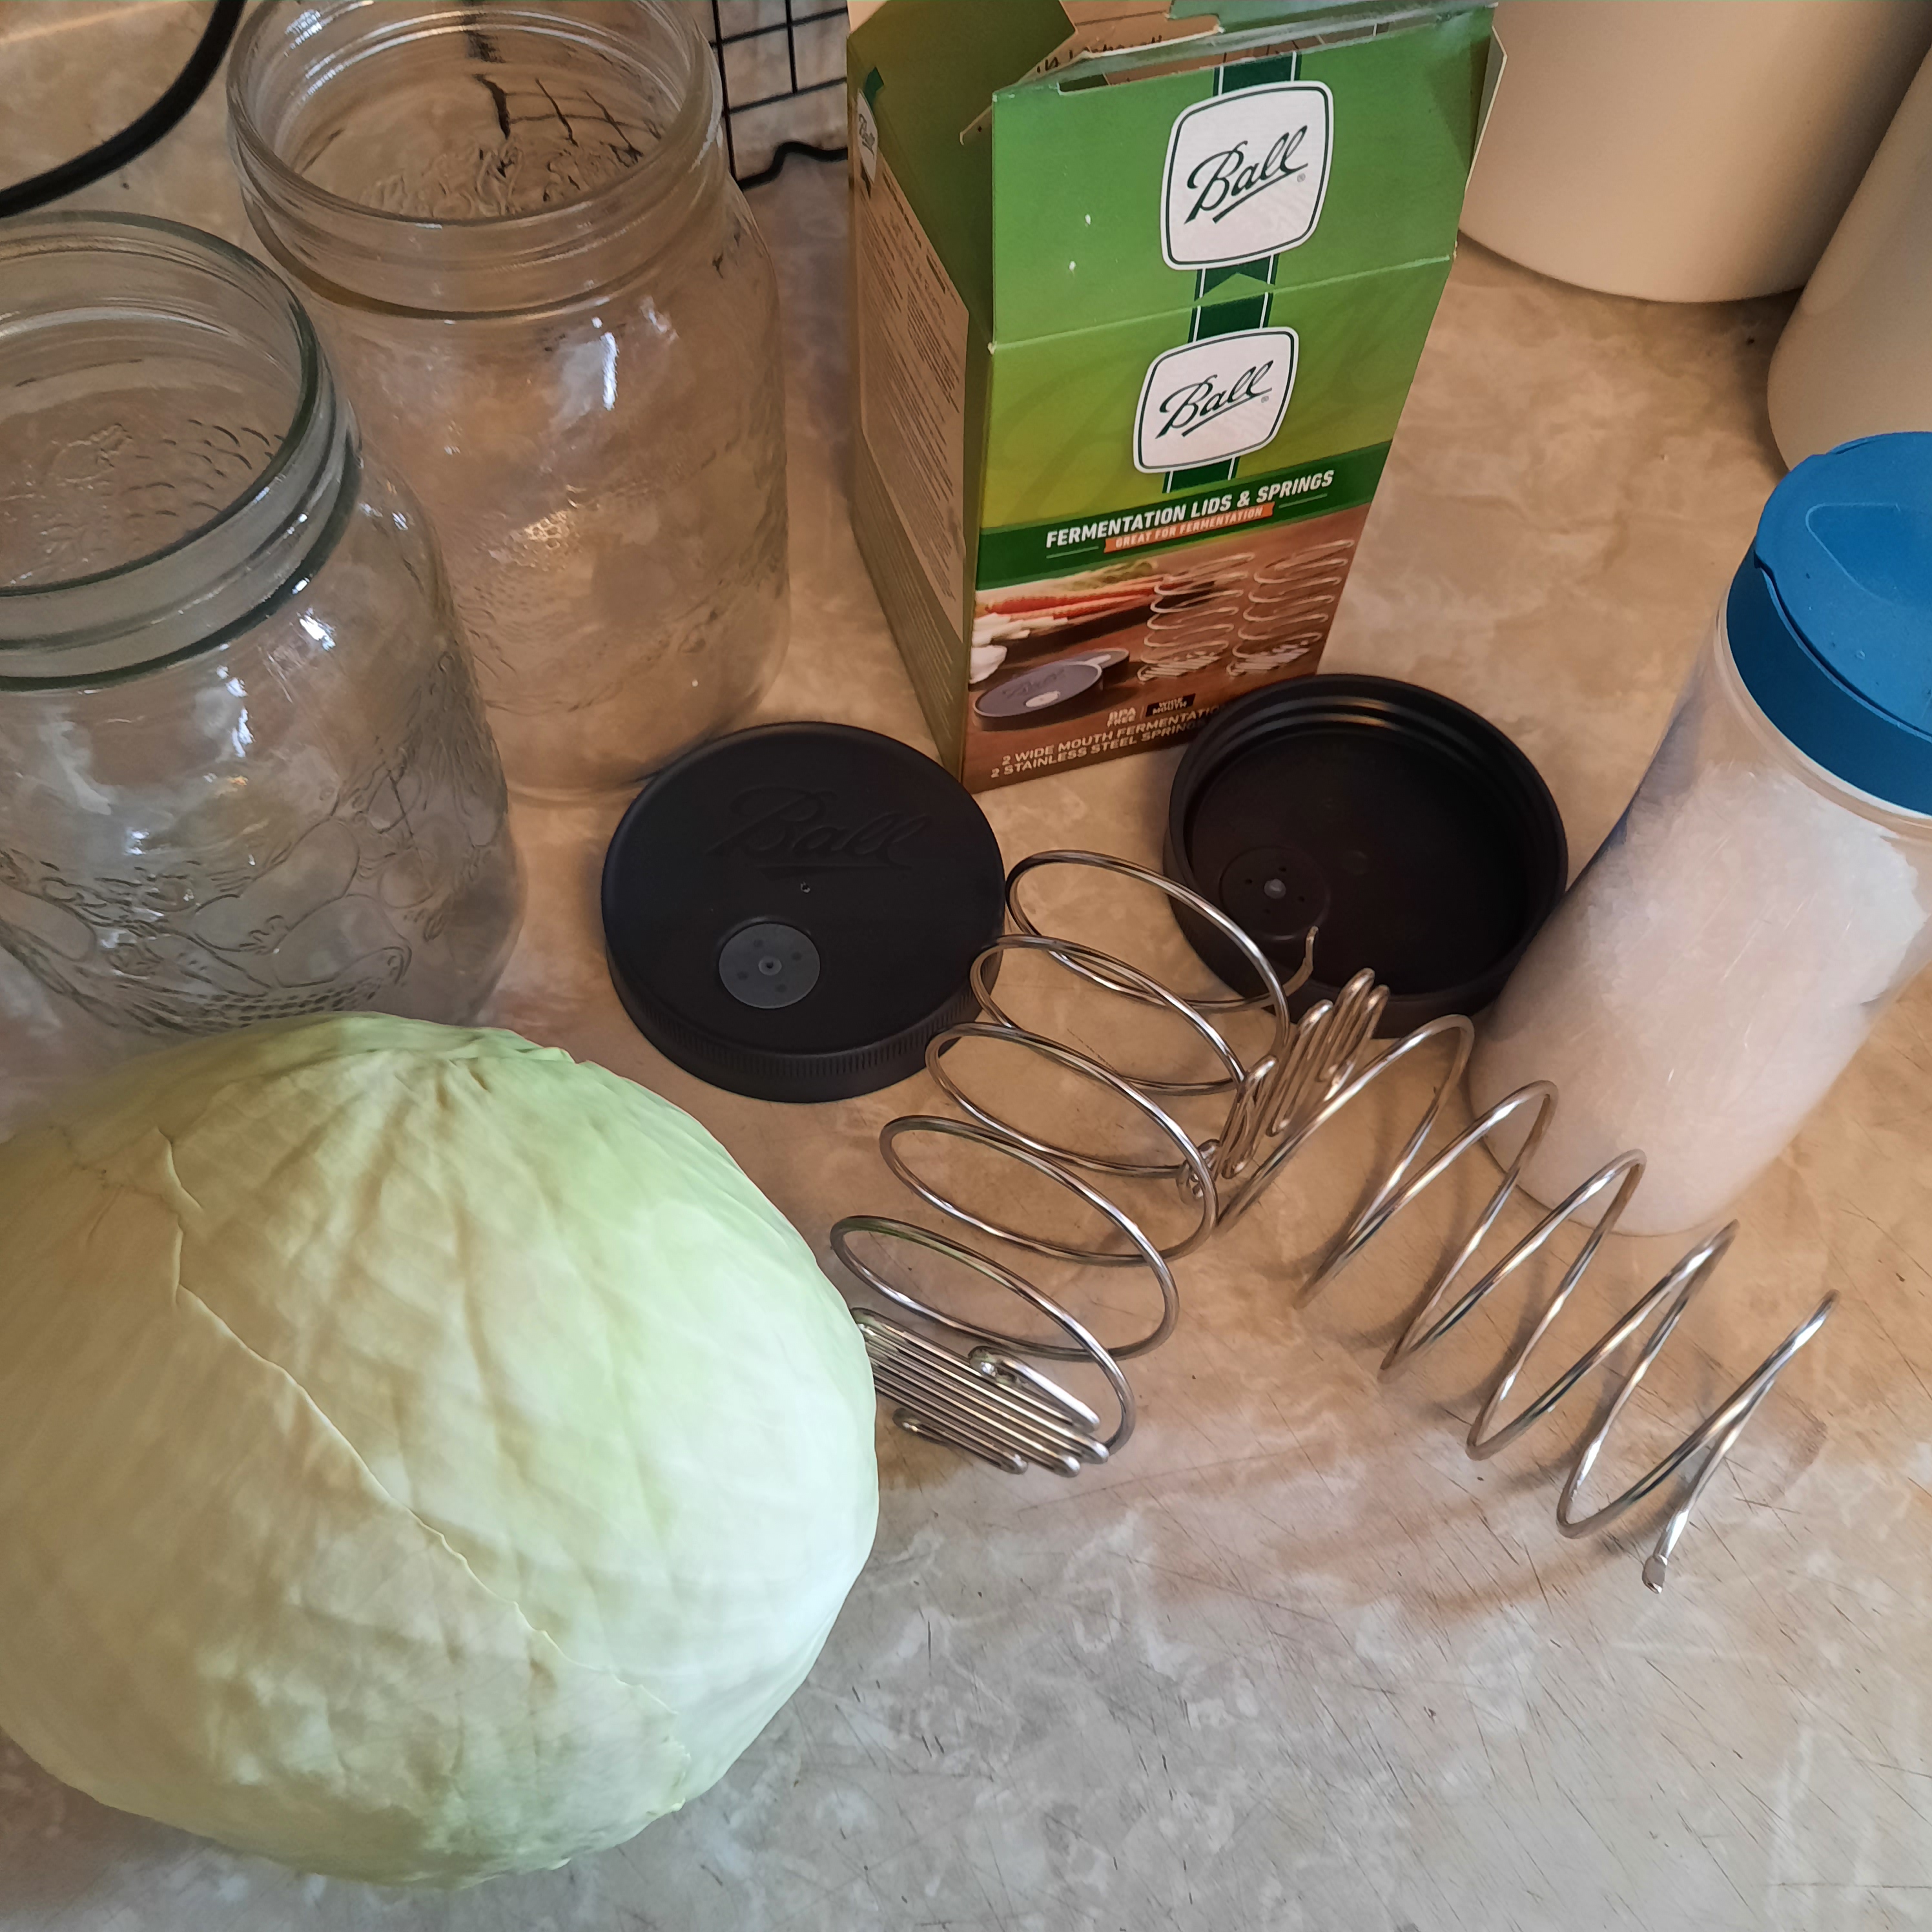
We love saurkraut and there is nothing better than making and eating your own fermented kraft.
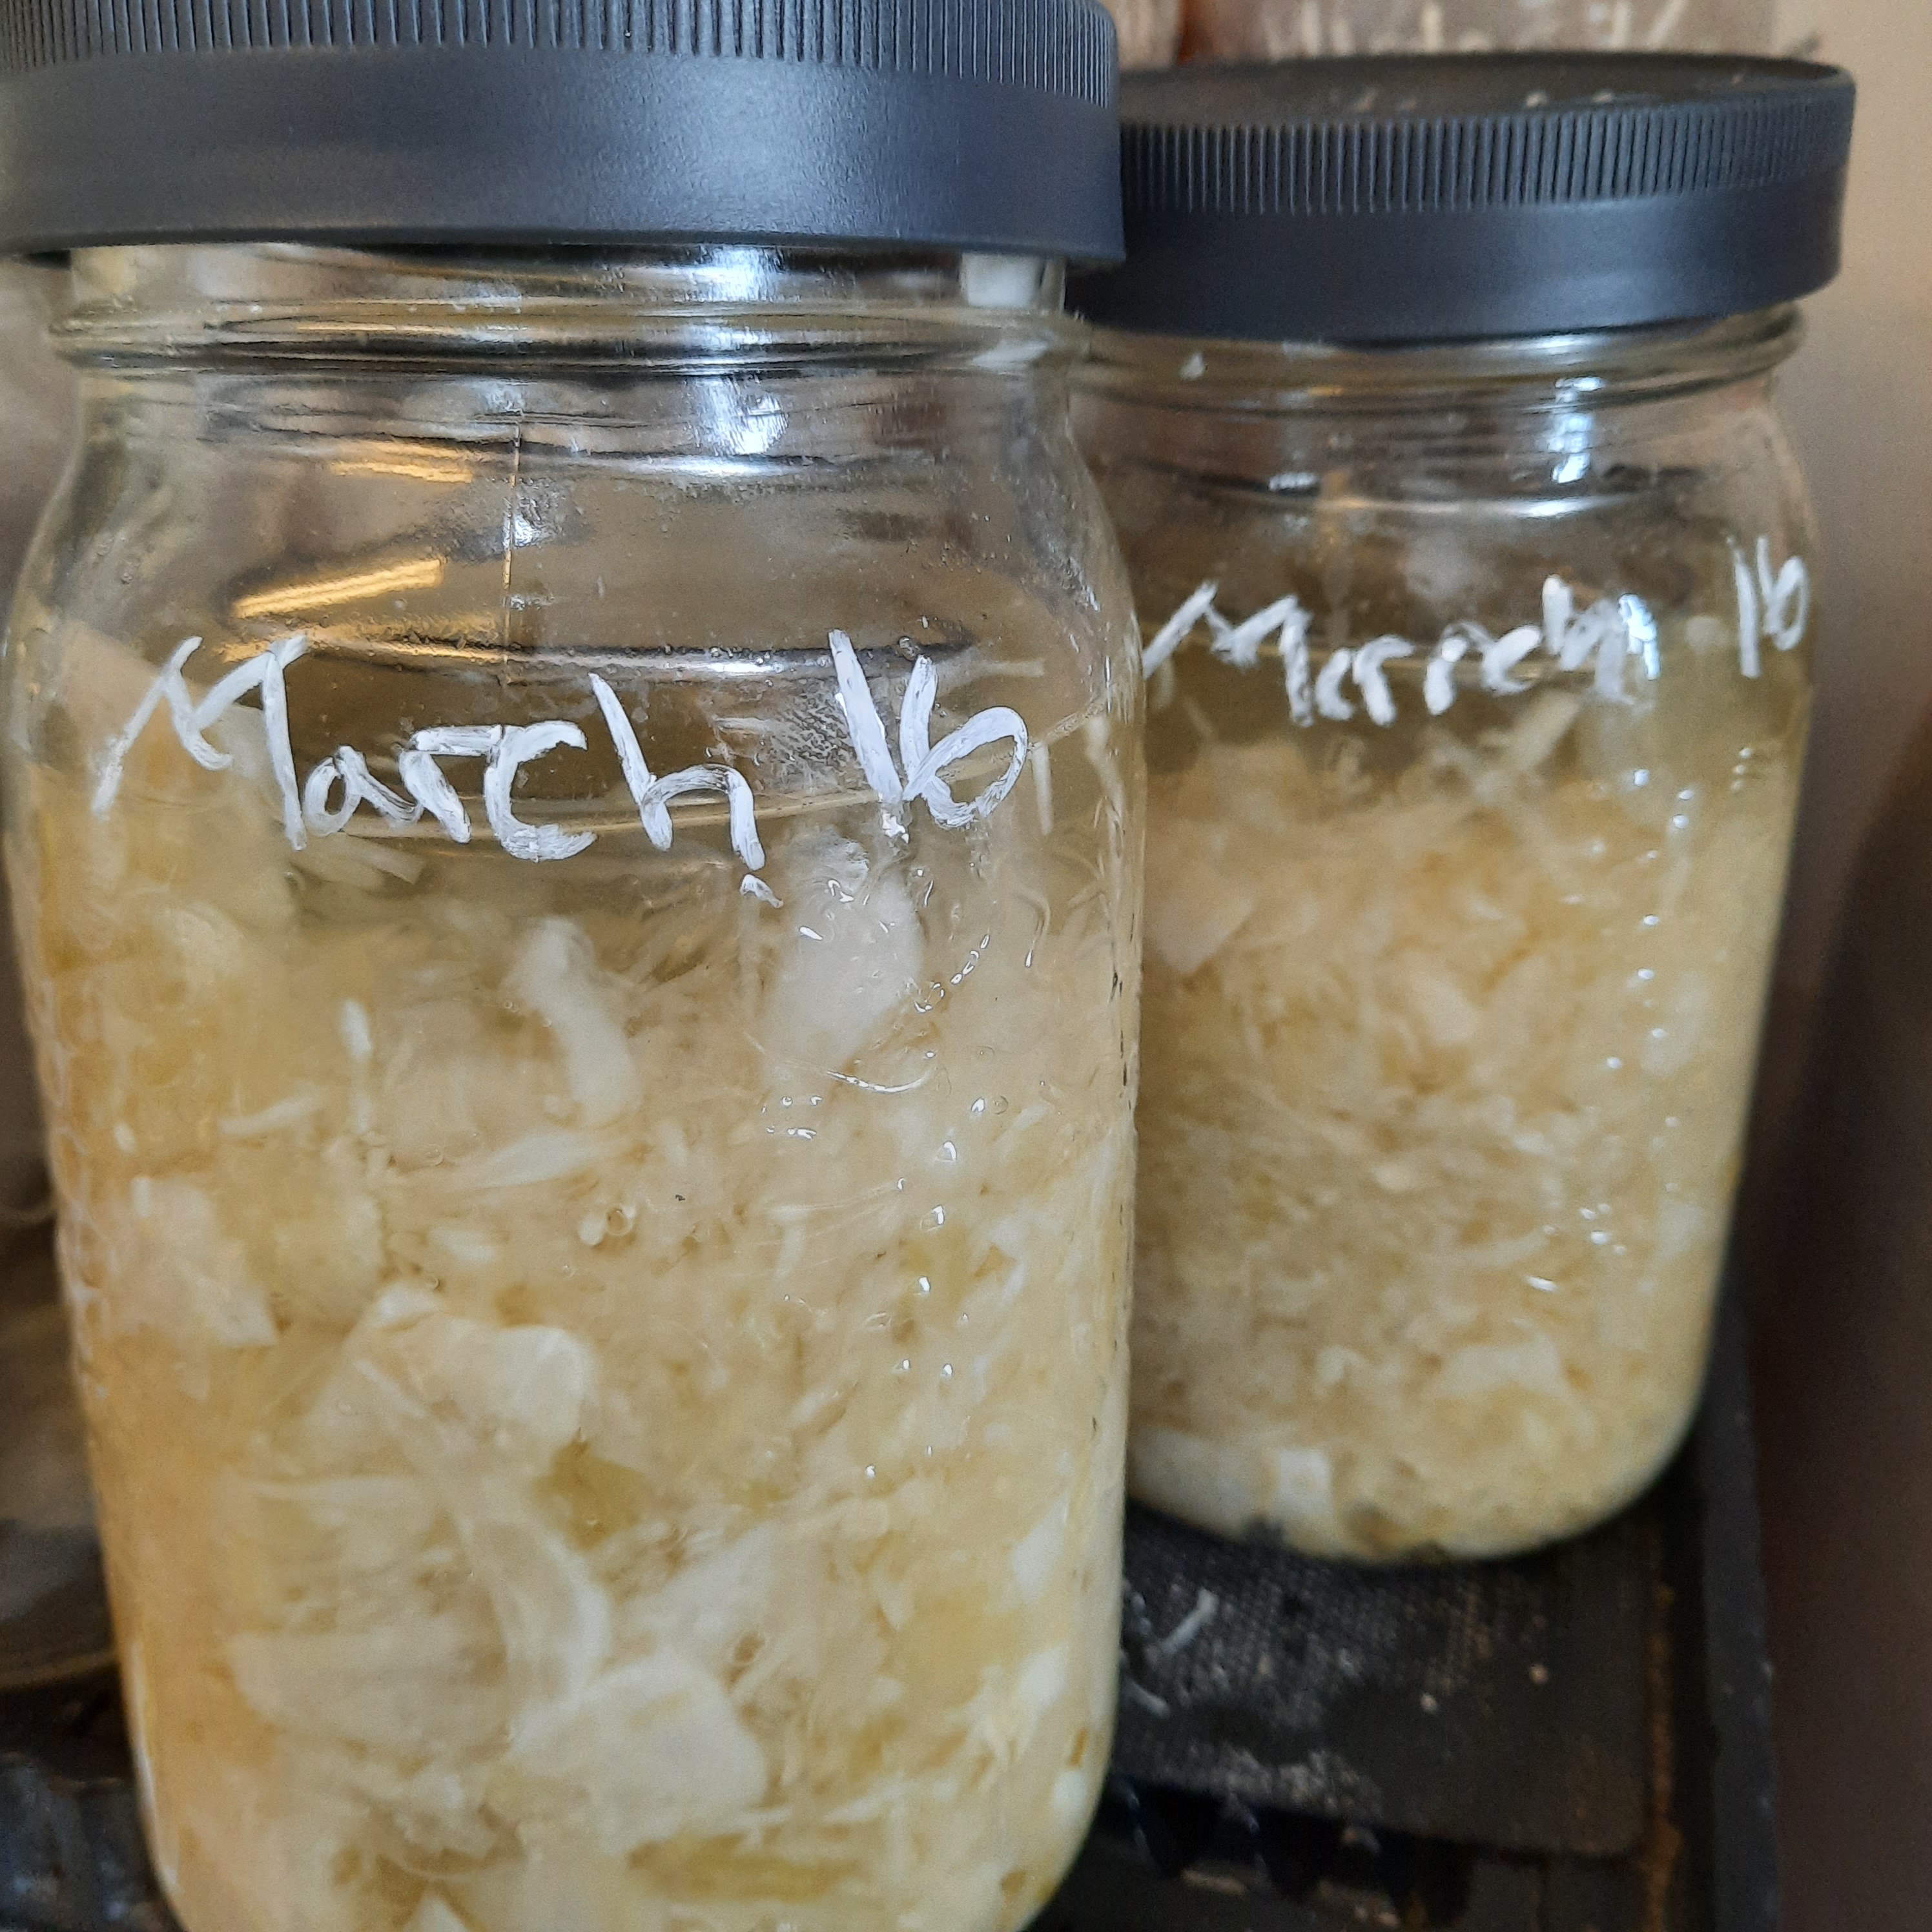
This batch that I have made is just a plain kraut this time around. You can make all kinds of variations: spicy, purple, tangy sweet, fall themed … etc.
It’s so easy to make, the health benefits are awesome and the taste well it makes your mouth water.
This cabbage I had around was a little aged, being a little more drier then I would prefer so I needed to add some extra salt water to cover it.

It’s been 7 days since I made it and I opened it this afternoon….. WOW….. you can smell the “saur” part…. I wish I could send that smell across…. should not be long before it goes into the fridge and enjoyed
My recipe called for 2 pounds of shredded cabbage, 4 teaspoons of pickling salt and my hands in a large bowl to “bruise” the cabbage and get the process started. Usually you wait 24 hours to make sure that you ha e enough cabbage juice to cover the kraut….
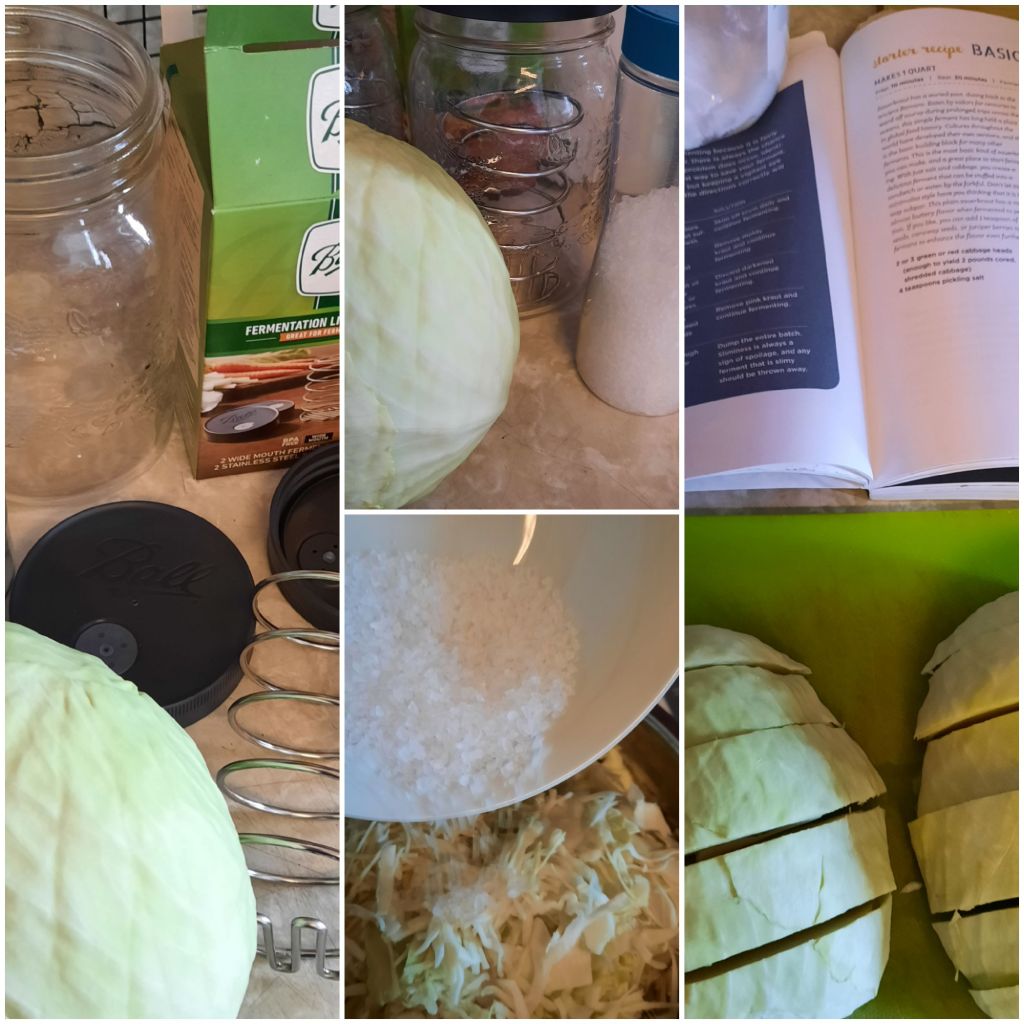
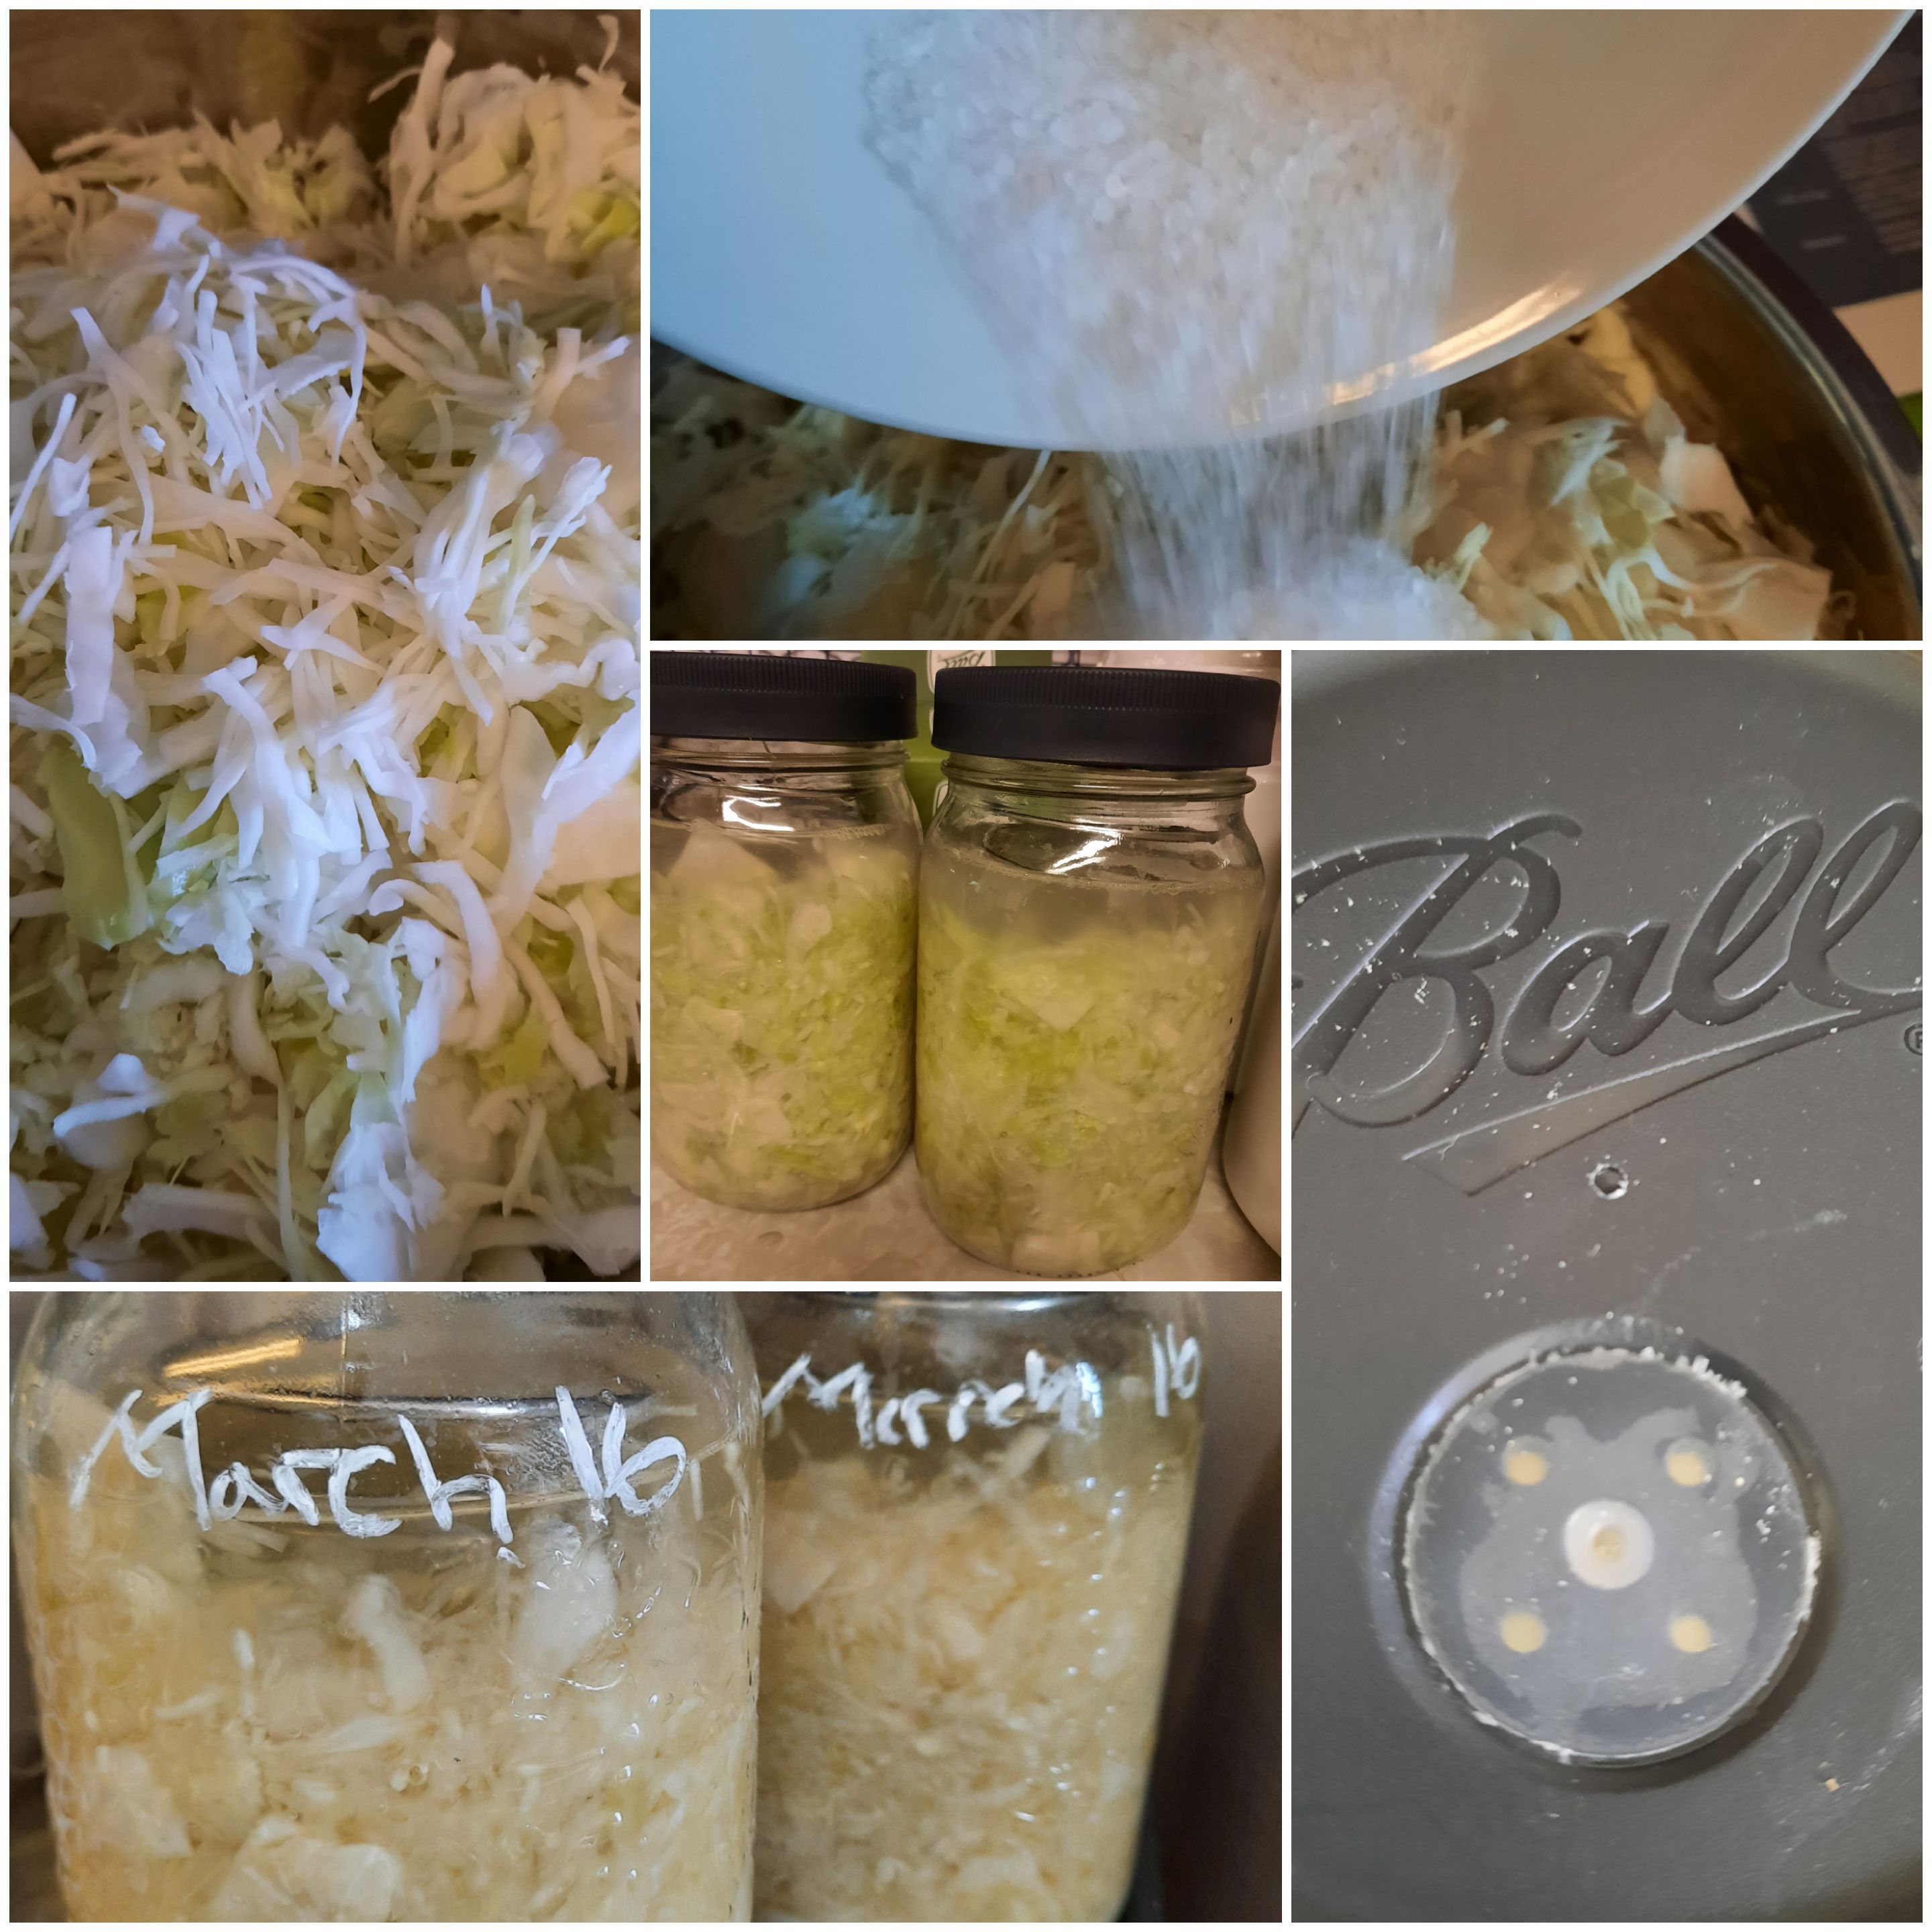
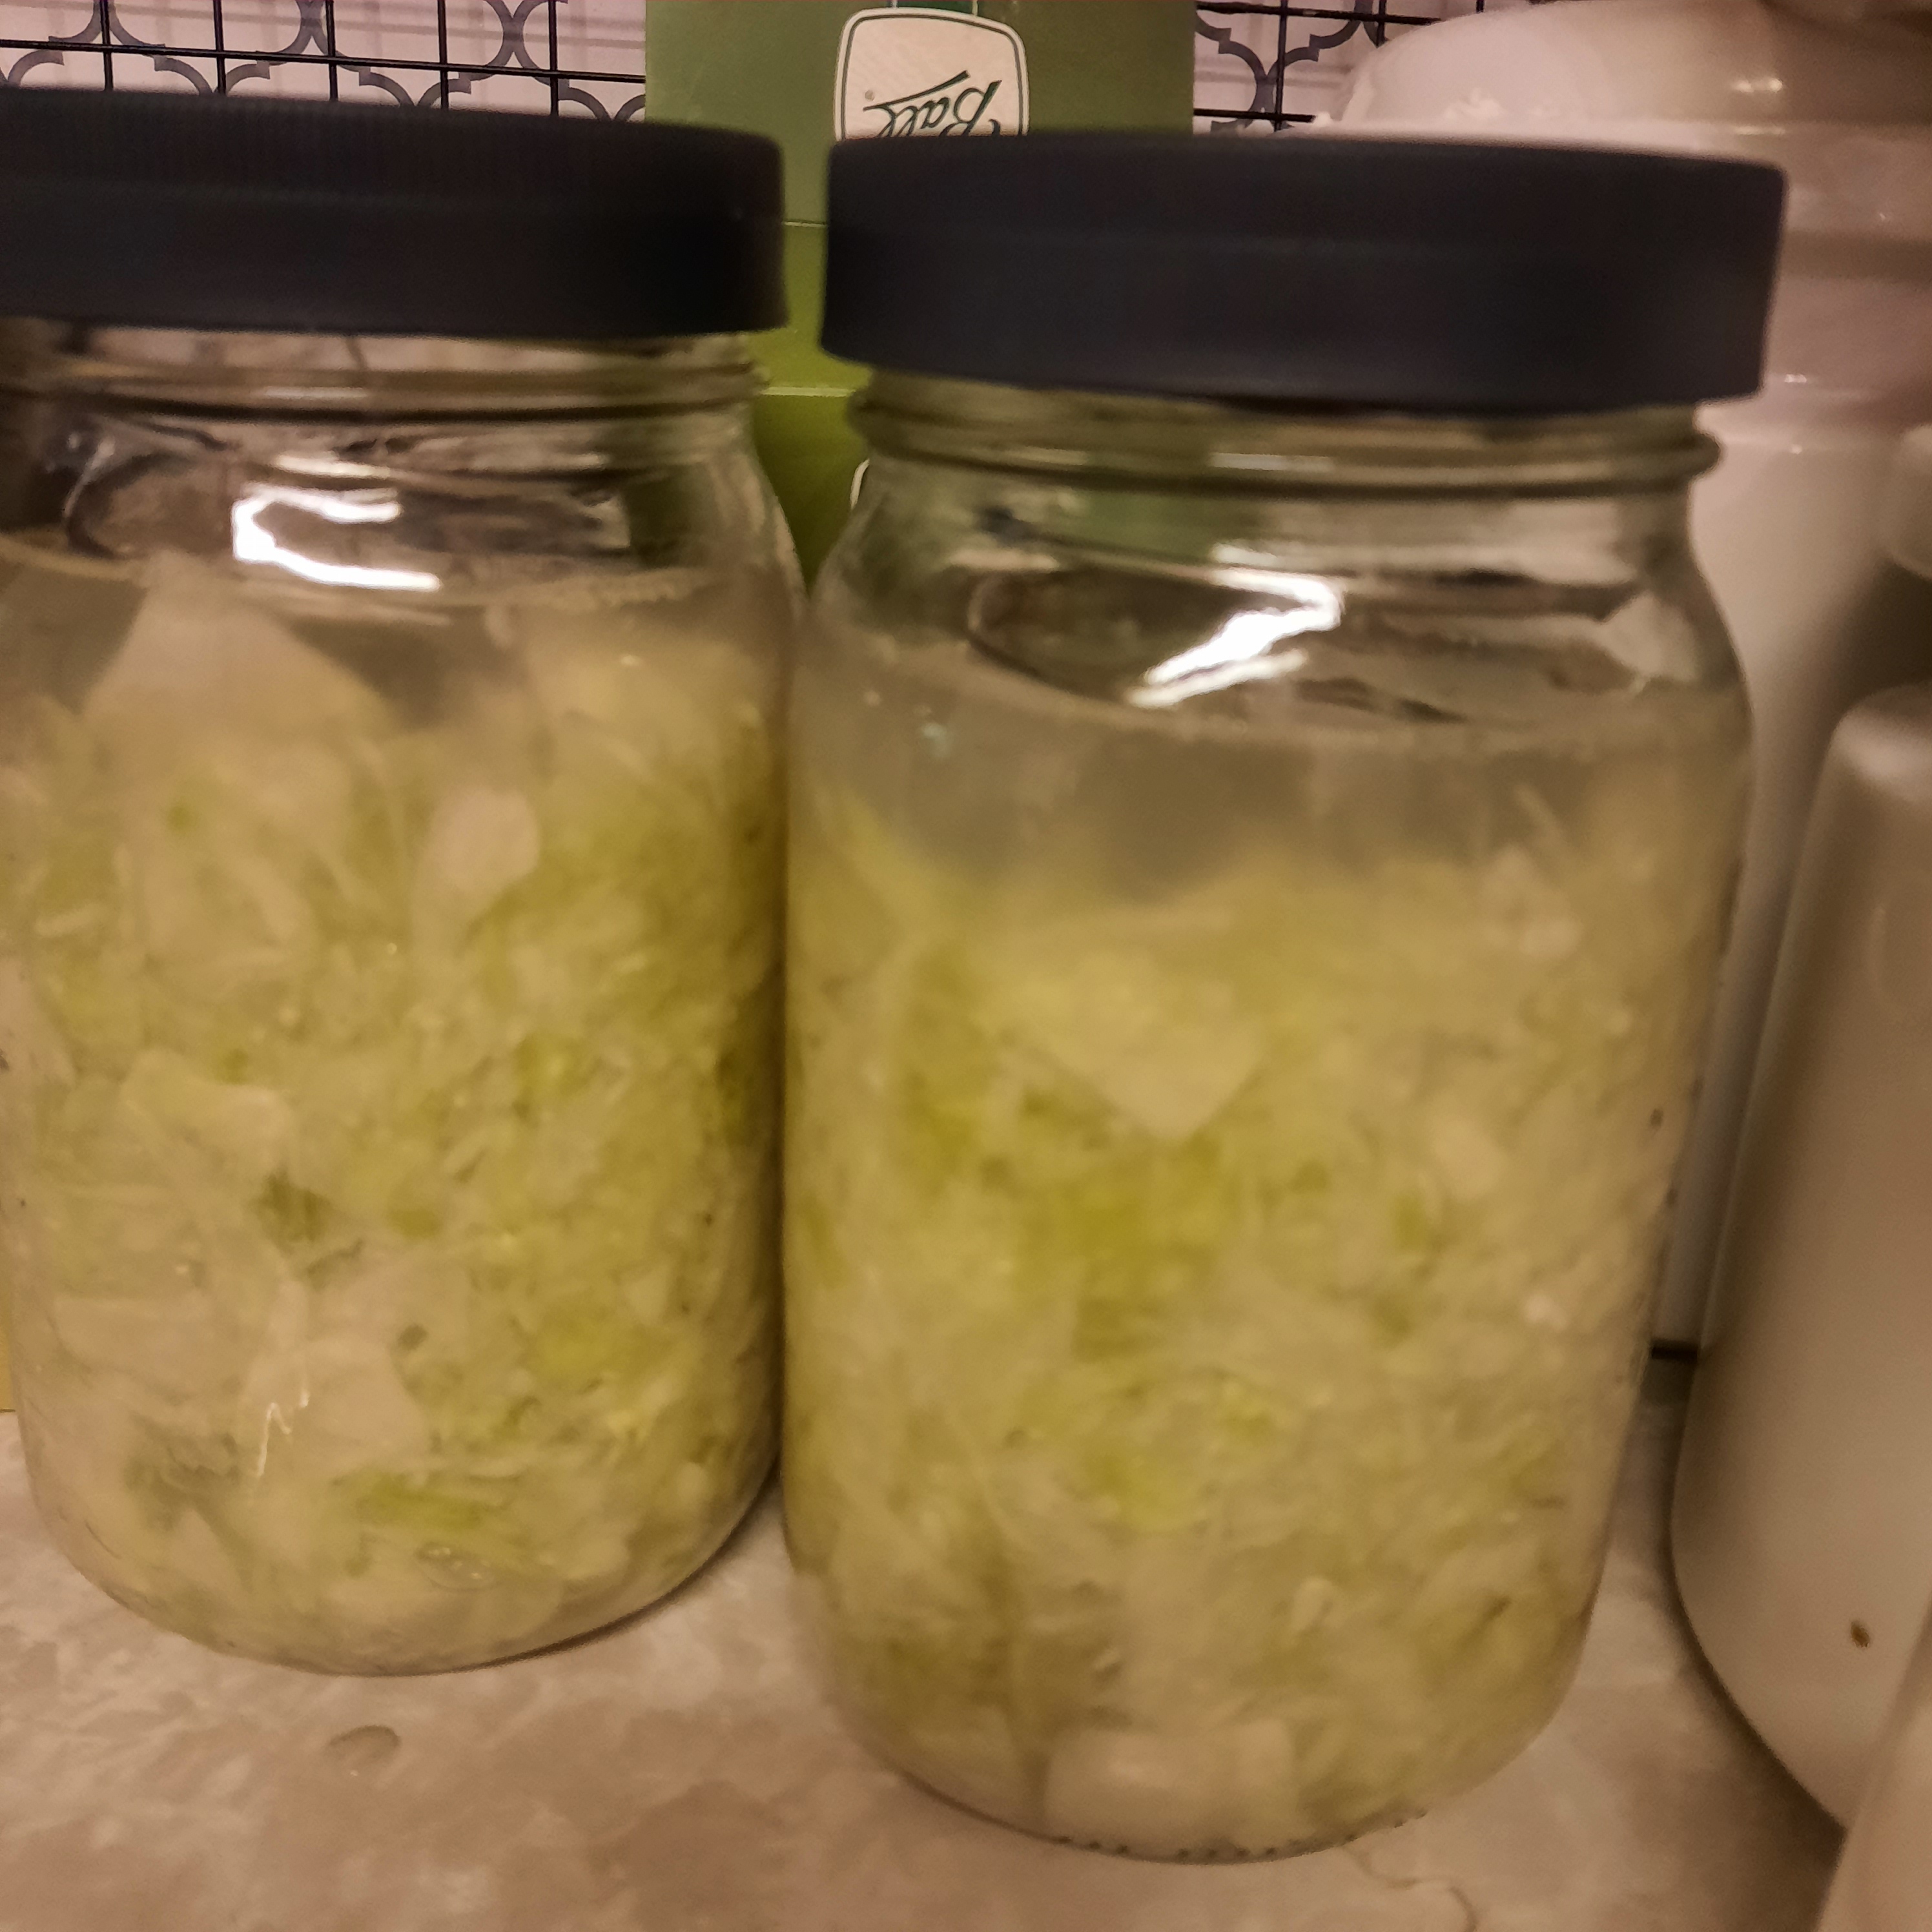
I am using my new ferment aid…. its a lid a spring contraption that pushes the prepared veggies down beneath the liquid. This help to properly ferment the cabbage…. you can also use a glass disc made for fermenting or a small glass to hold it down…. on the line is a built in air/gas escape route… so far I am very happy with the fermenting lid and springing thingy…..
So step out and stretch your kitchen preserving skills….. make some saurkraut soon♡ you won’t be disappointed…. oh yes be prepared to get the fermenting fever or bug♡
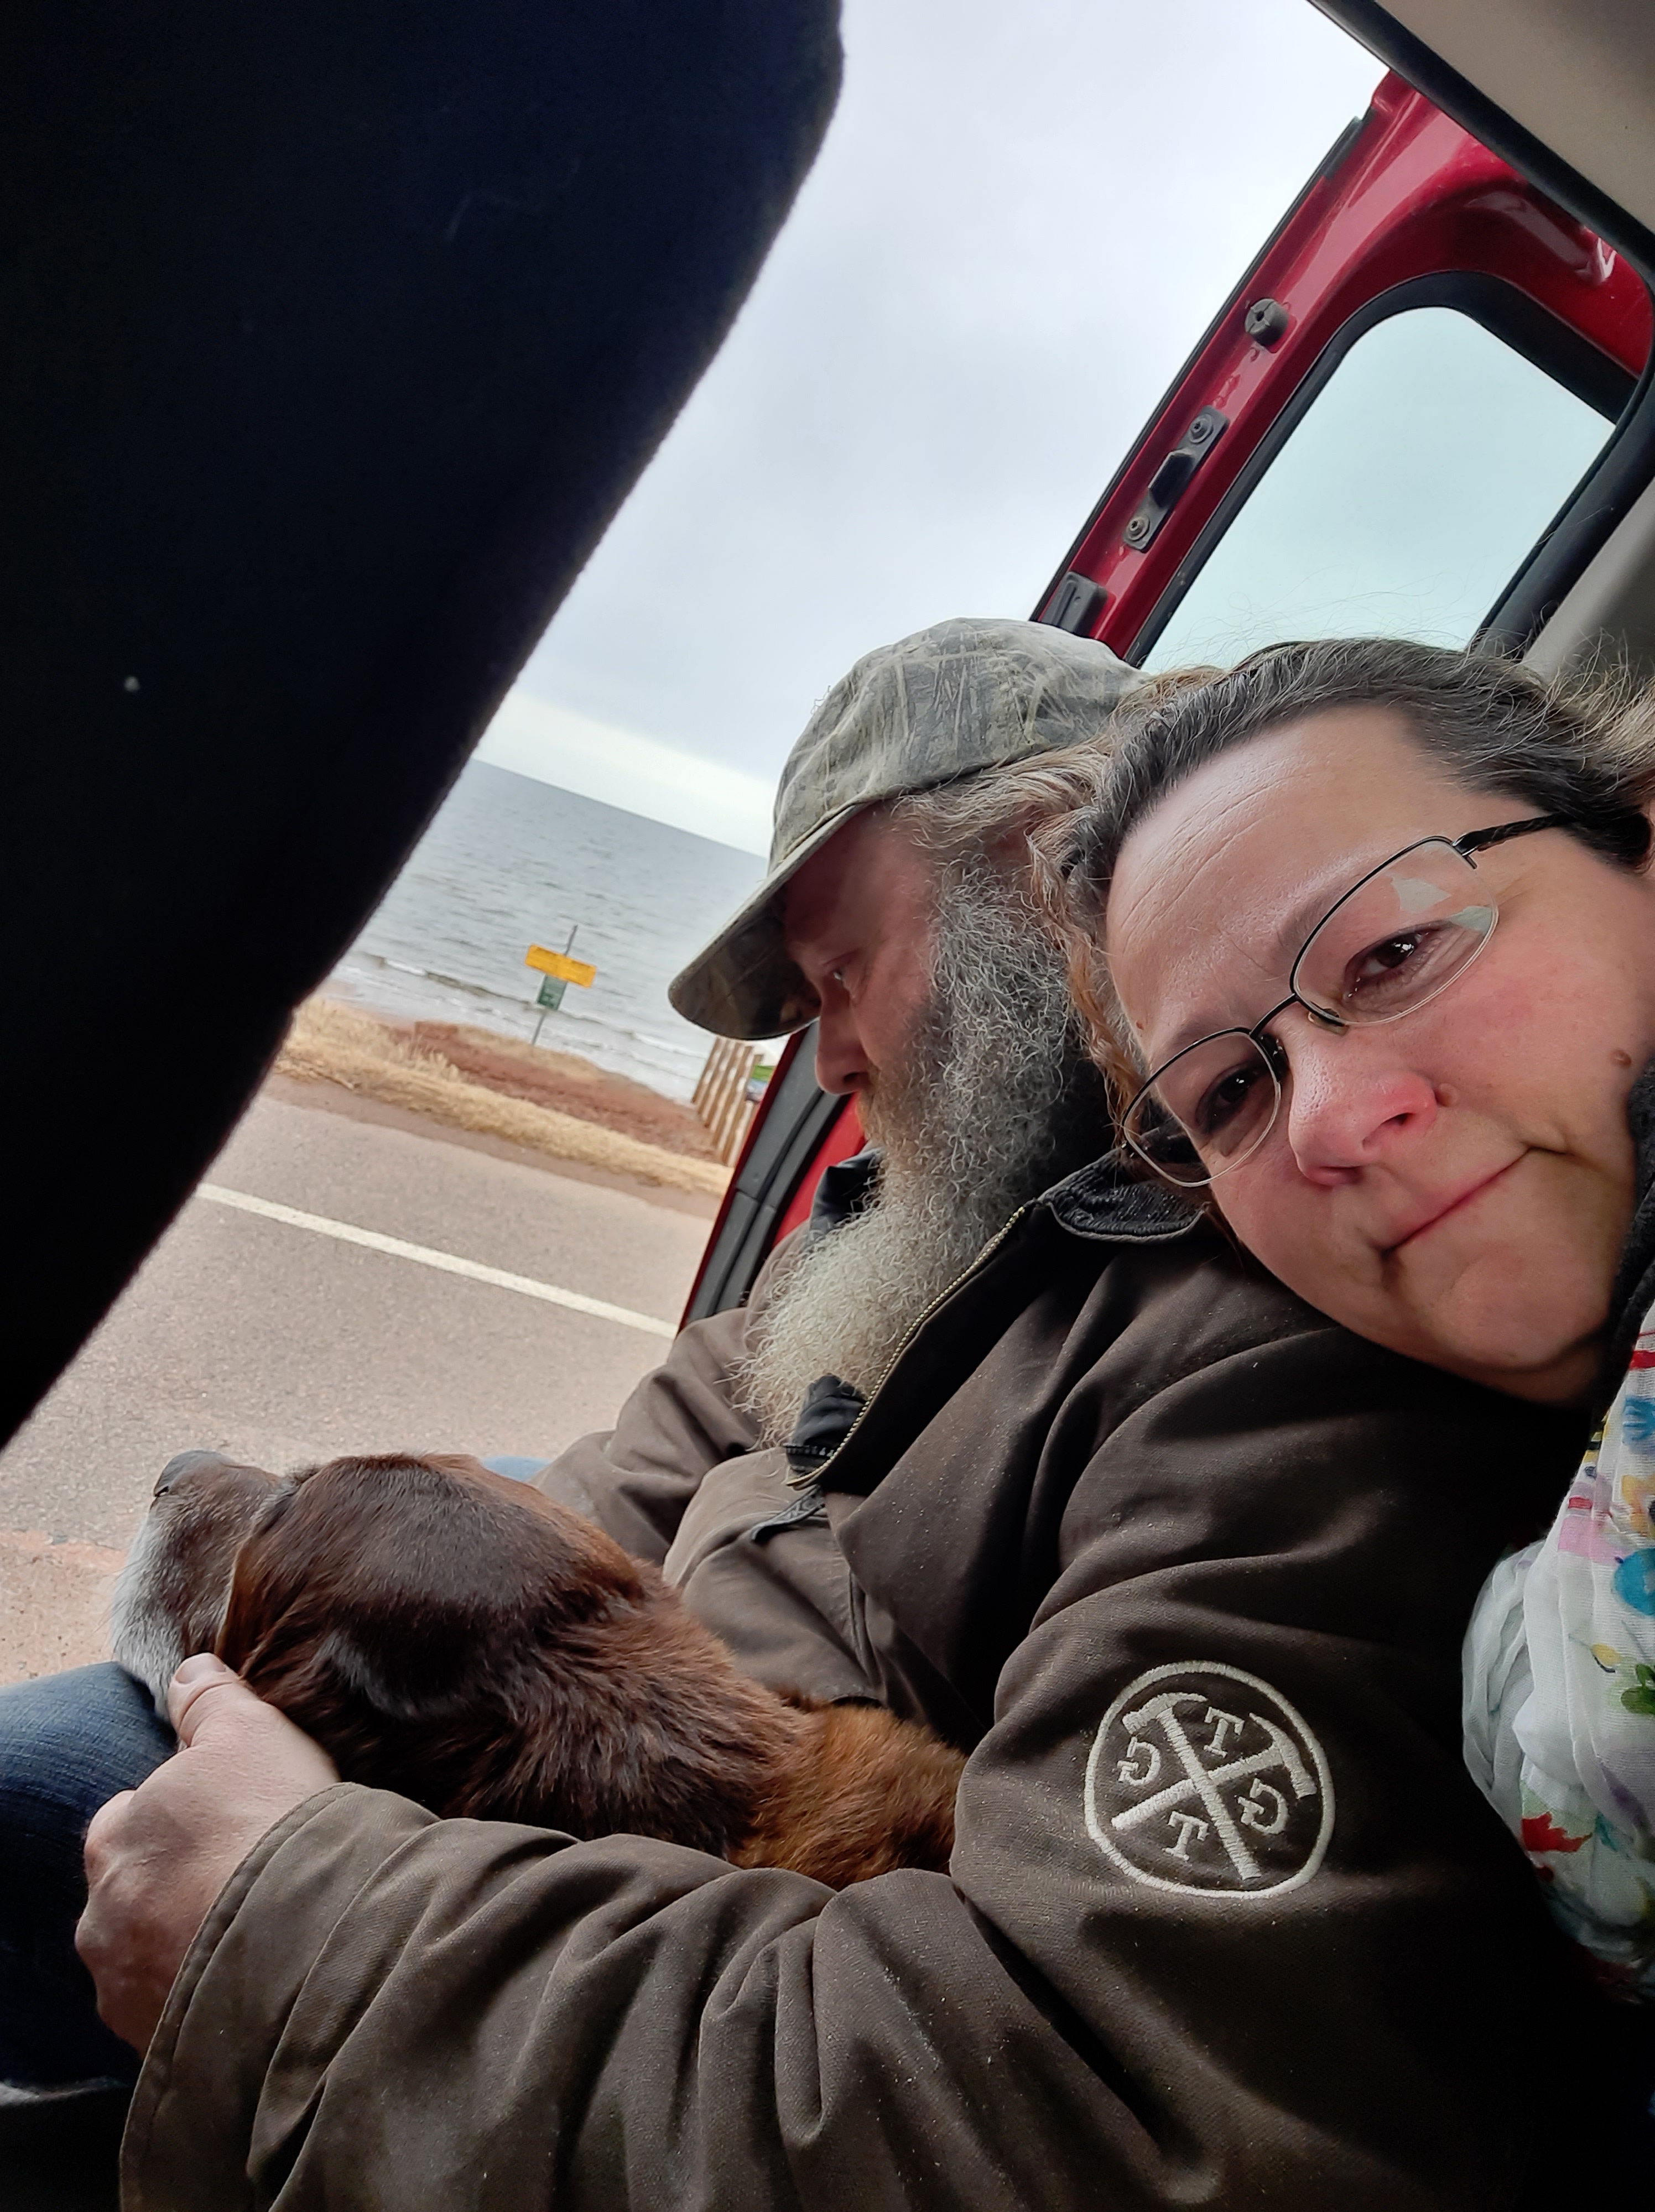
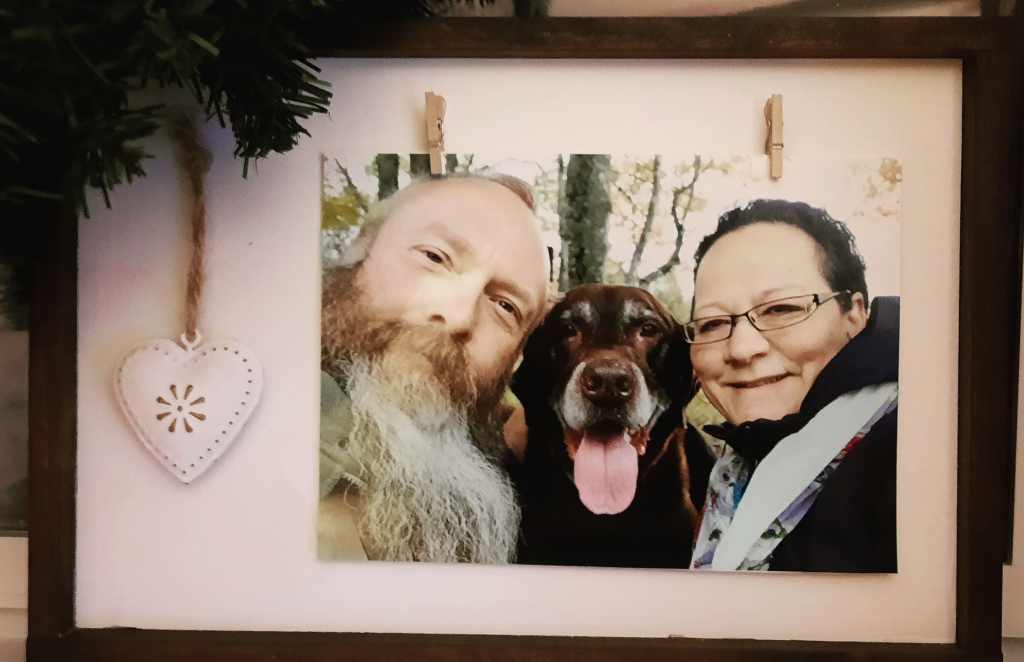
We had to say goodbye to our beloved Murdoch today…. he went downhill even more from yesterday.


So we decided to have a nice morning together with him, hugging him and whispering all our love to him as we lay on the floor.
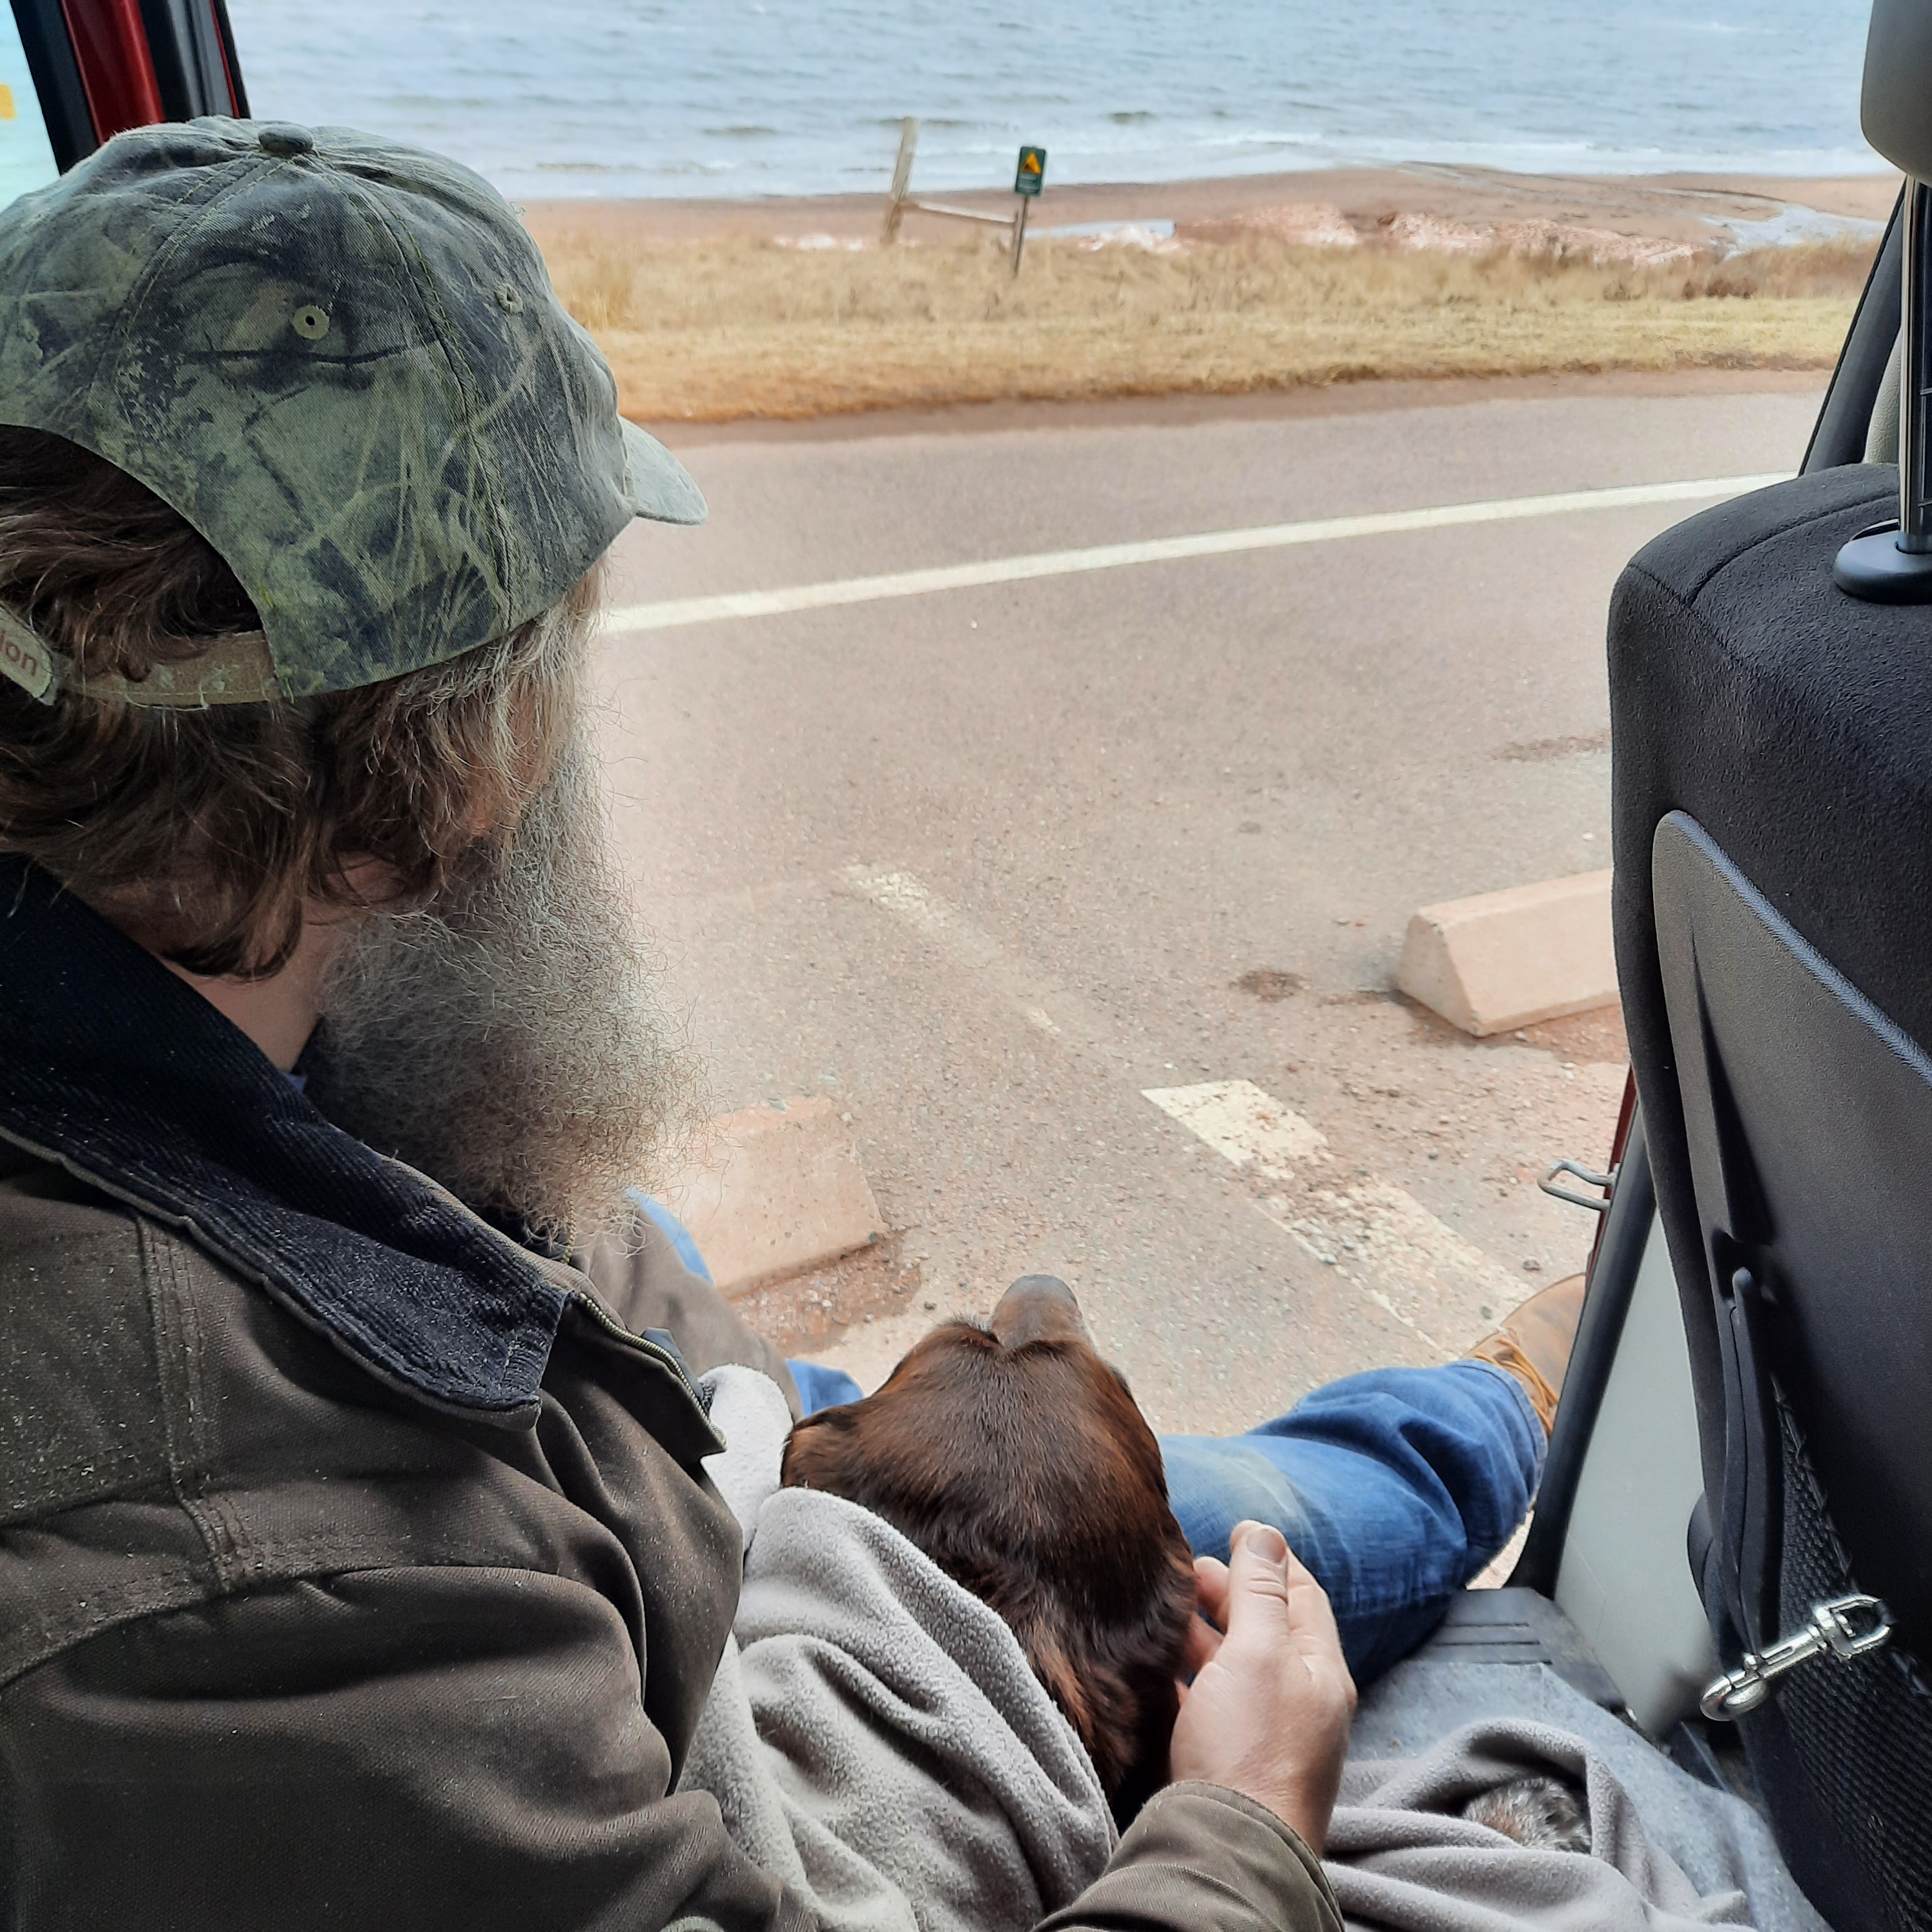
Then when we gathered all our courage and we carried Murdoch out to the van….. we decided that a drive through Cavedish to one of his favorite places would be it. I laid out the blankets and we carried him out and lifted him in.
When we got to the ocean we opened the door and sat down with him. He laid his head on Rusty’s lap and sniffed the salt air and looked out to the ocean. We covered him up and we sat together taking it all in…..
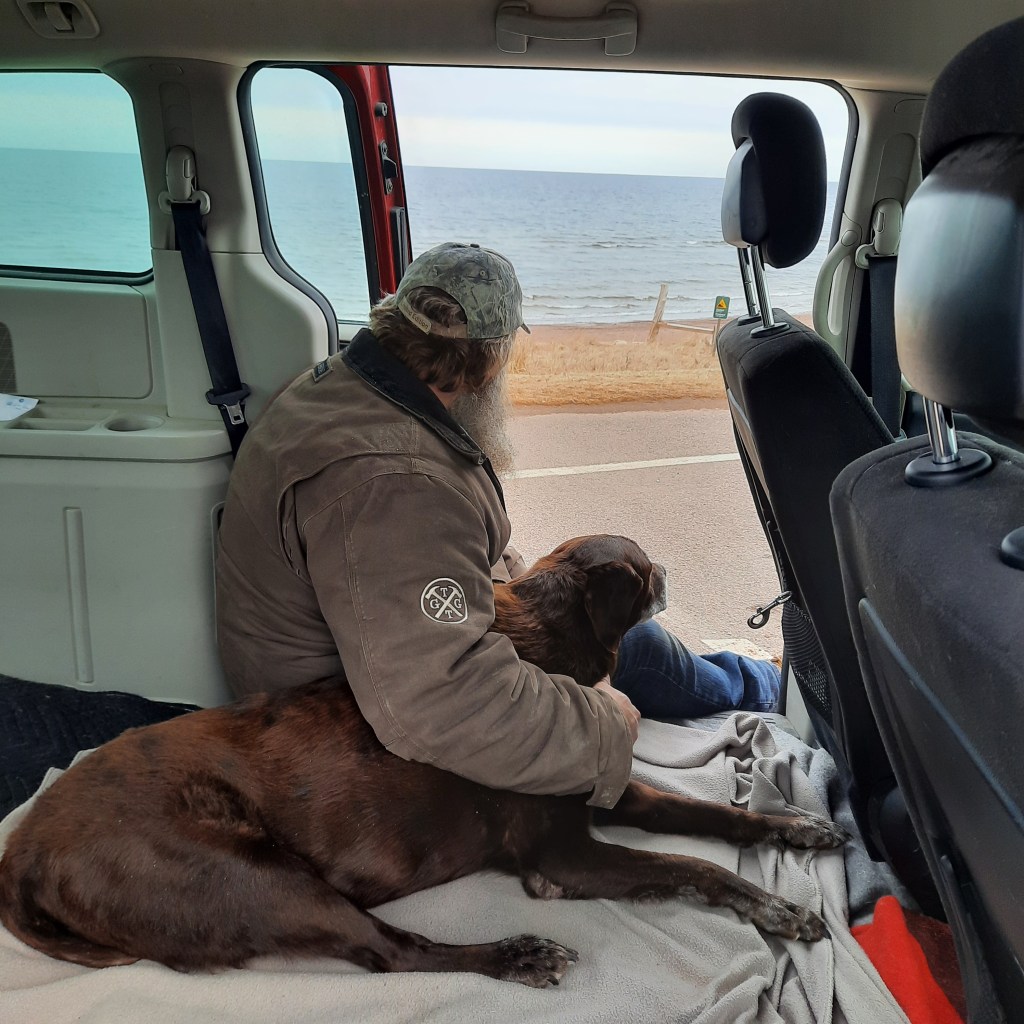


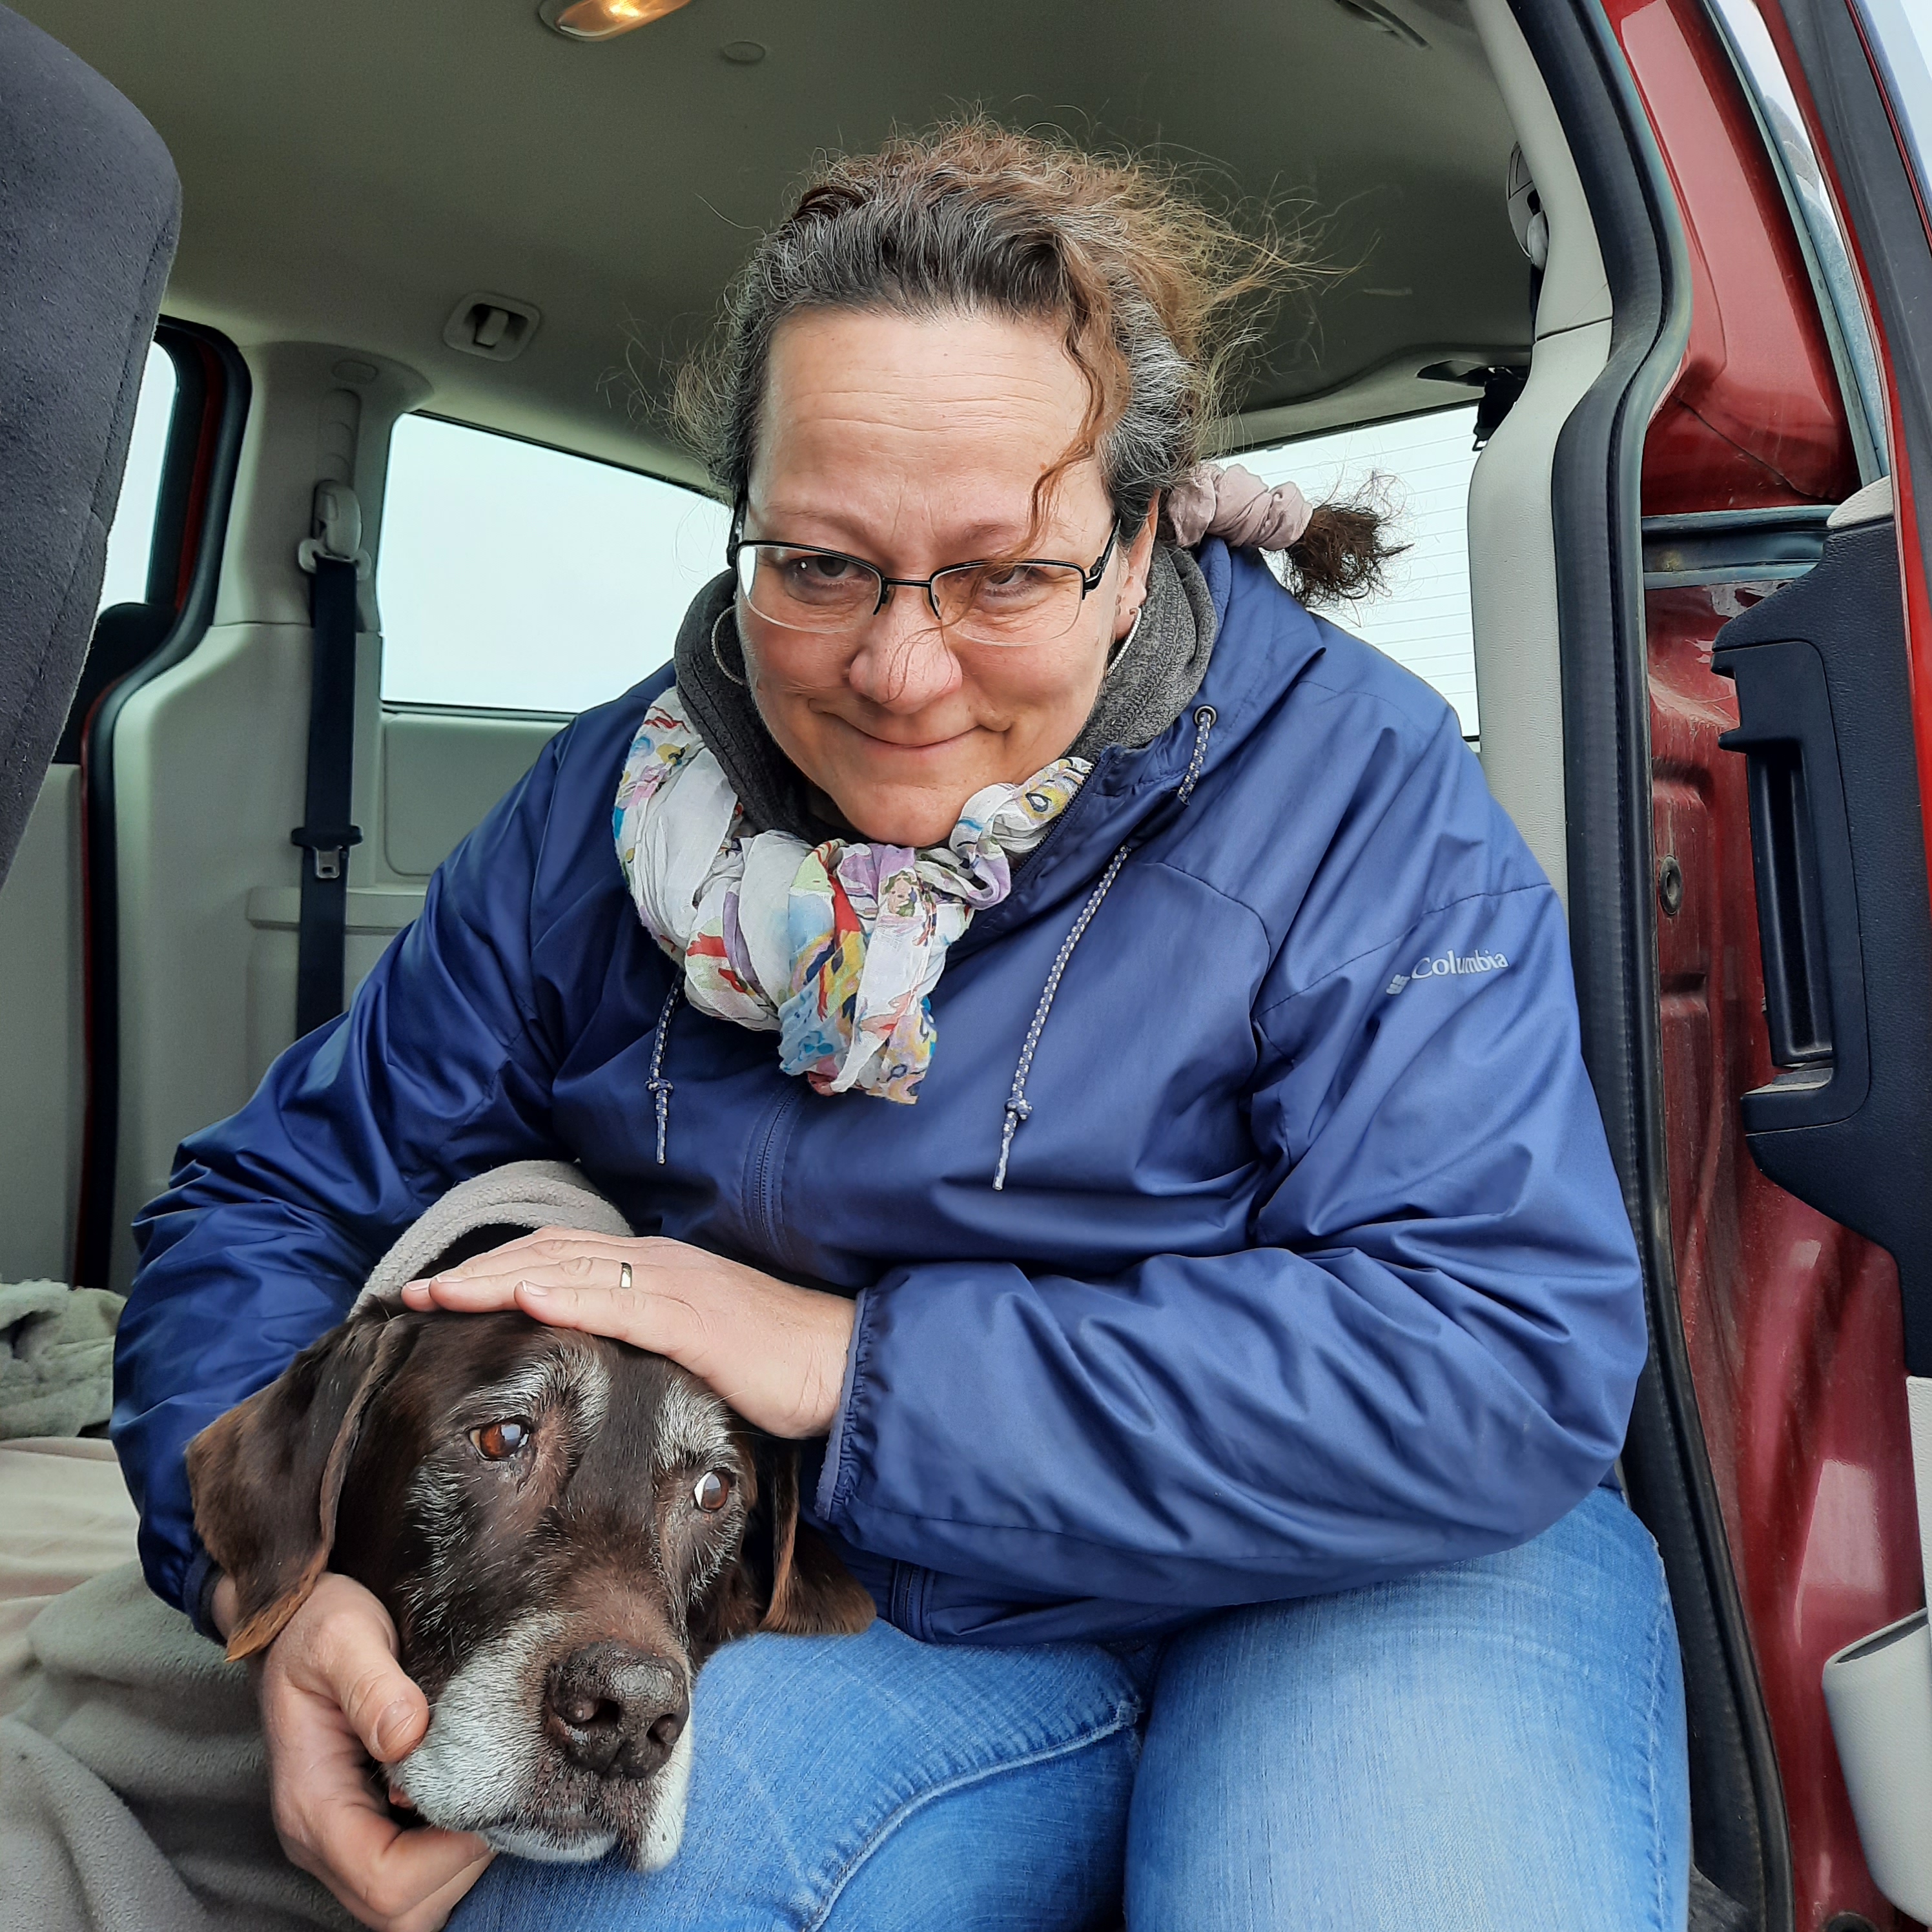
We went to the AVC and the sweet doctors and vet techs toke us back to the special room and we all laid on the floor on mats and discussed the best for our sweet Murdoch…. they are so amazing there. We had a chance to take whatever time we needed and Murdoch left this earthly dwelling and I would hope that he is somewhere up above running around in fields of tall grass chasing rabbits and squirrels and that maybe some day we will see that beautiful kind hearted amazing dog.
We are grieving hard today, He, Murdoch was with us for 13 amazing years and that is I guess the hardest part. He filled a huge hole in our hearts 13 years ago and now again our hearts have big empty space.
The waves of sadness flow but also do all the happy memories. It’s gonna take a while but bare with us as we go…
We have decide to have Murdoch cremated and then we will place him in a beautiful place on our land where he loved to sit and we will plant a beautiful tree or bush to provide him with shade in the summer as he watches over us in the garden♡♡♡
Thanks everyone for the hugs, love and prayers we appreciate it.
Love Rusty & Vanessa


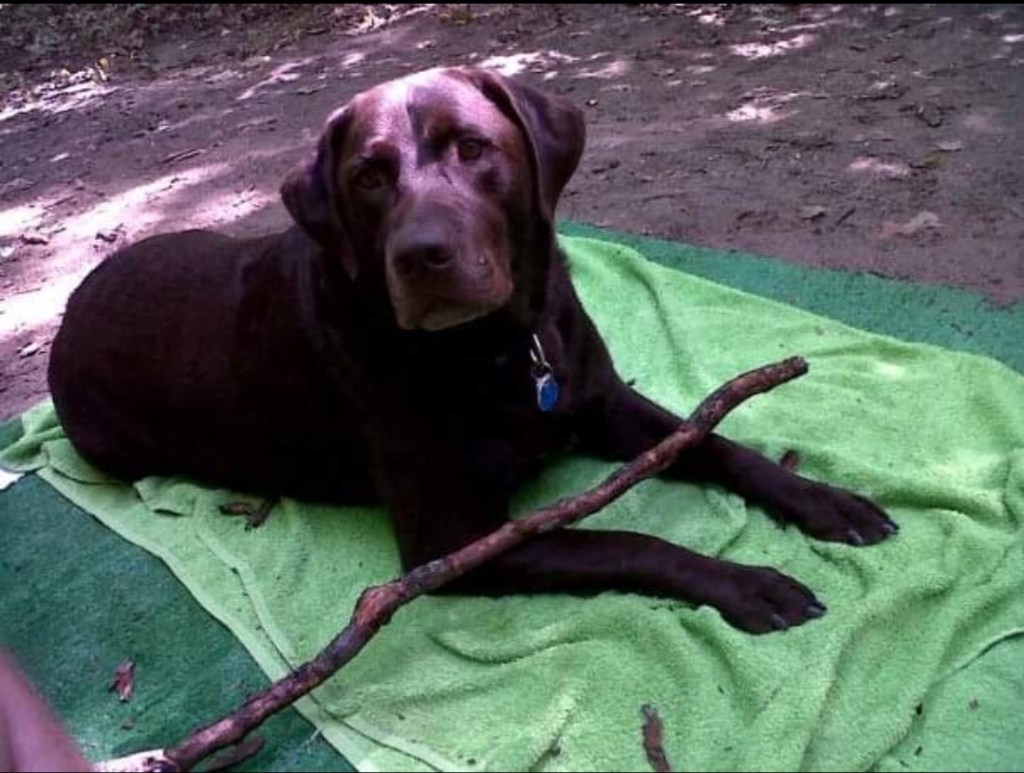
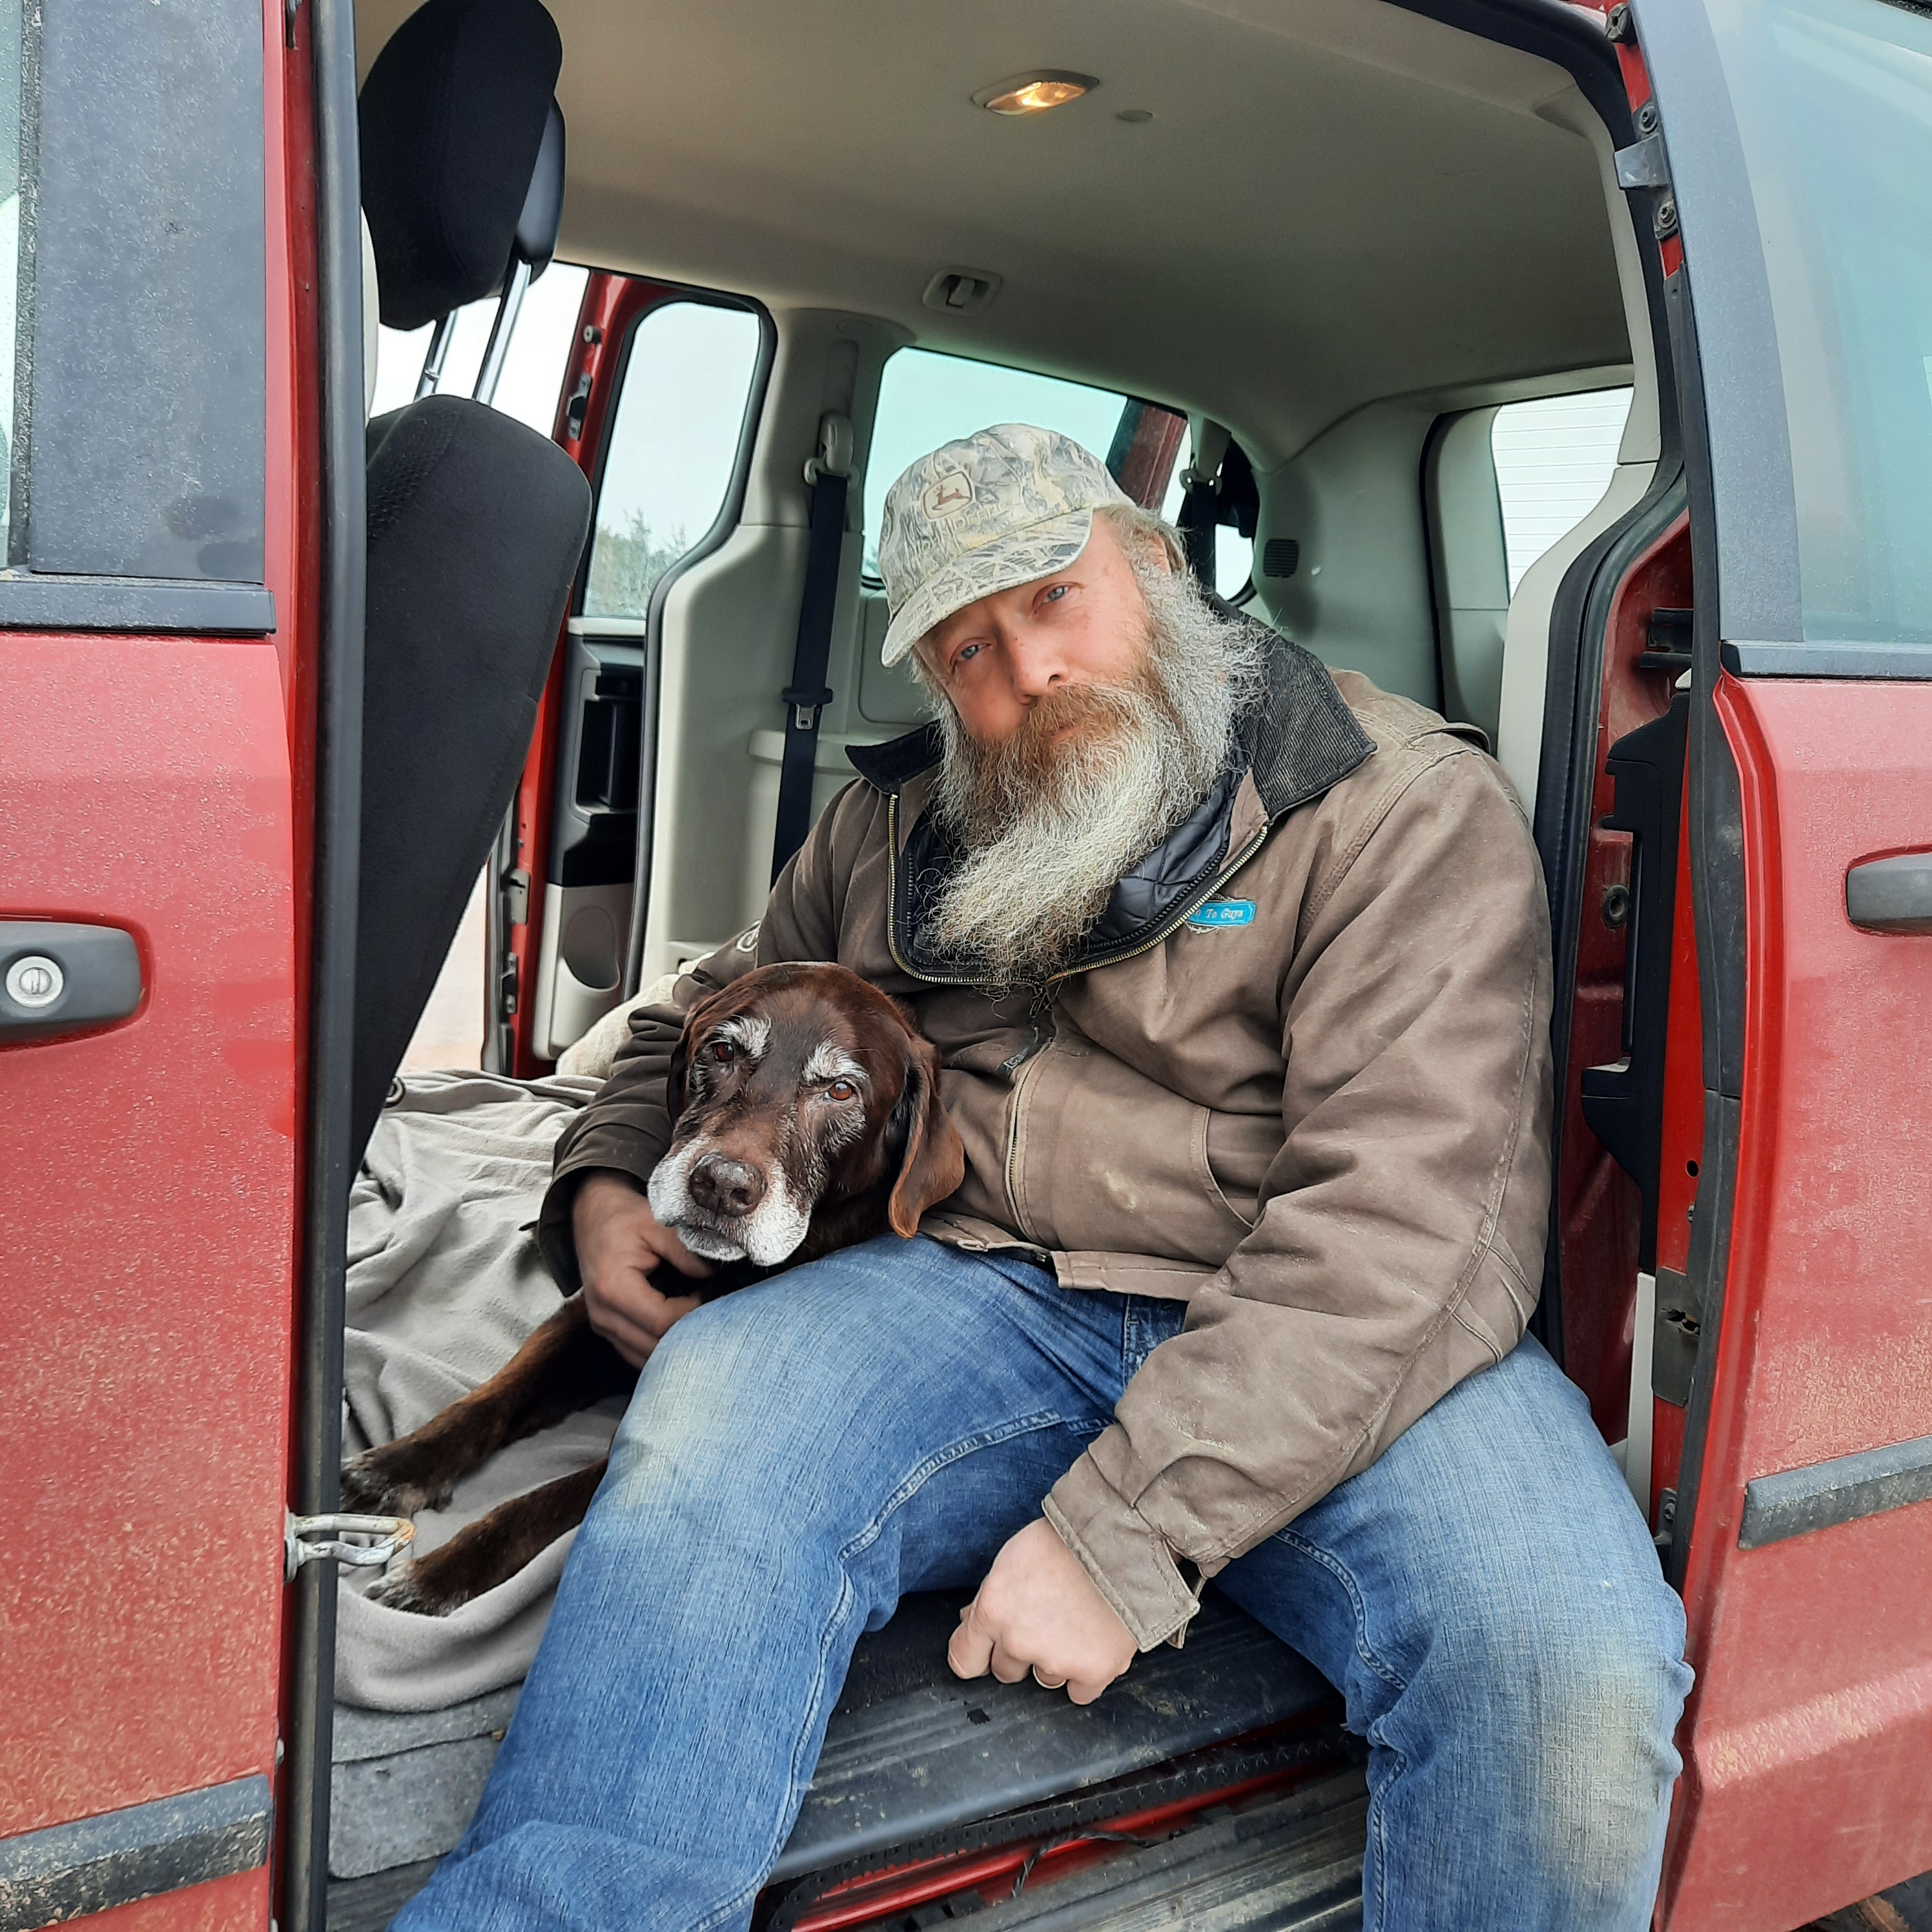
My post tonight is one that we knew is coming….. we didn’t know exactly how much time he has left but yes the days are numbered…… it has been the most difficult two days but has also been the most difficult bunch of weeks.

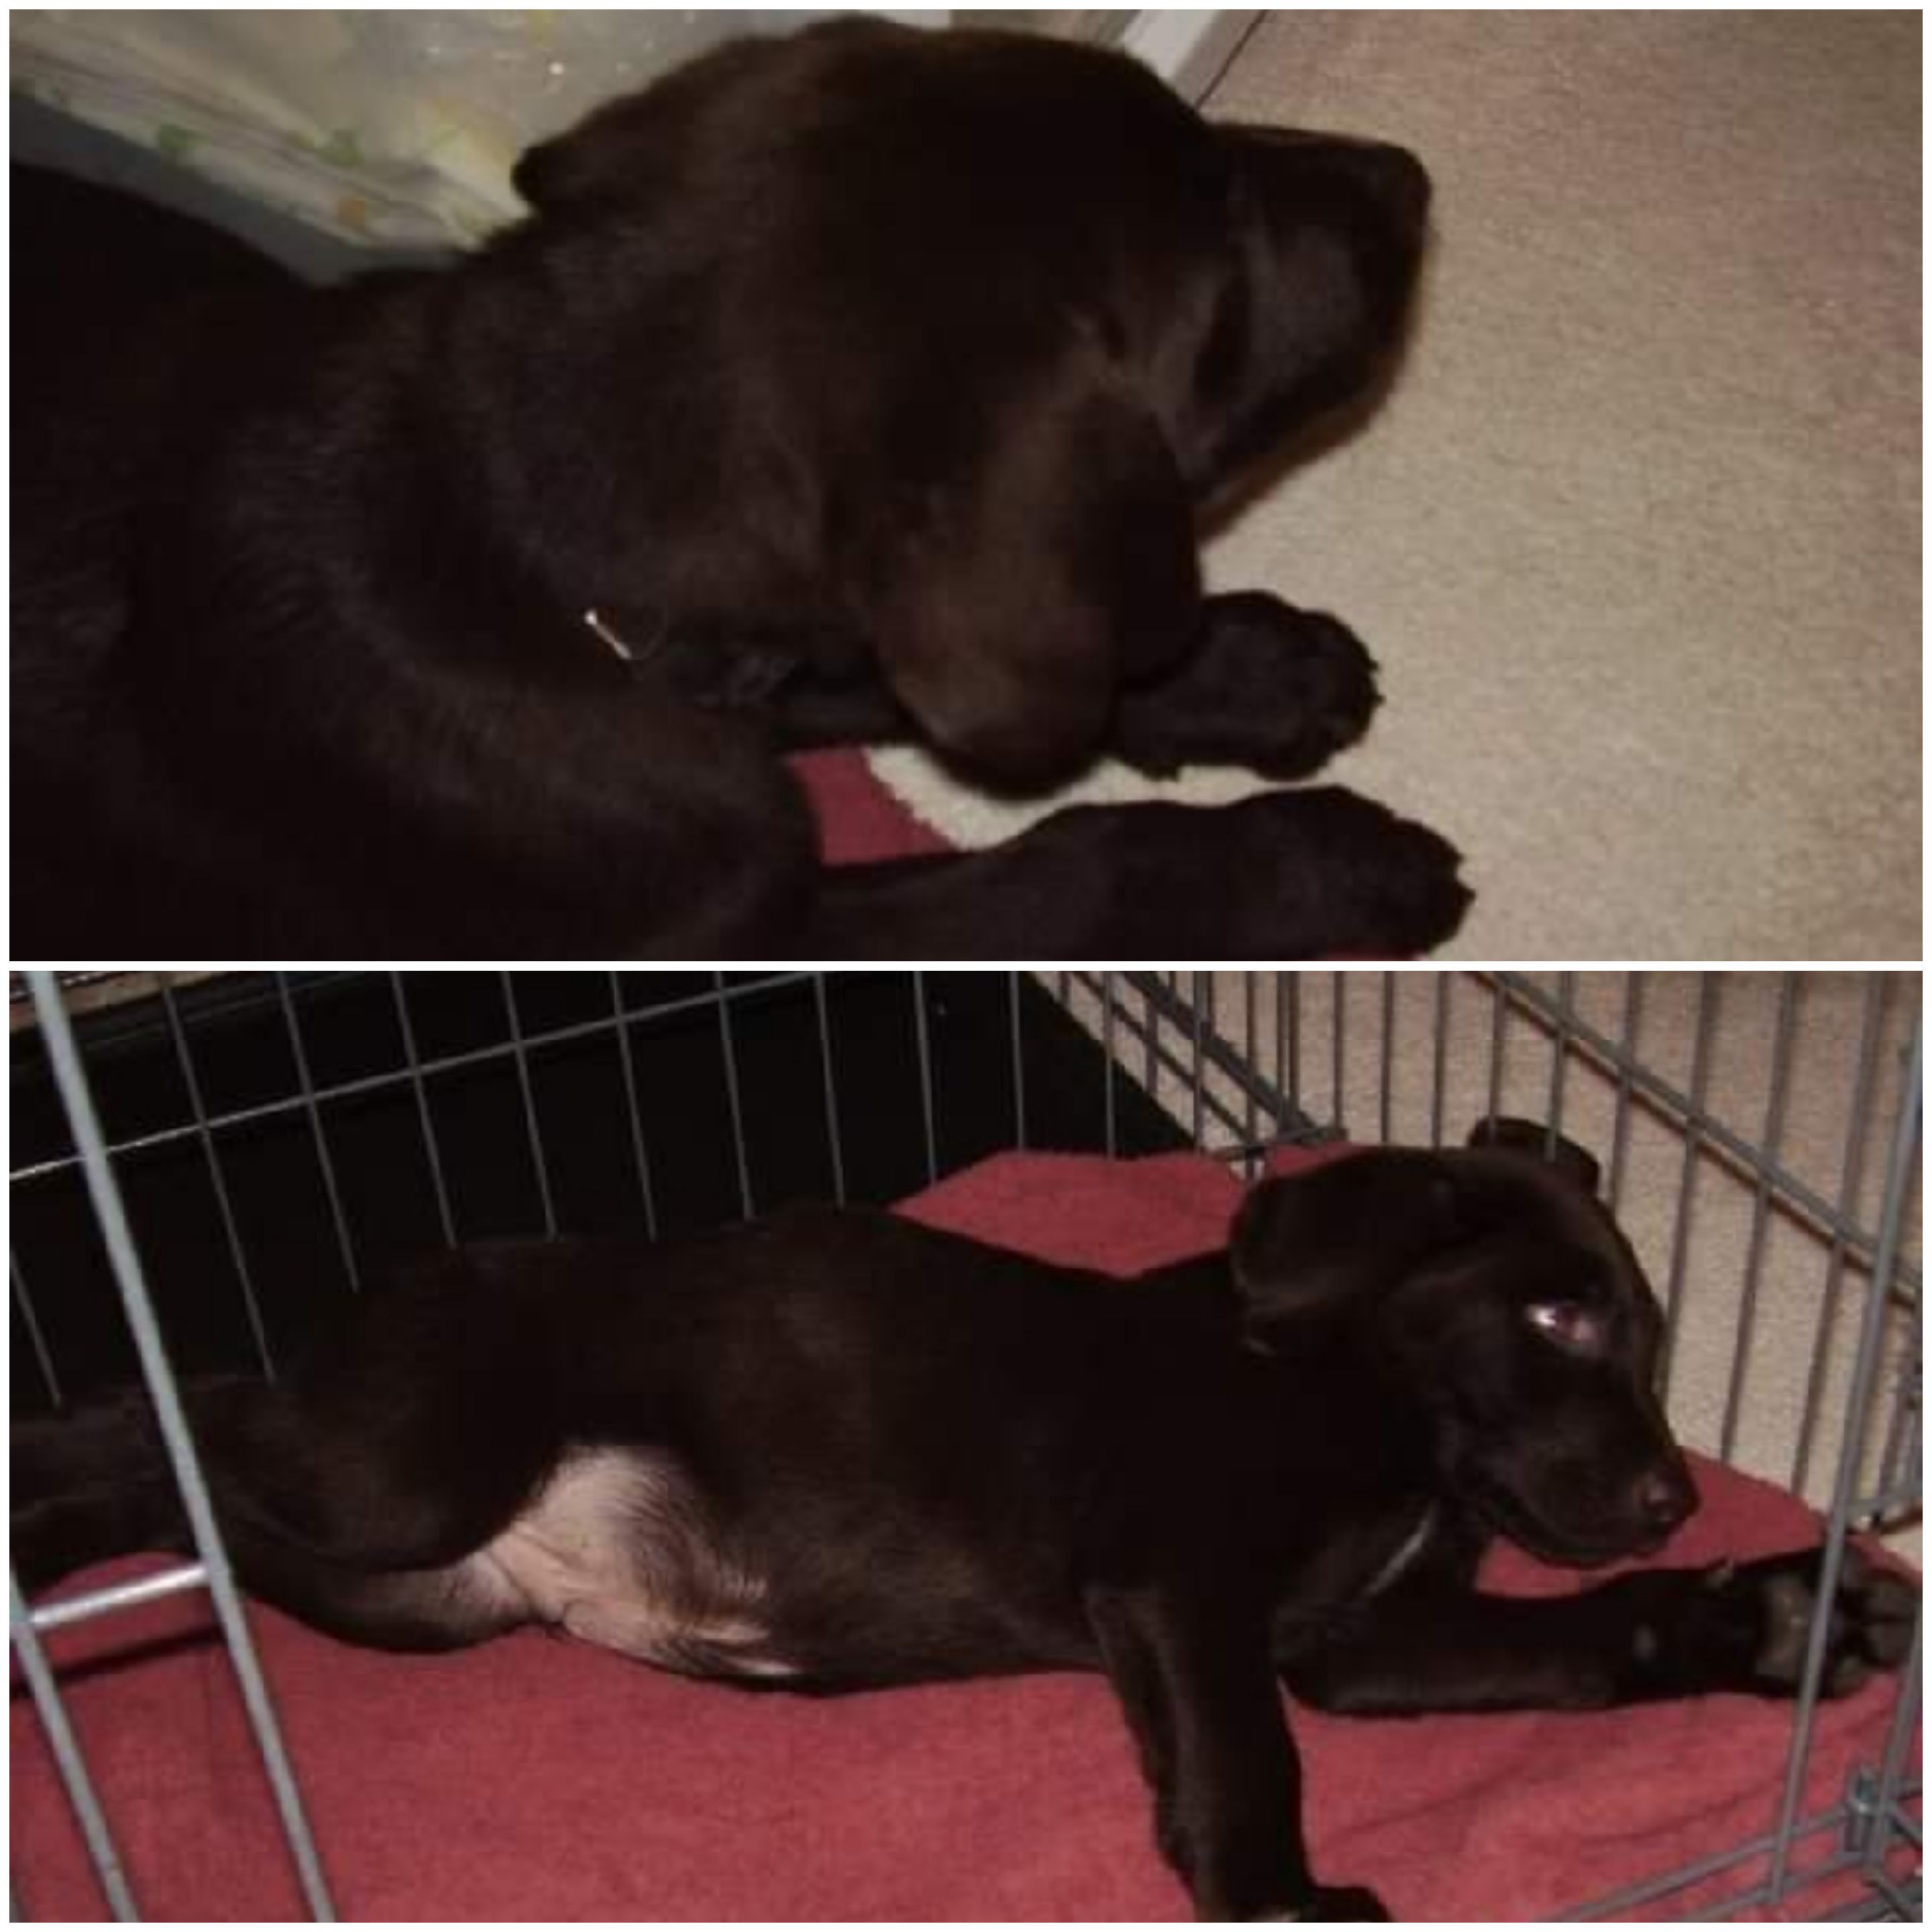
He made his way into my heart and my life at a time when I need him some much but at the same time I was terrified to have him. I remeber his beautiful blue eyes and his first bunch of cries of loneliness the first day or two…. but our lives were turn upside down with love and he most definitely filled a rather large void in our lives.
He was the perfect shade of chocolate and he was the sweetest puppy. He fit our lives so well and we his little life. I think everyone like us was so taken with him his big huge paws and his fat little belly but he most definitely won our hearts mine especially in those first couple days.

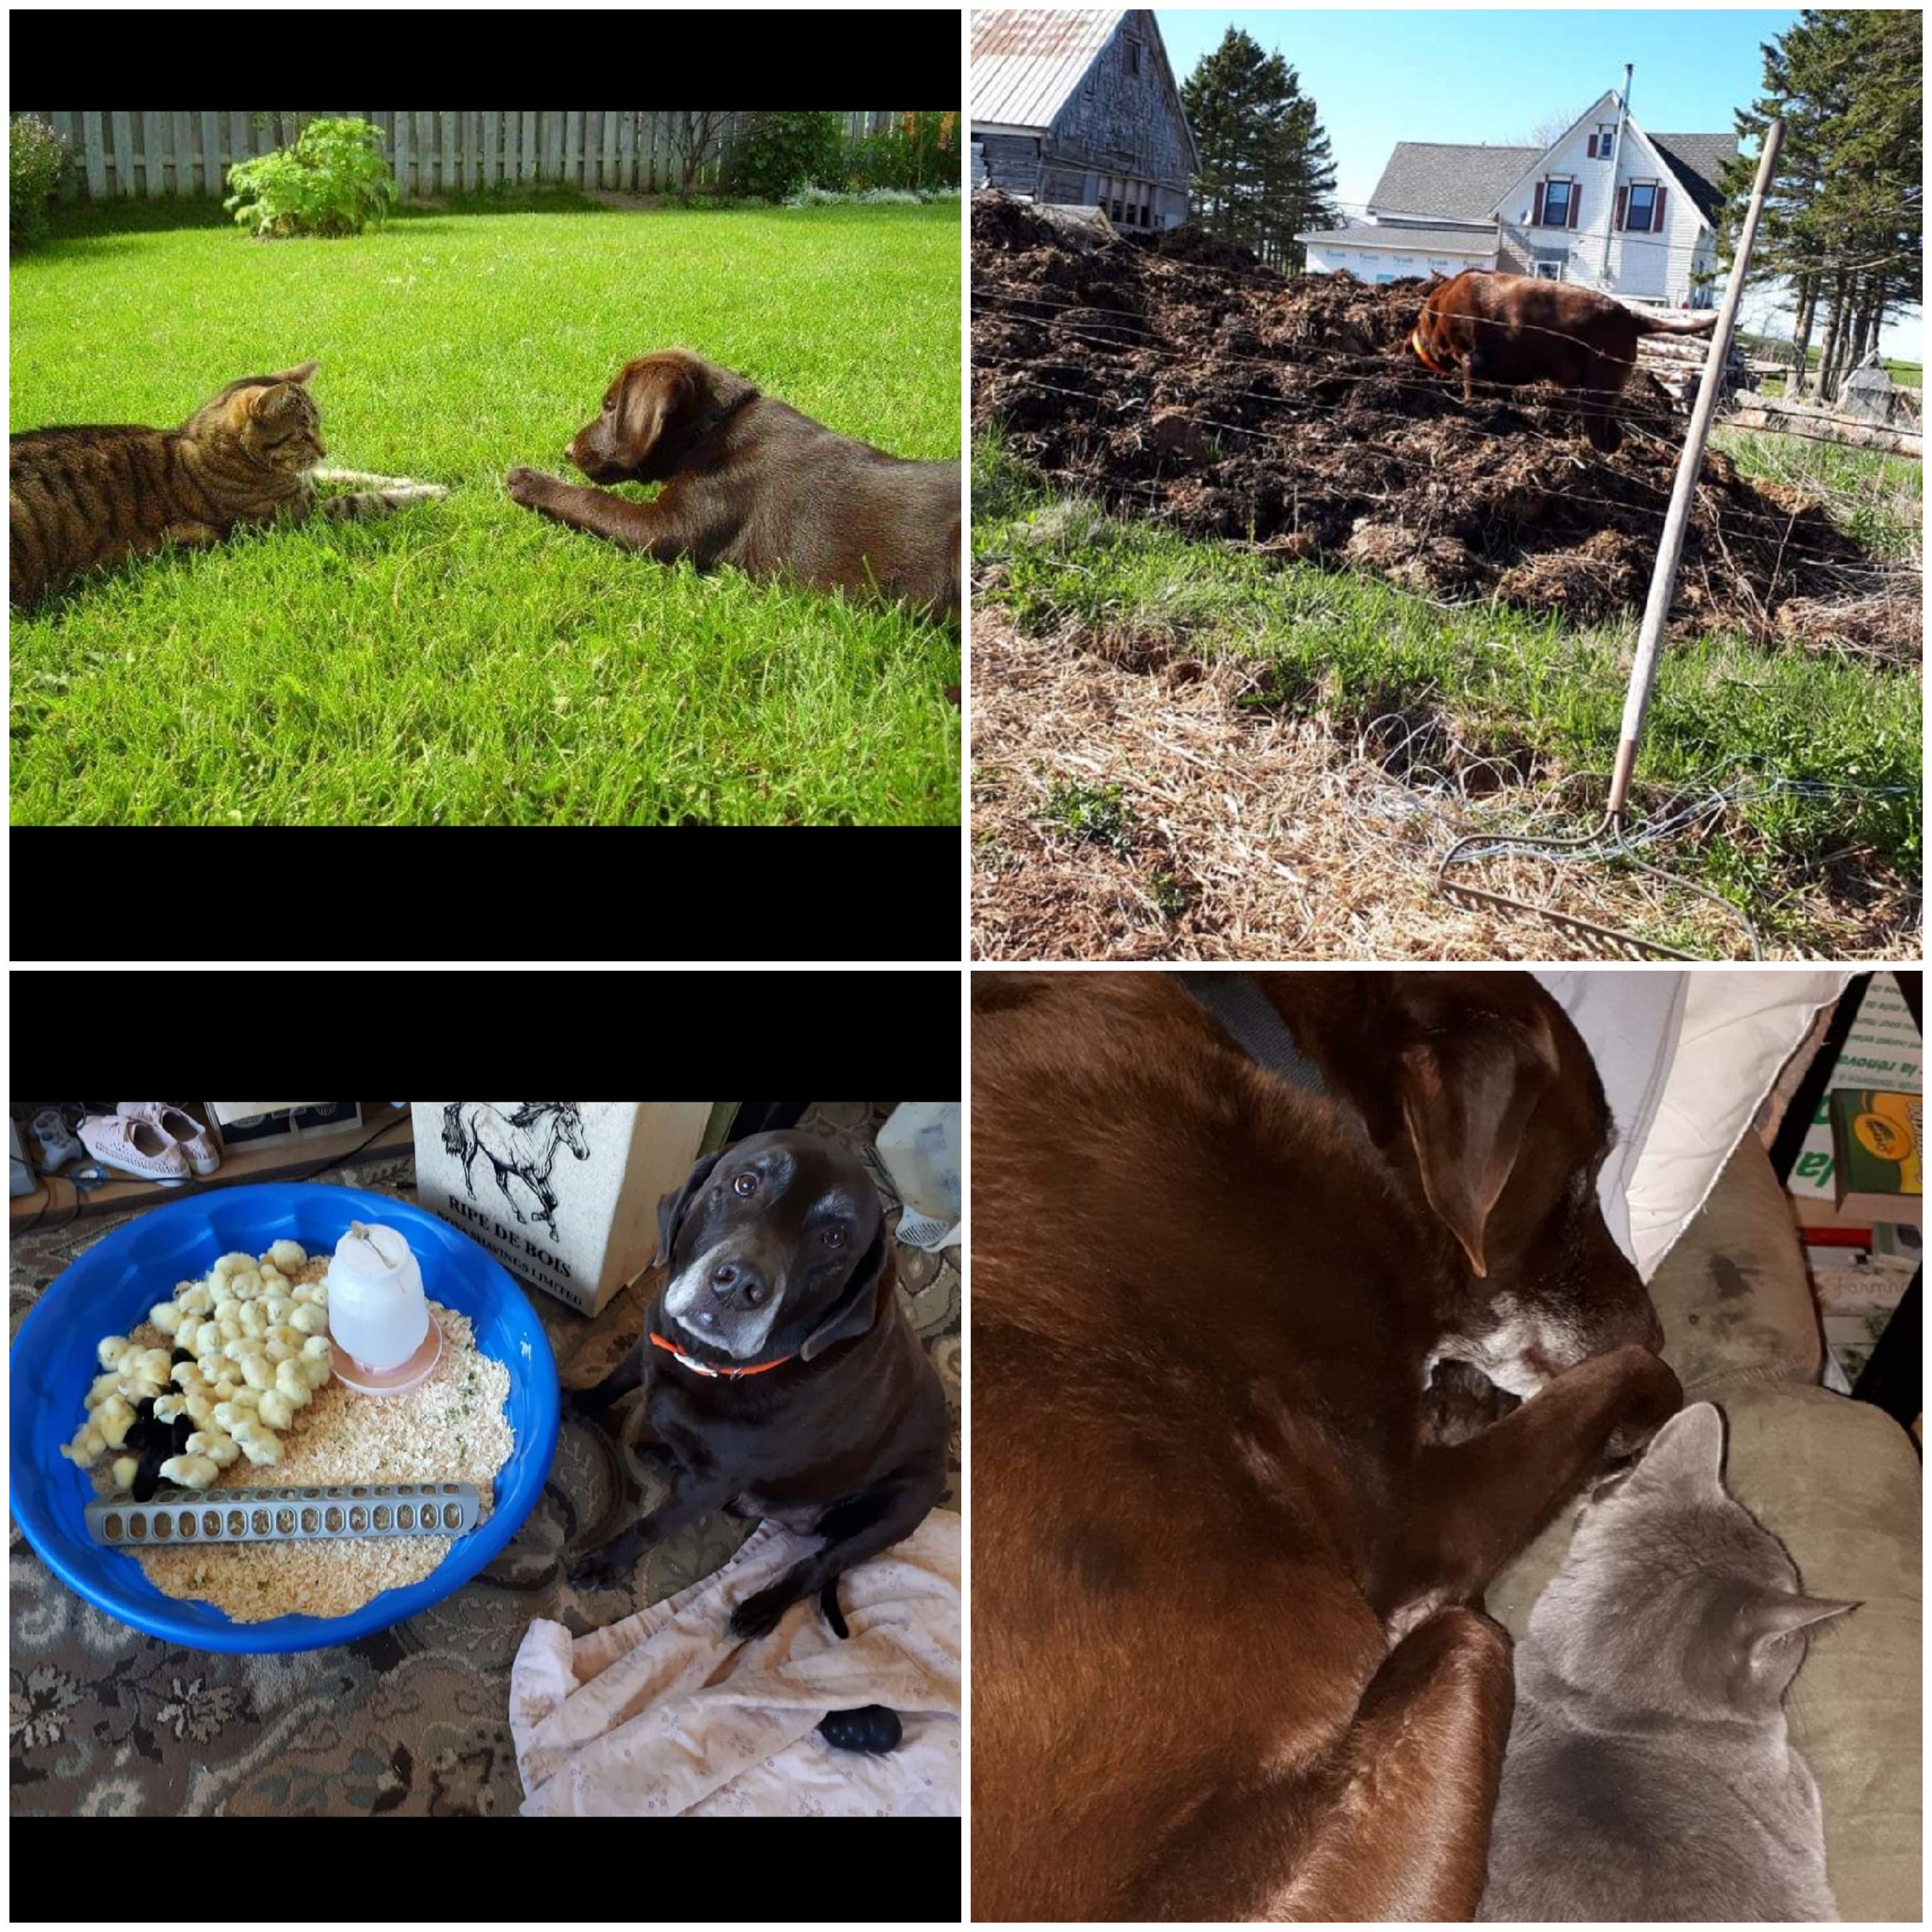
Our cats at the time were not so very happy this was not what they wanted…… they checked him out from a distance and sniffed the air and usually hid under the bed or sofa were it would not be very easy to be pounced on by a puppy.

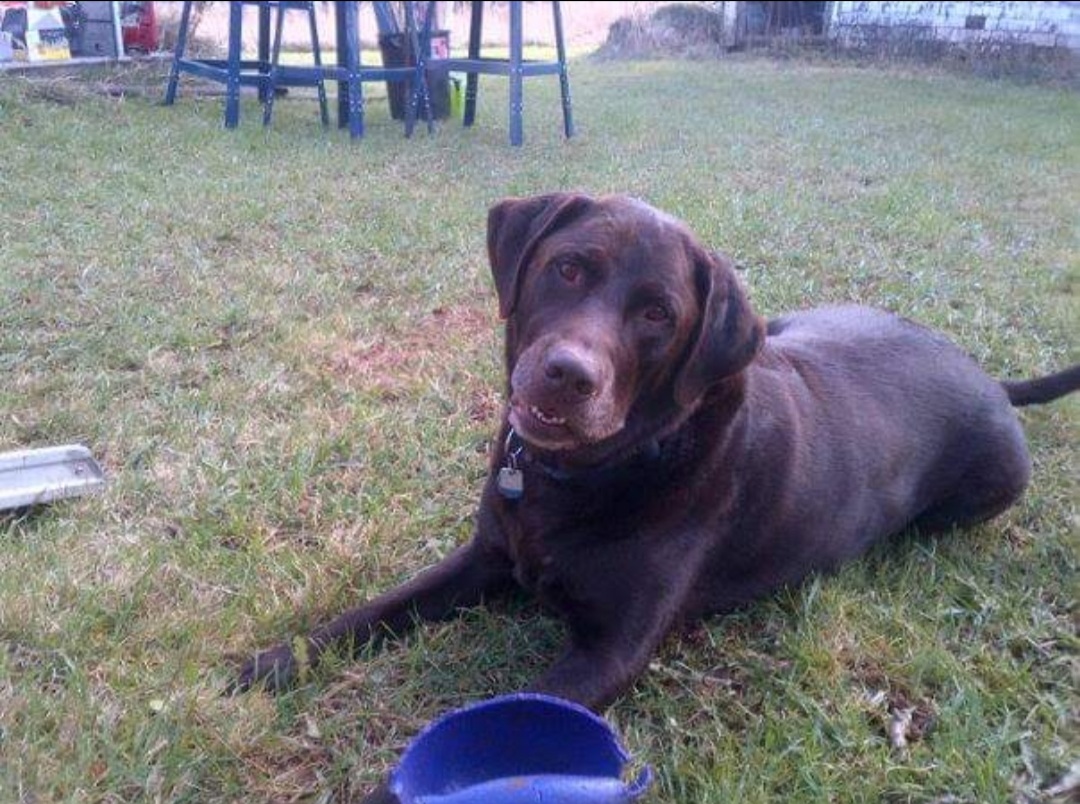
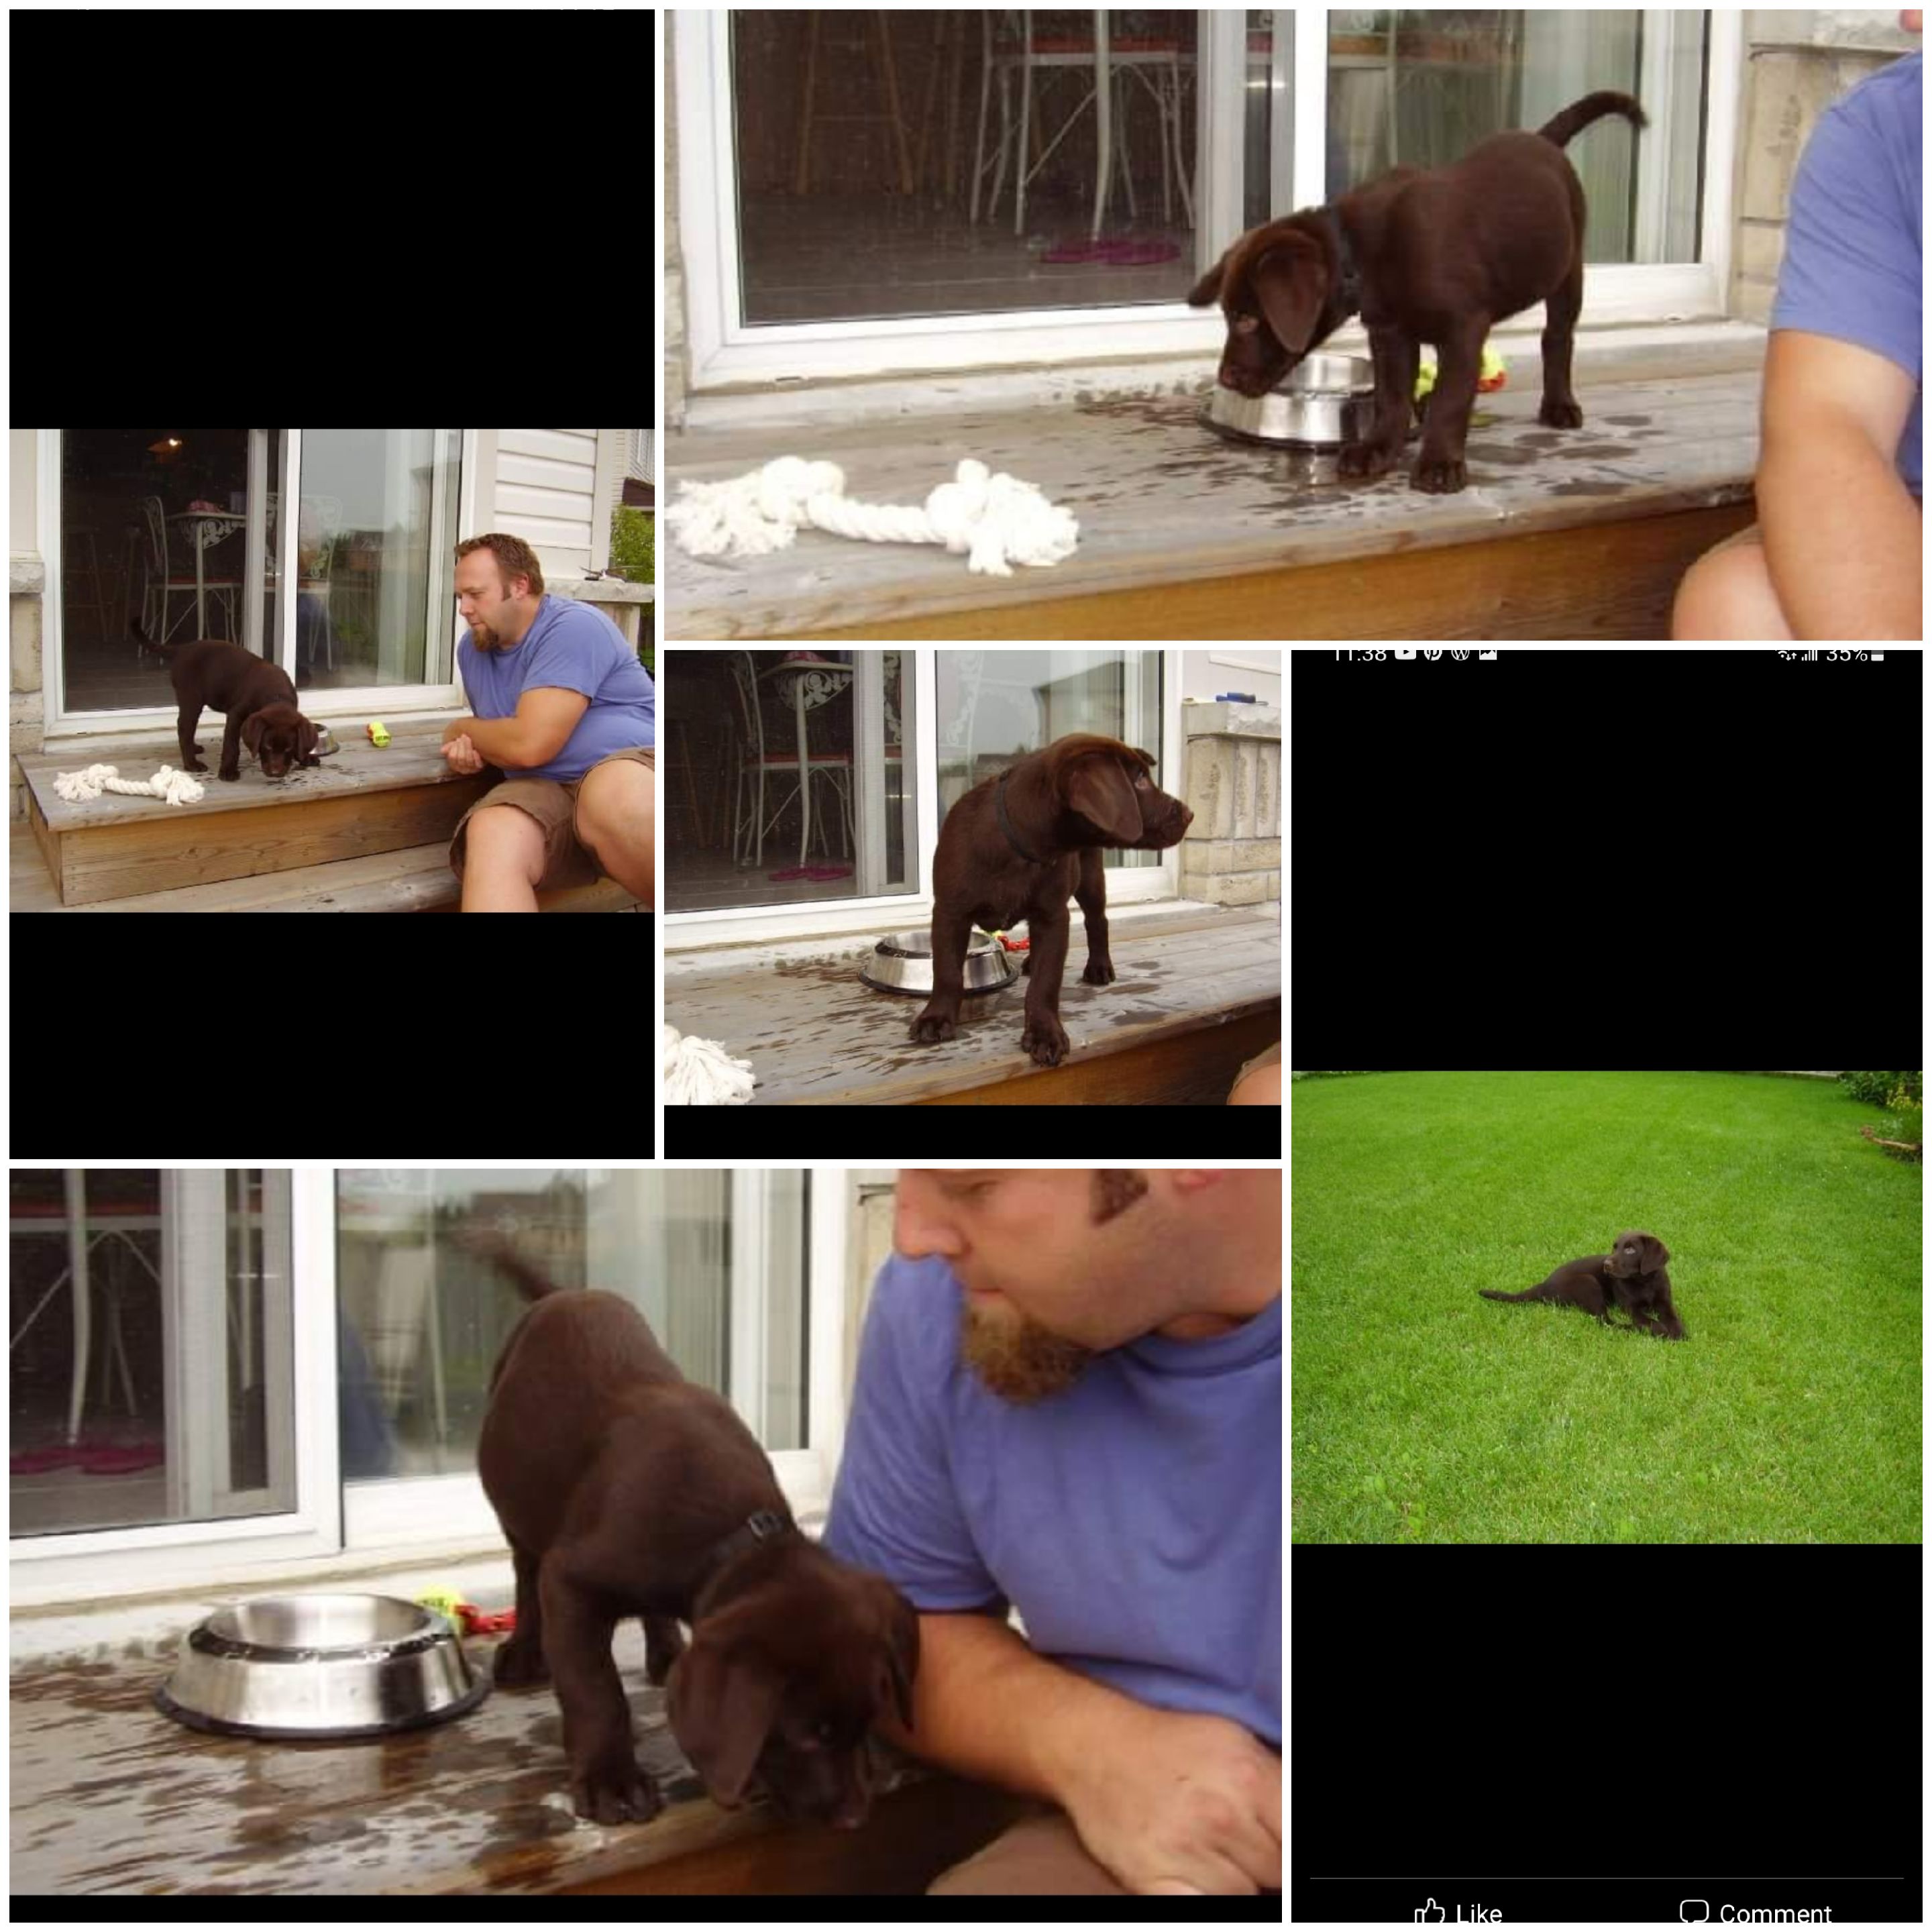
Rusty had the honor of naming him and his name was murdoch after the a team show not the detective…. so many walks, so many runs in the park and going for rides was his favorite. Up in the seat next to me or on my lap for the first little but as he grew….. we would go camping and visiting with his other dig relatives….. he absolutely loved it all. We took day trips here and there and he even got to be doggie sat for a weekend…..

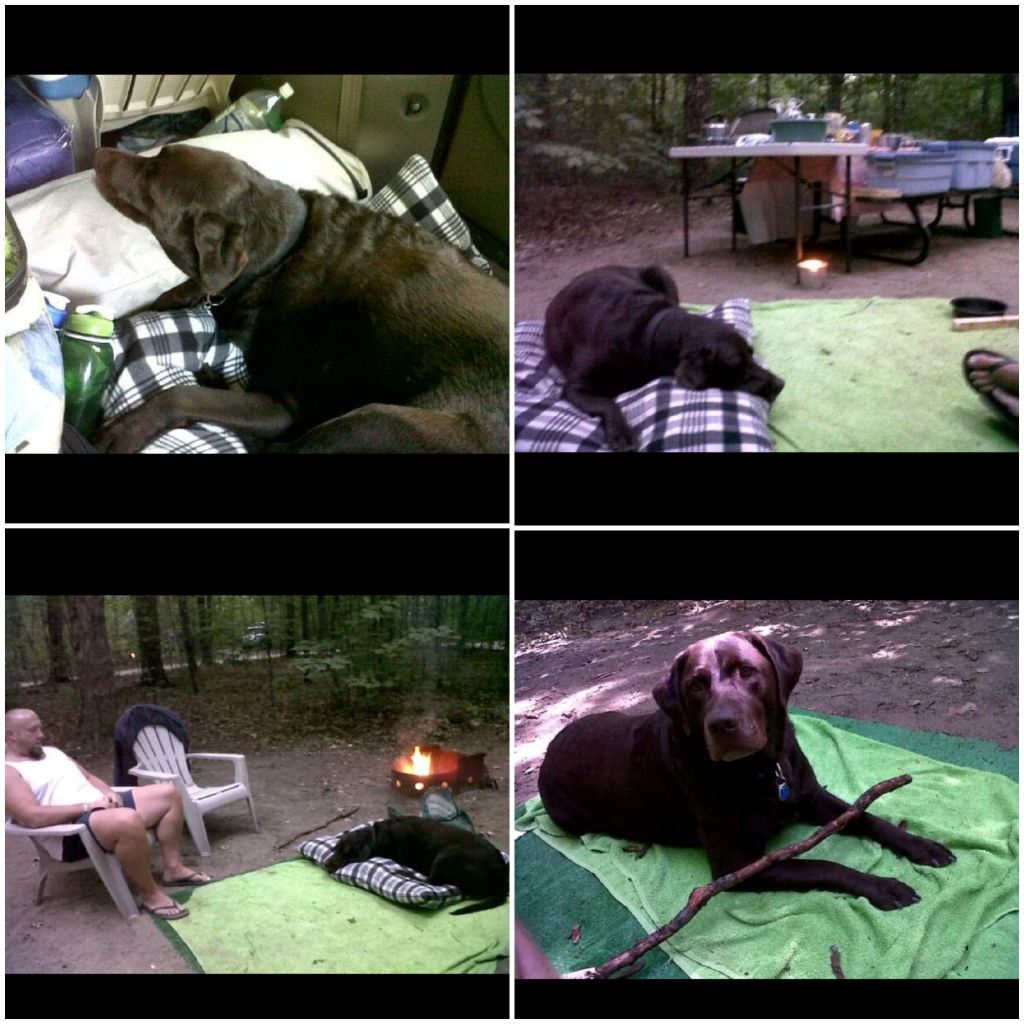
He loved all his chew toys… balls…. ropes…. and kongs….stuffed animals with or without squeakers were a favorite too…. sometimes he would try to drag the stuffed animal that was his size all over the house. I list track of how many fiber stuffing balls and scraps I picked up. They all made him so happy as he was such a happy-go-lucky dog… we got to love him.
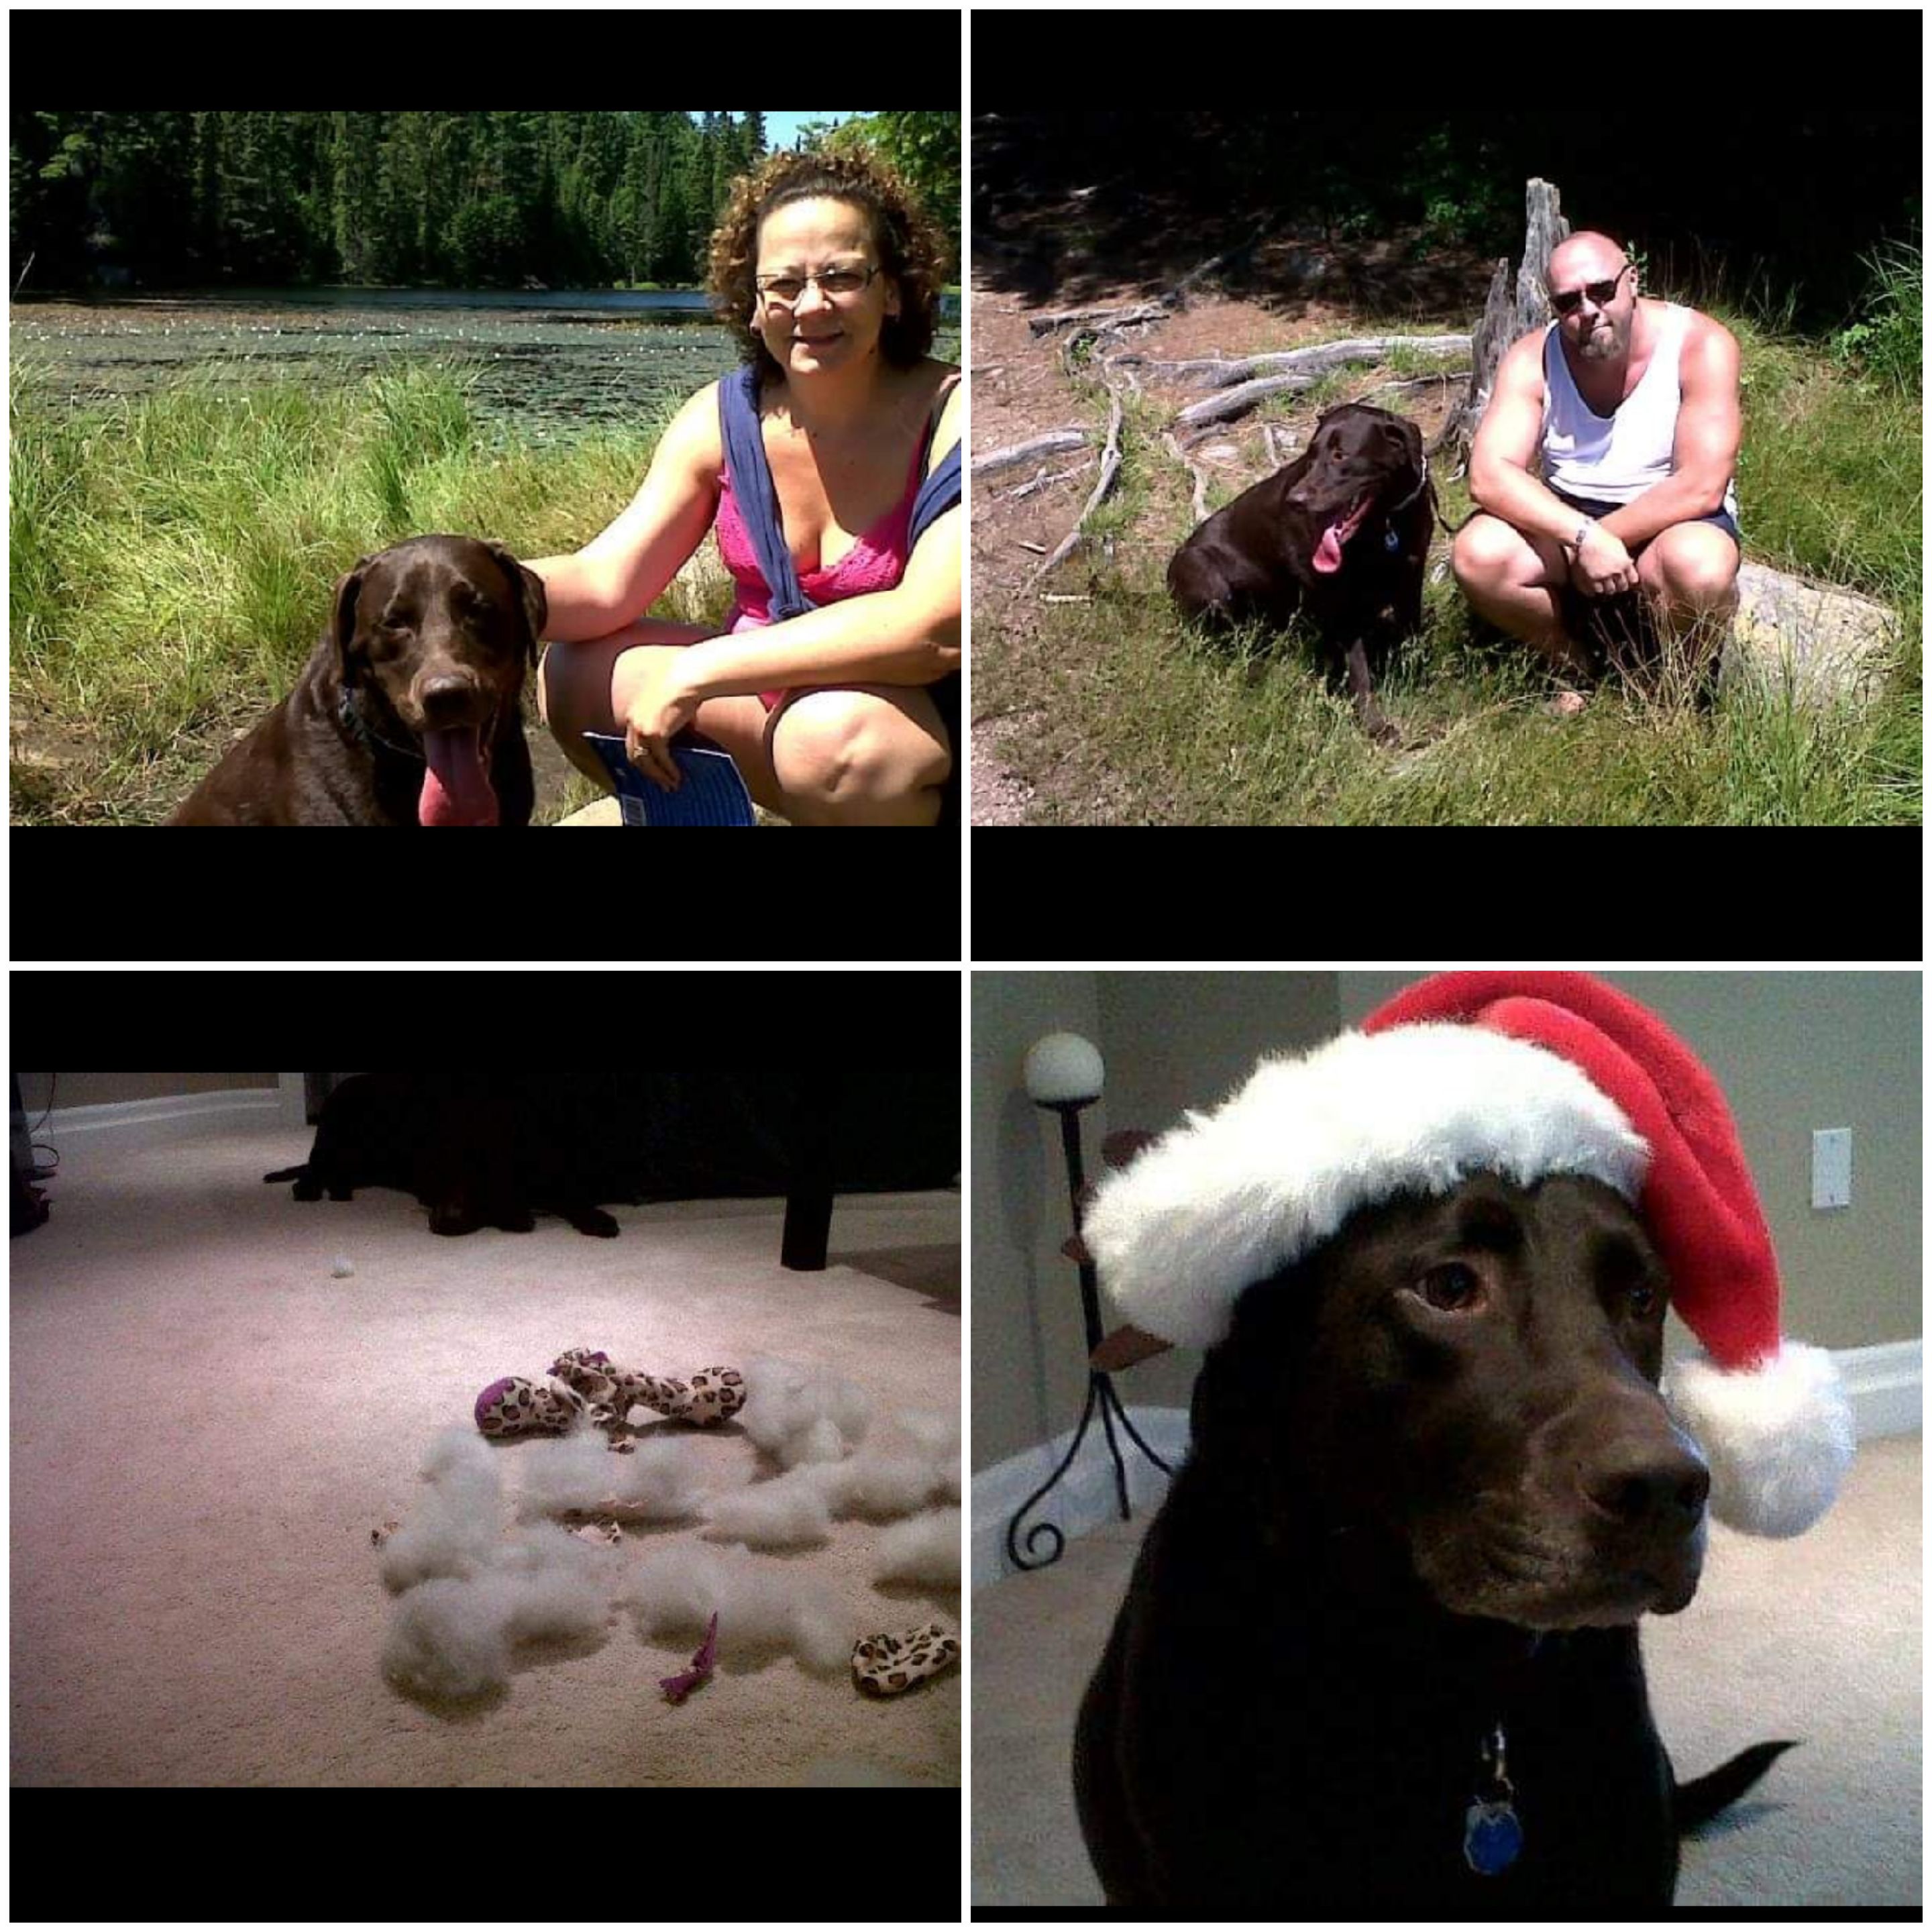
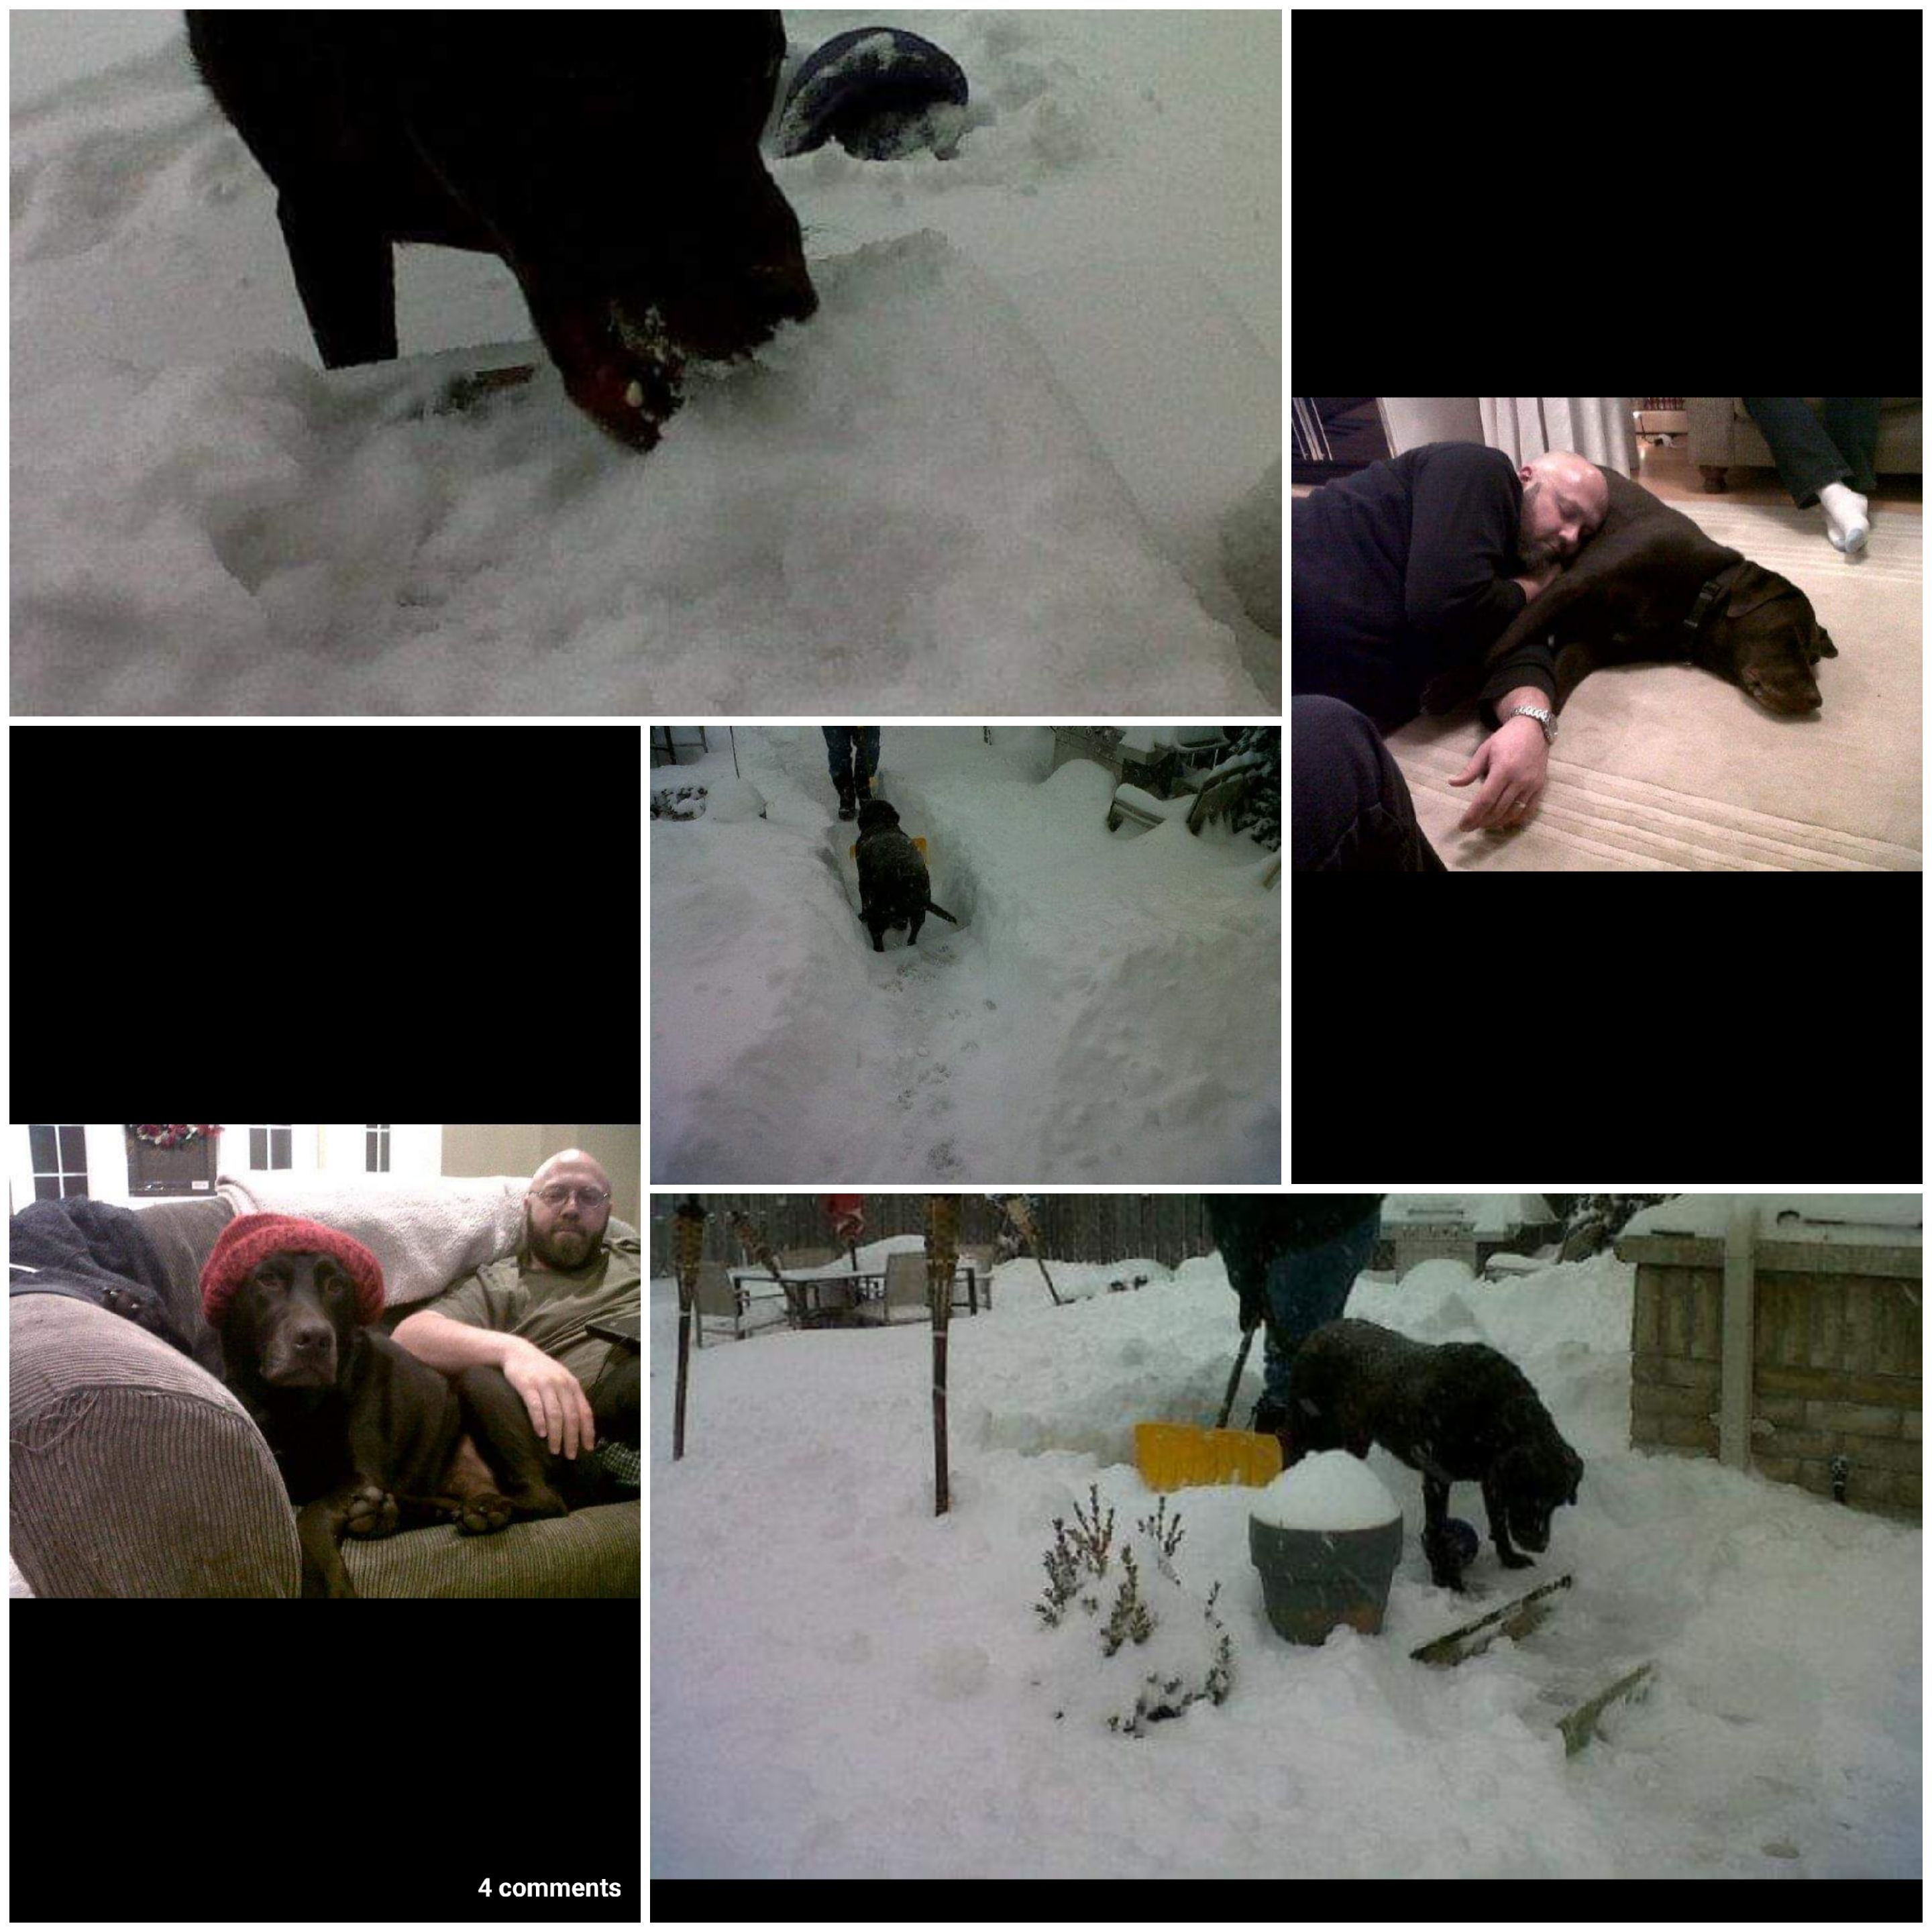


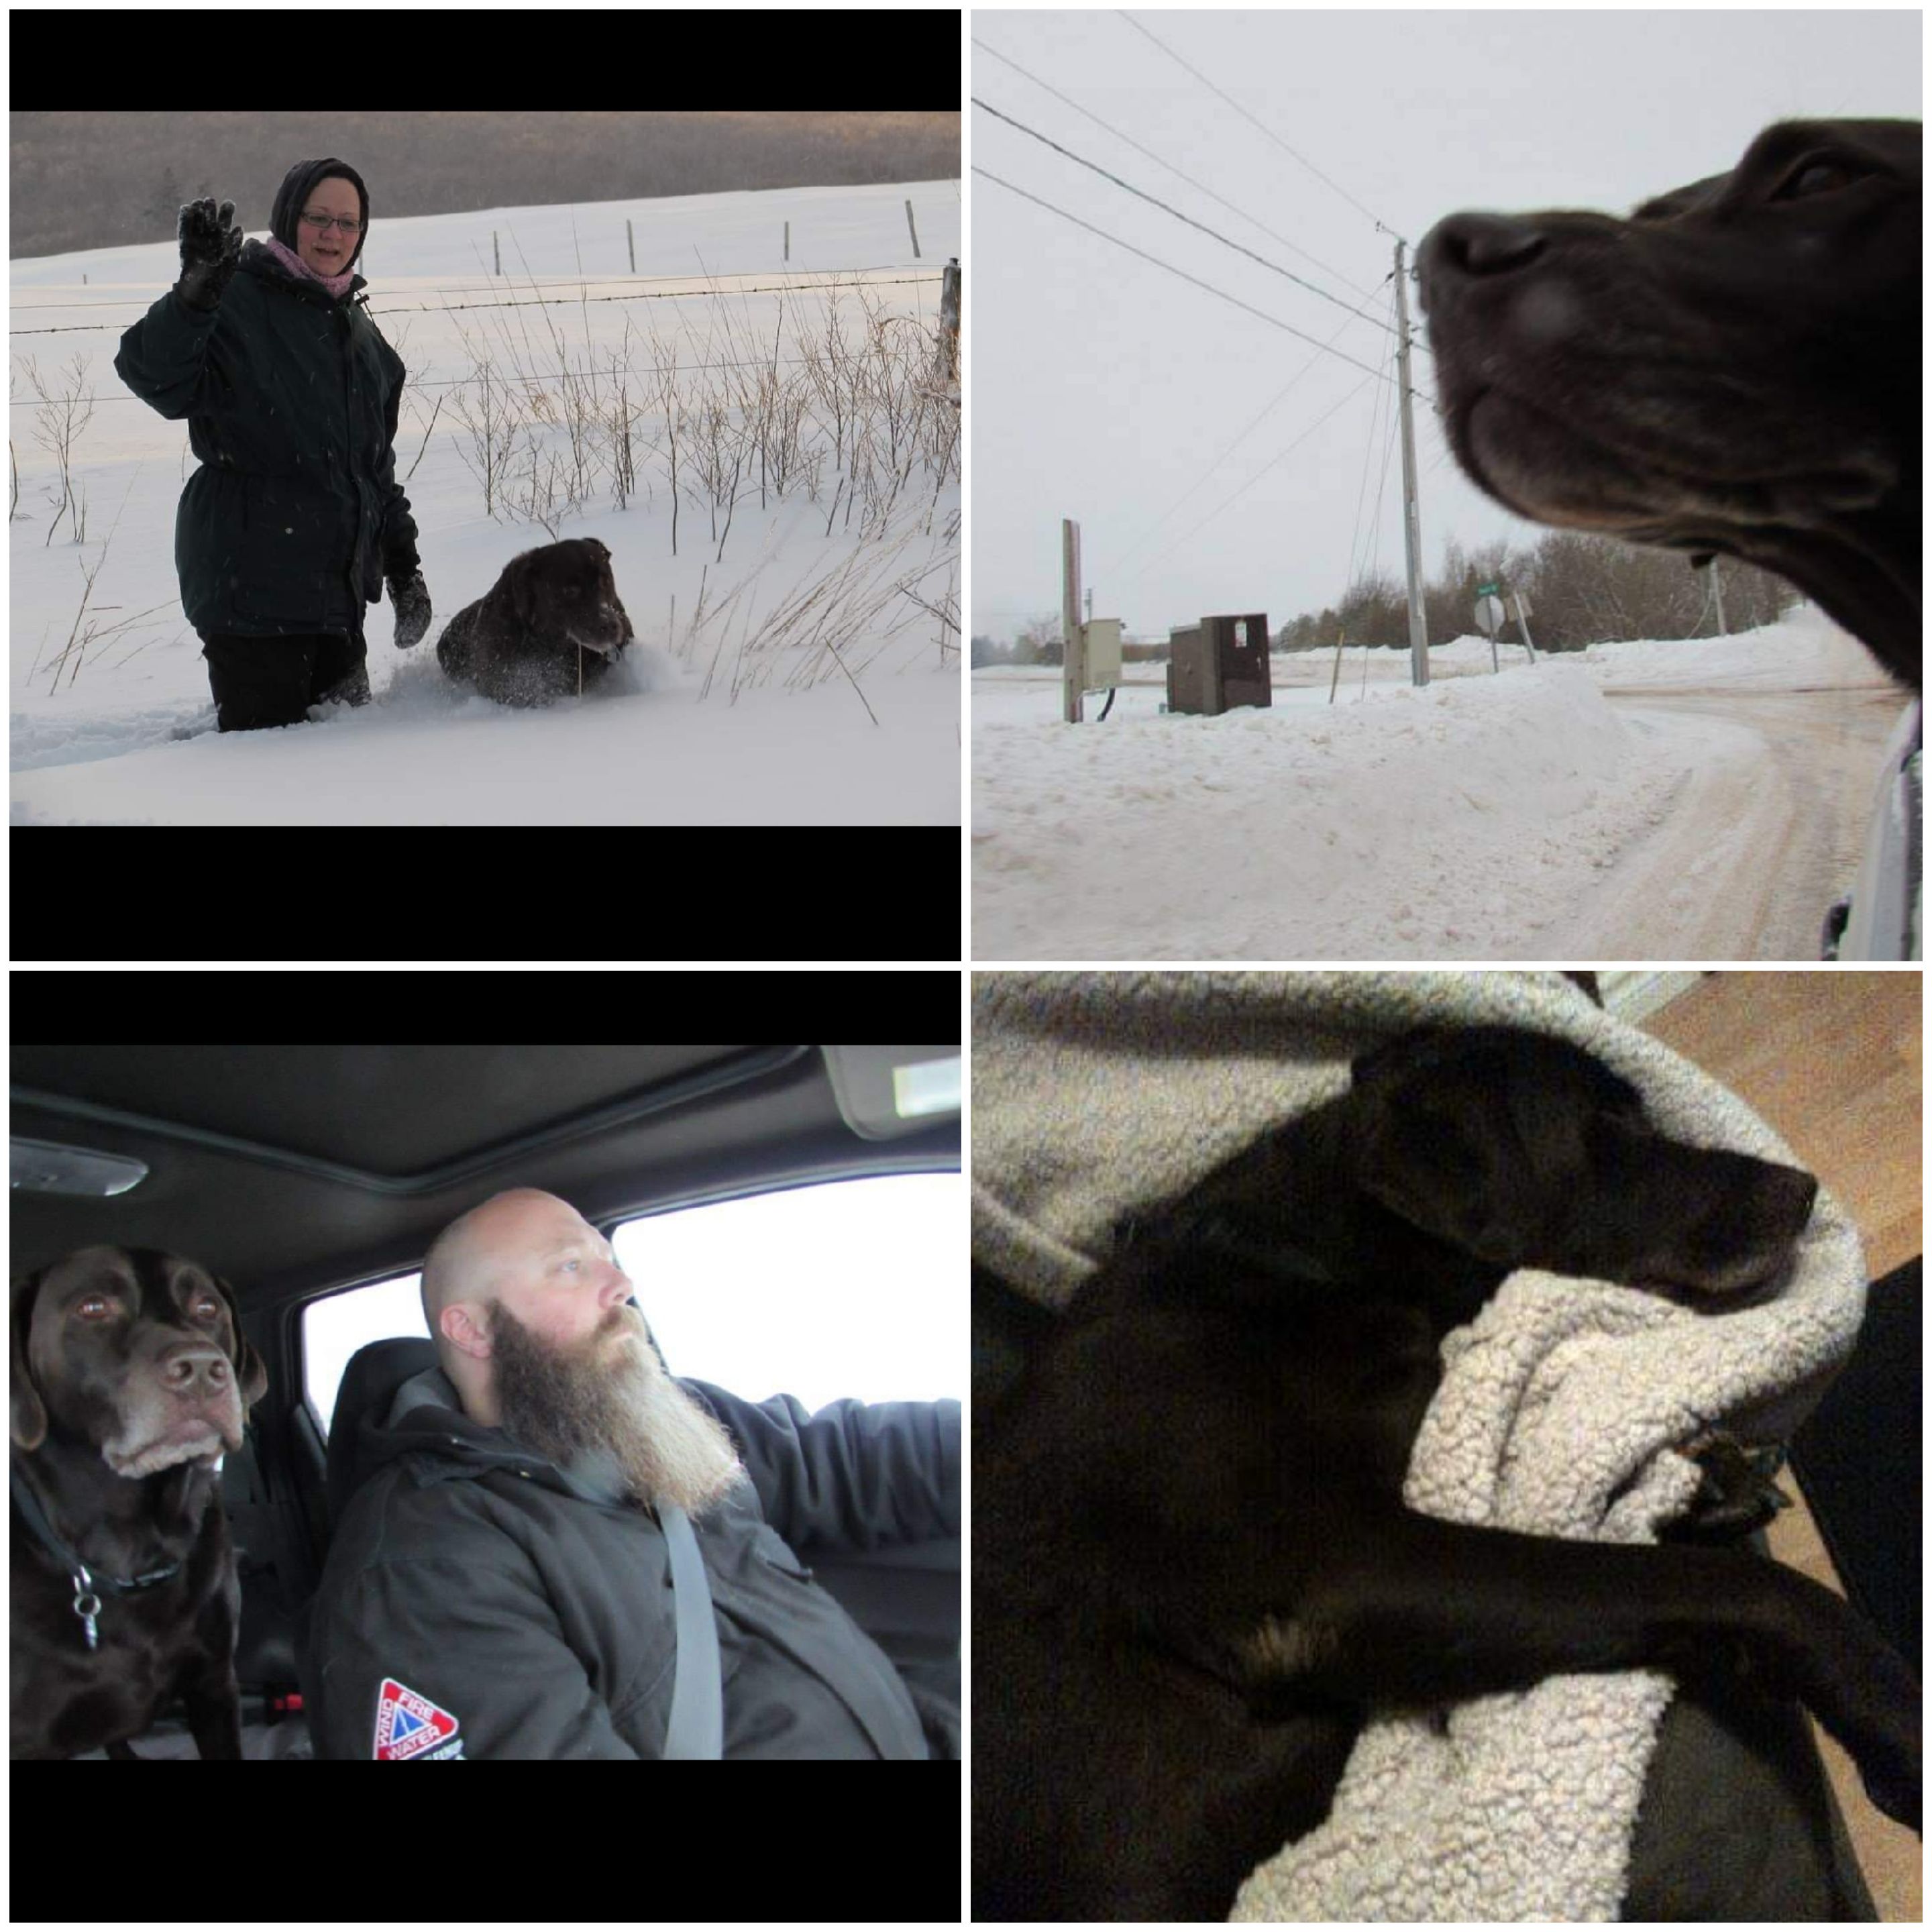

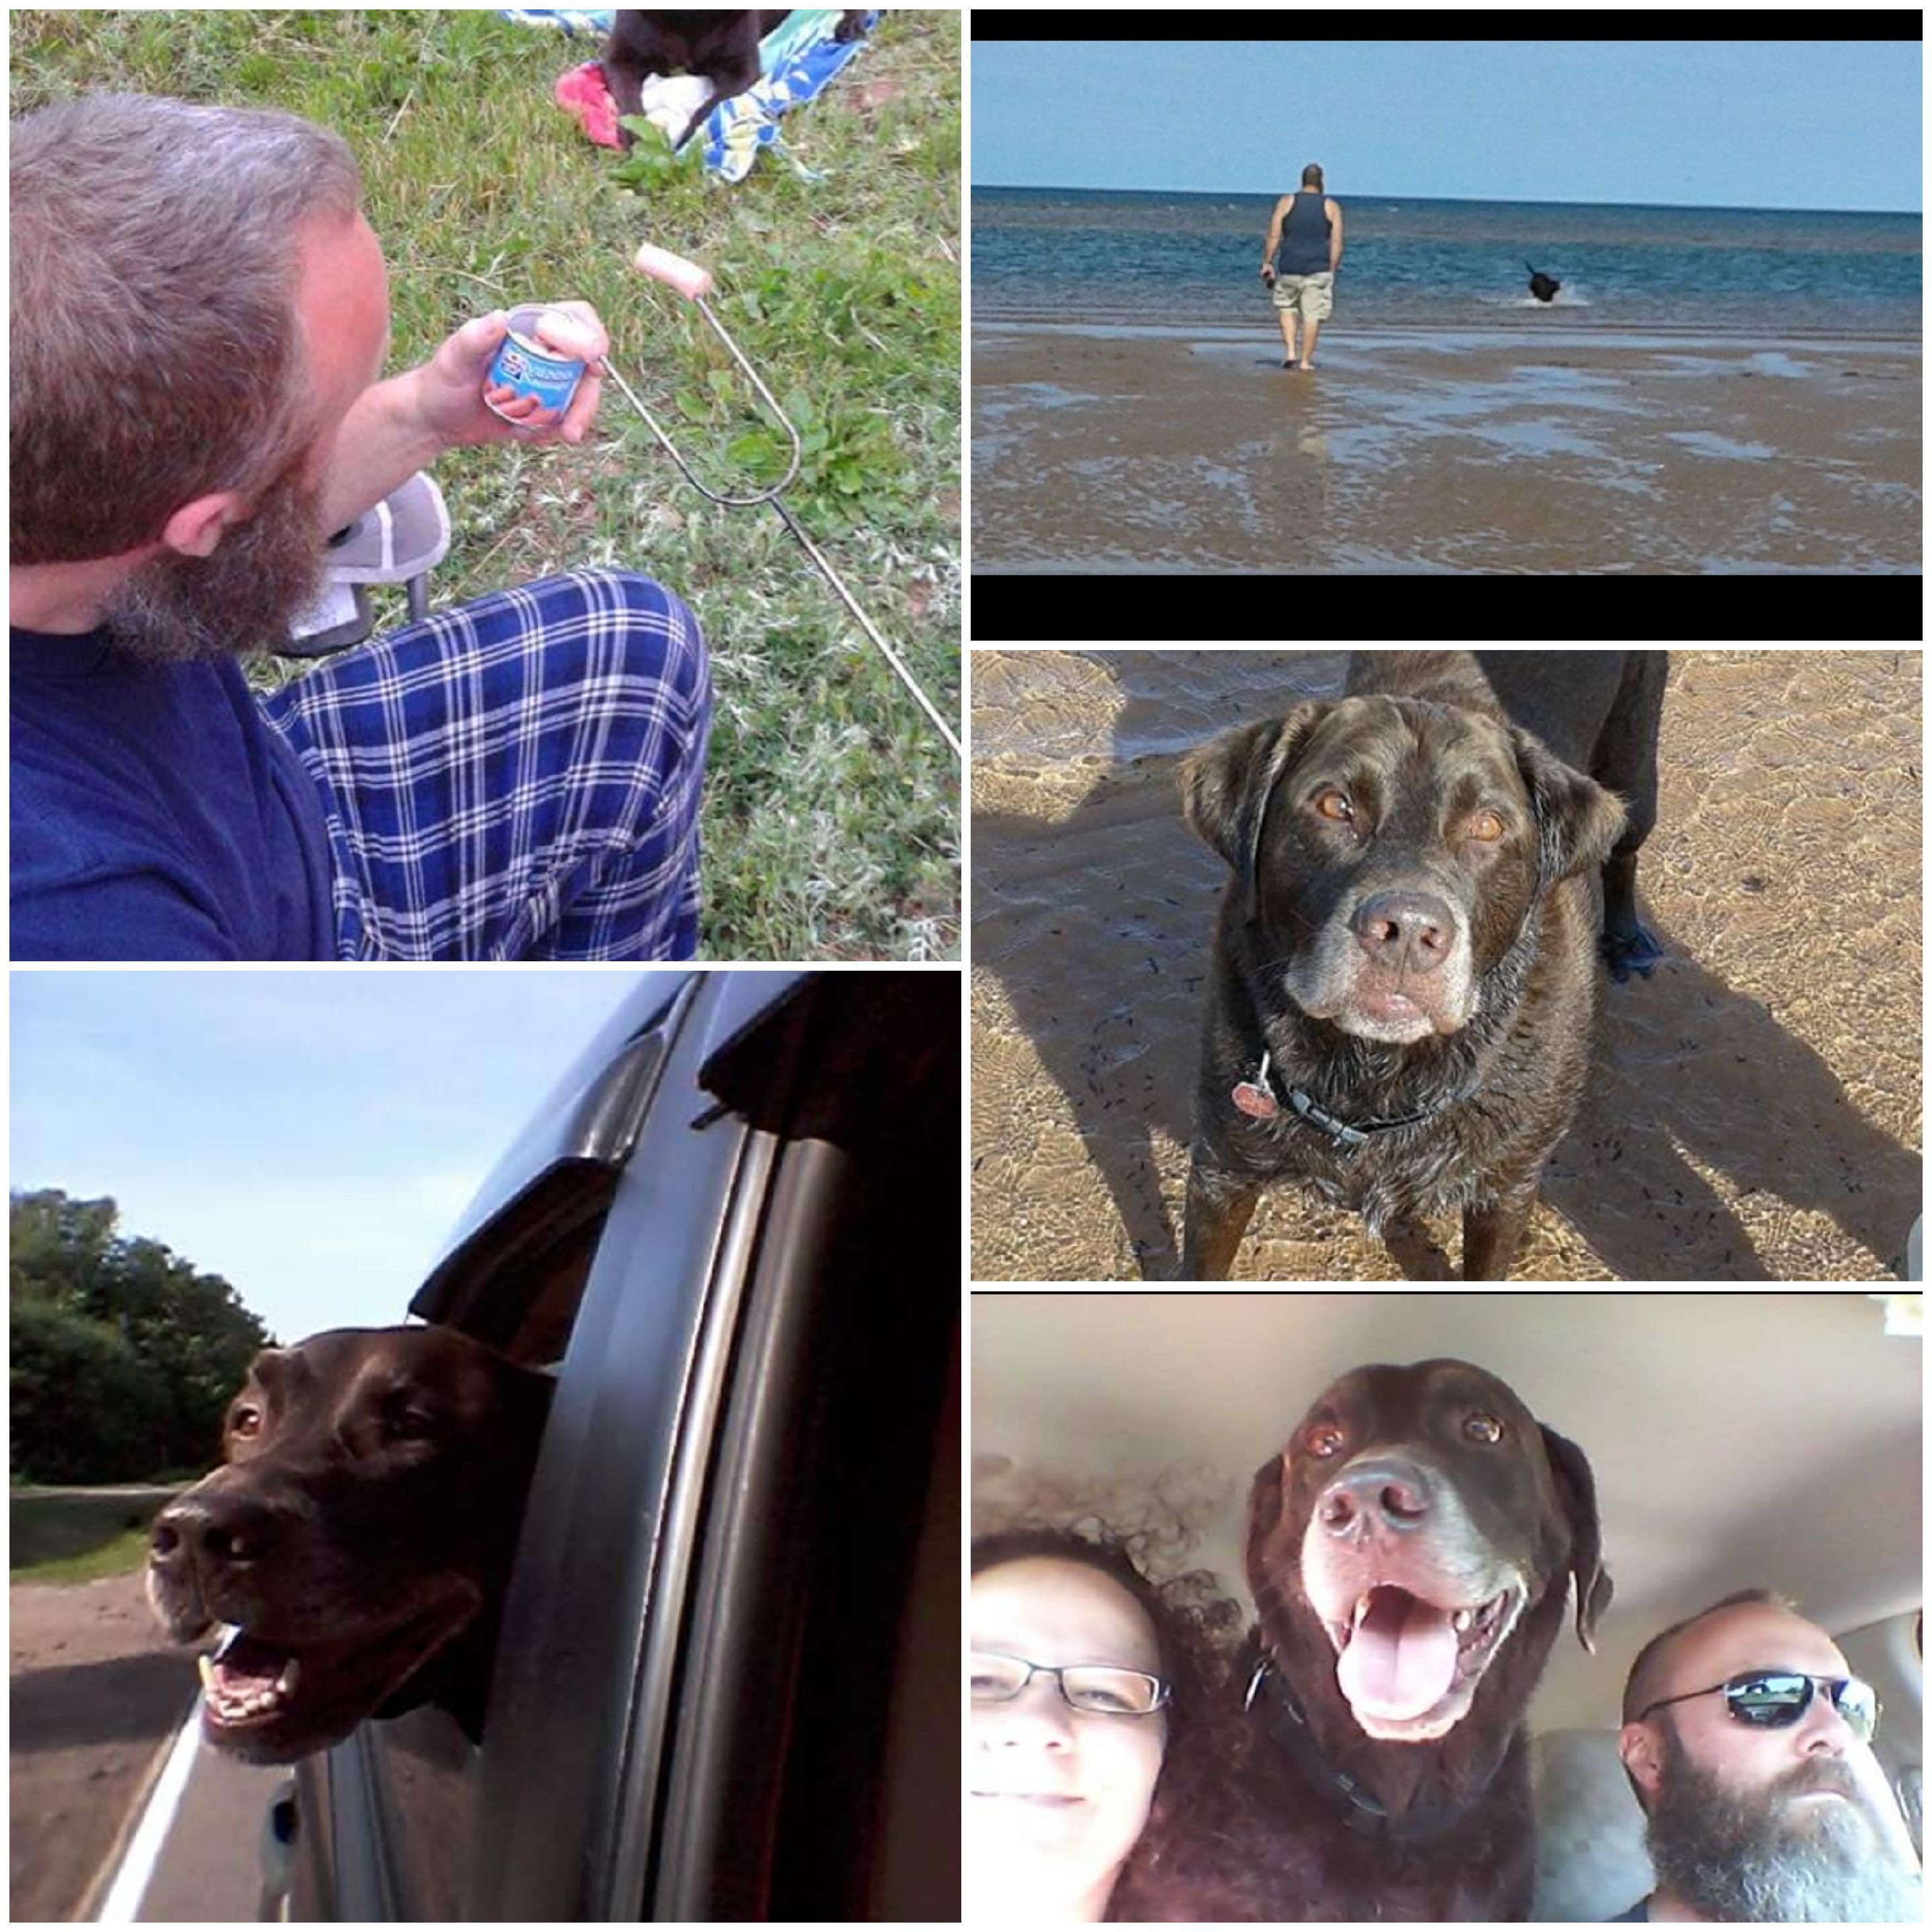
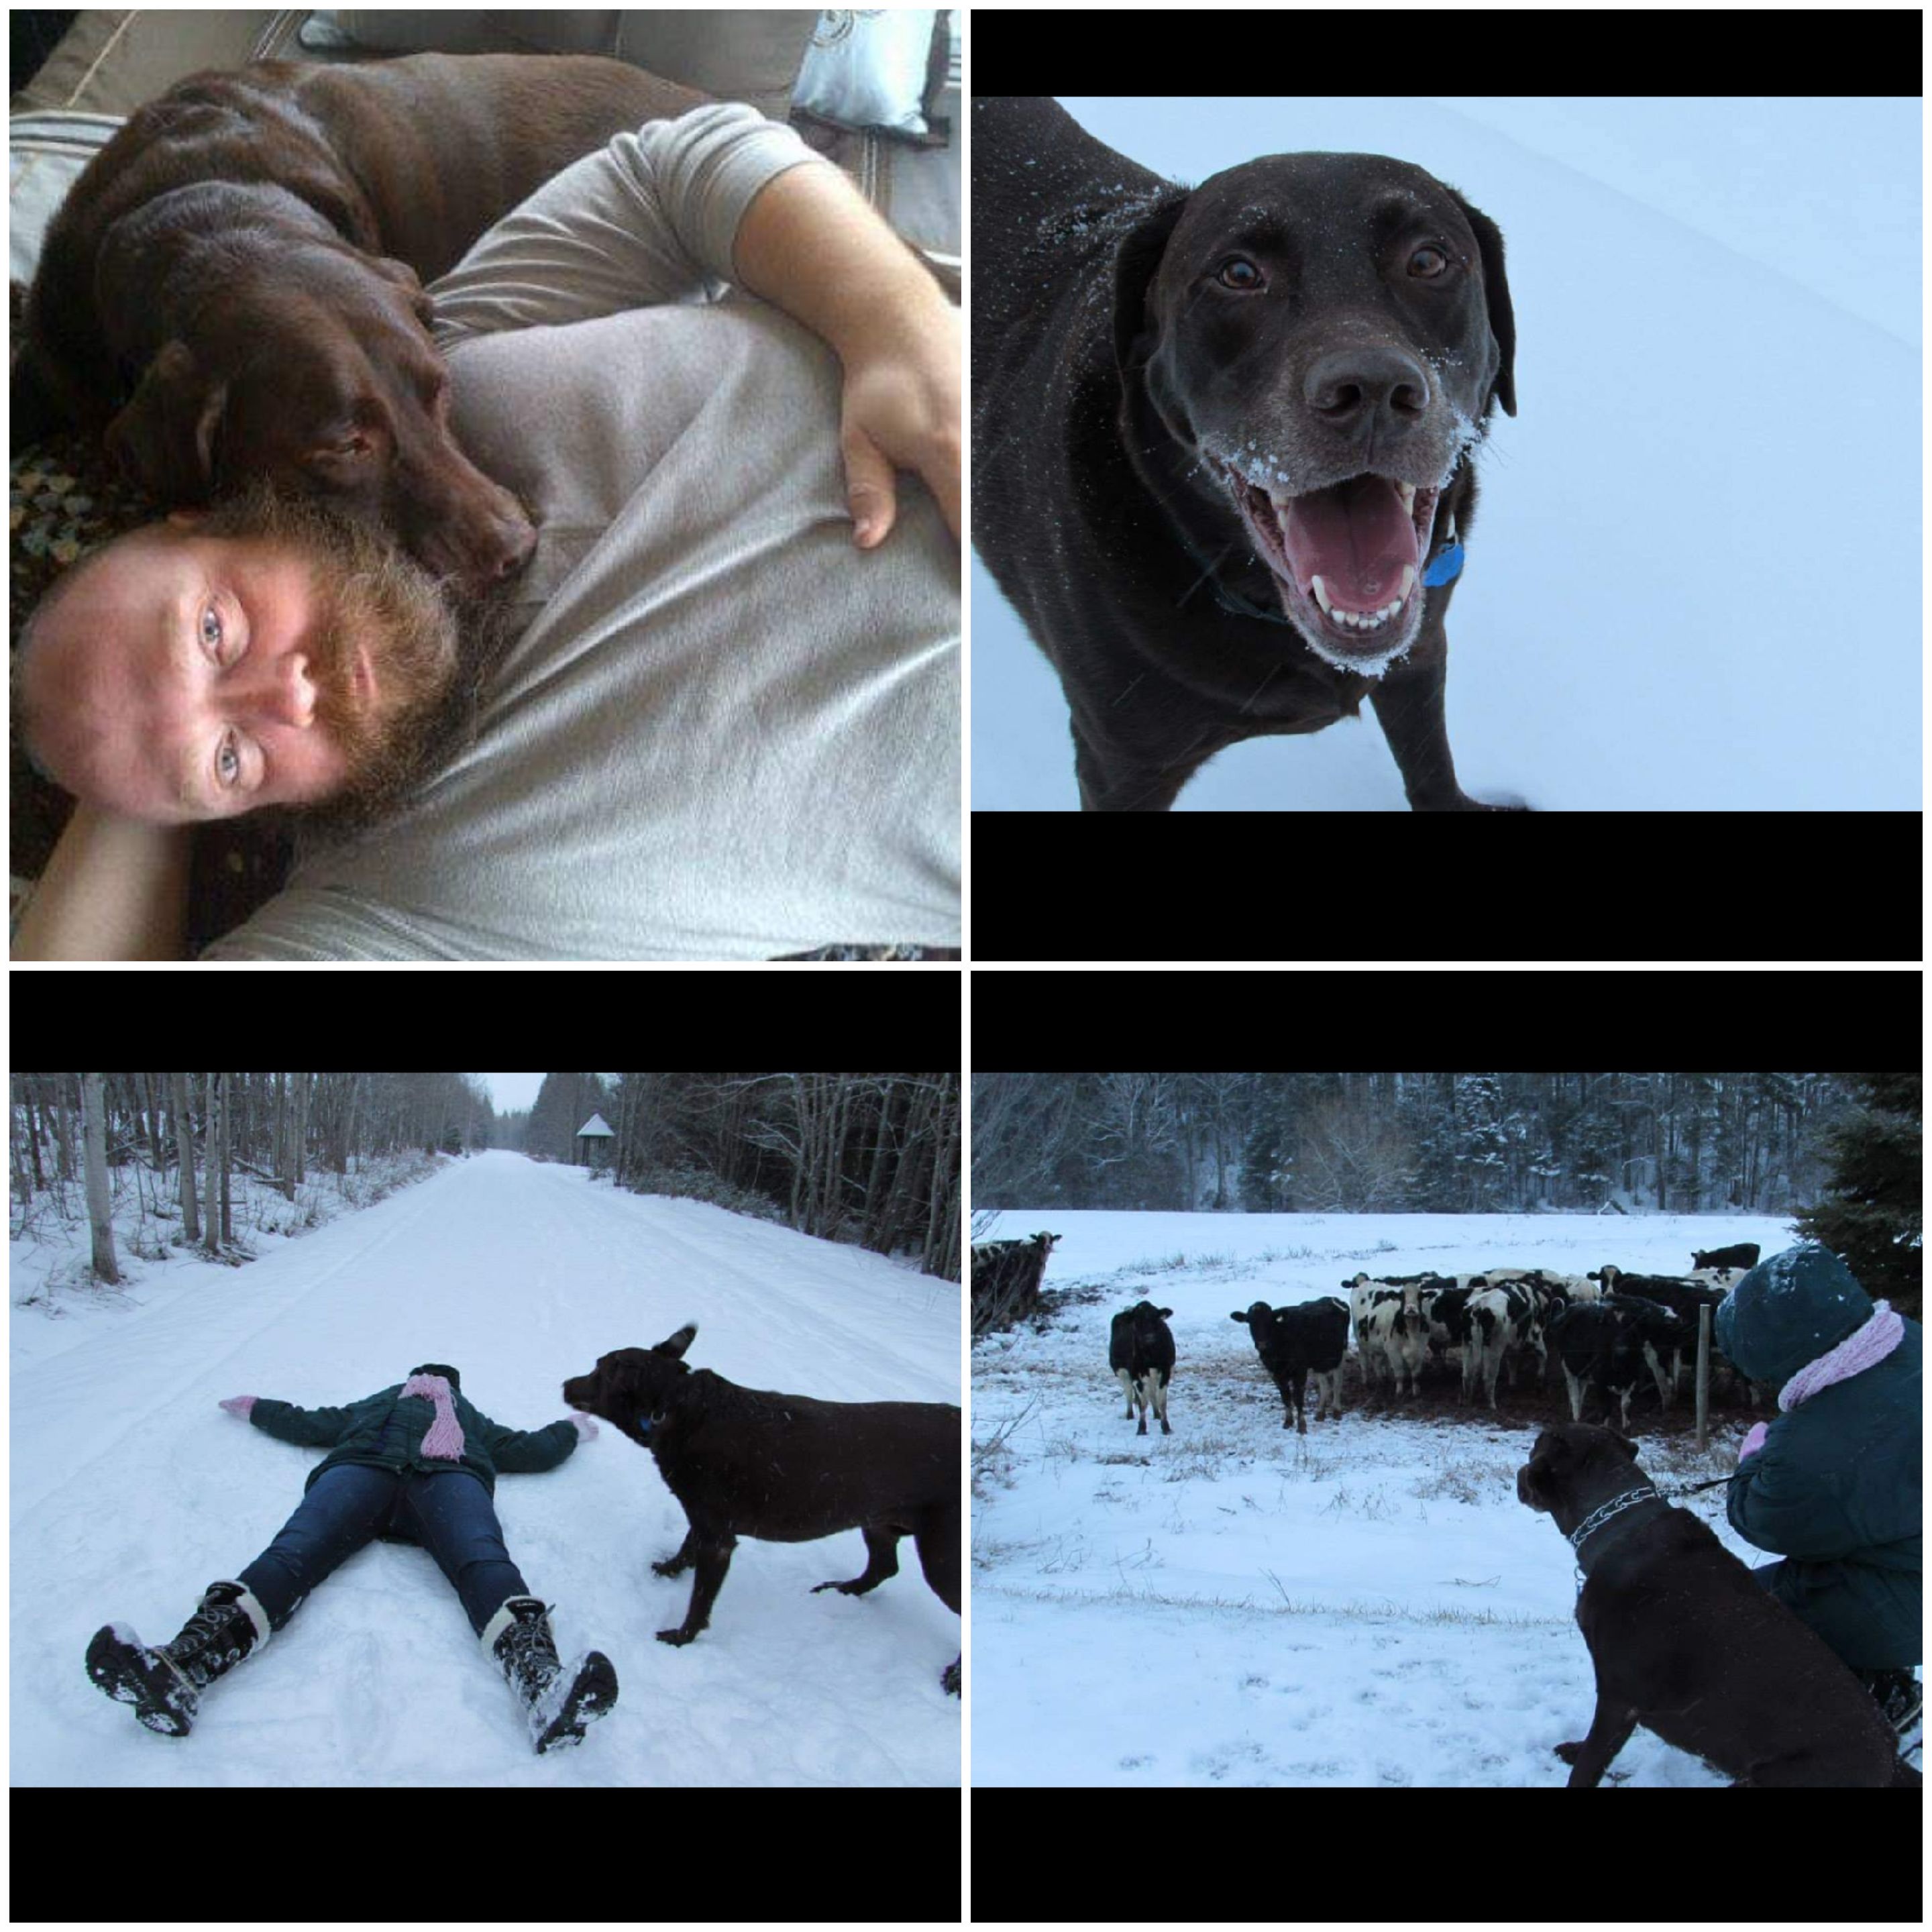
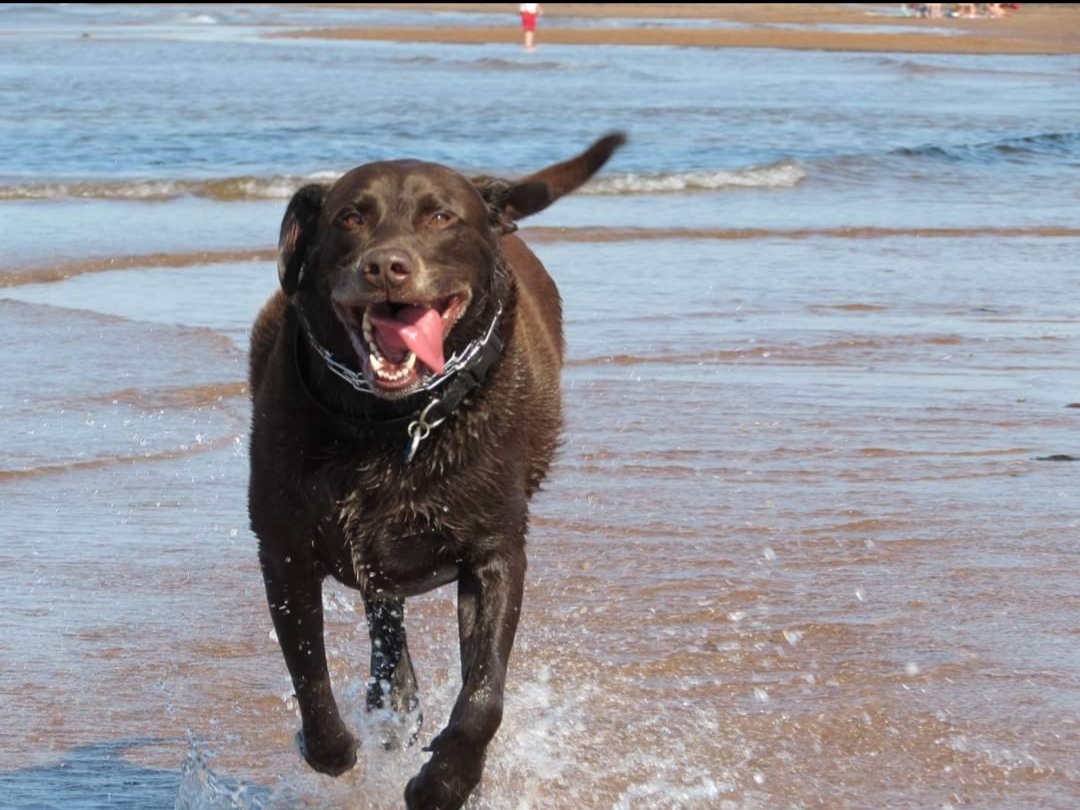
We even took a long trip in the car to our new home that would give him beaches to run on and trails to sniff and a huge backyard to run around in. He love it…. he was such a trooper.


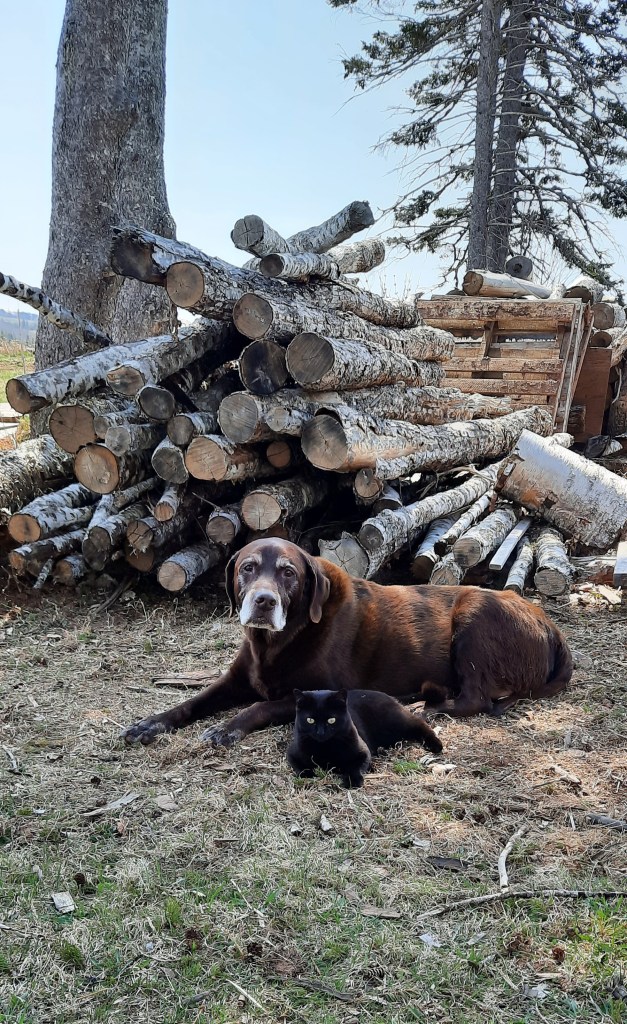
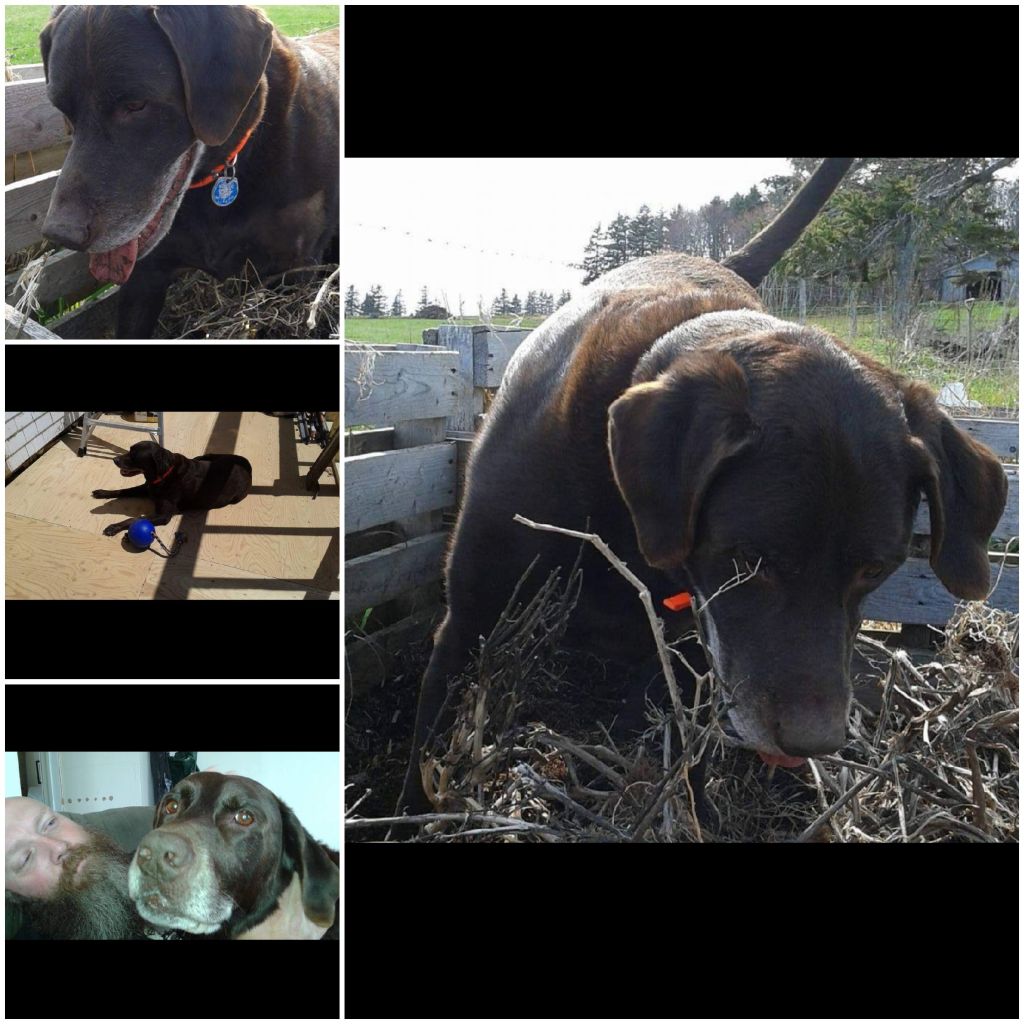
I have had the pleasure of him being my farm dog and hanging out with me all day chasing mice, voles and rats and squirrels…..he has been my constant companion day in and day out keeping me company on our old farmhouse.


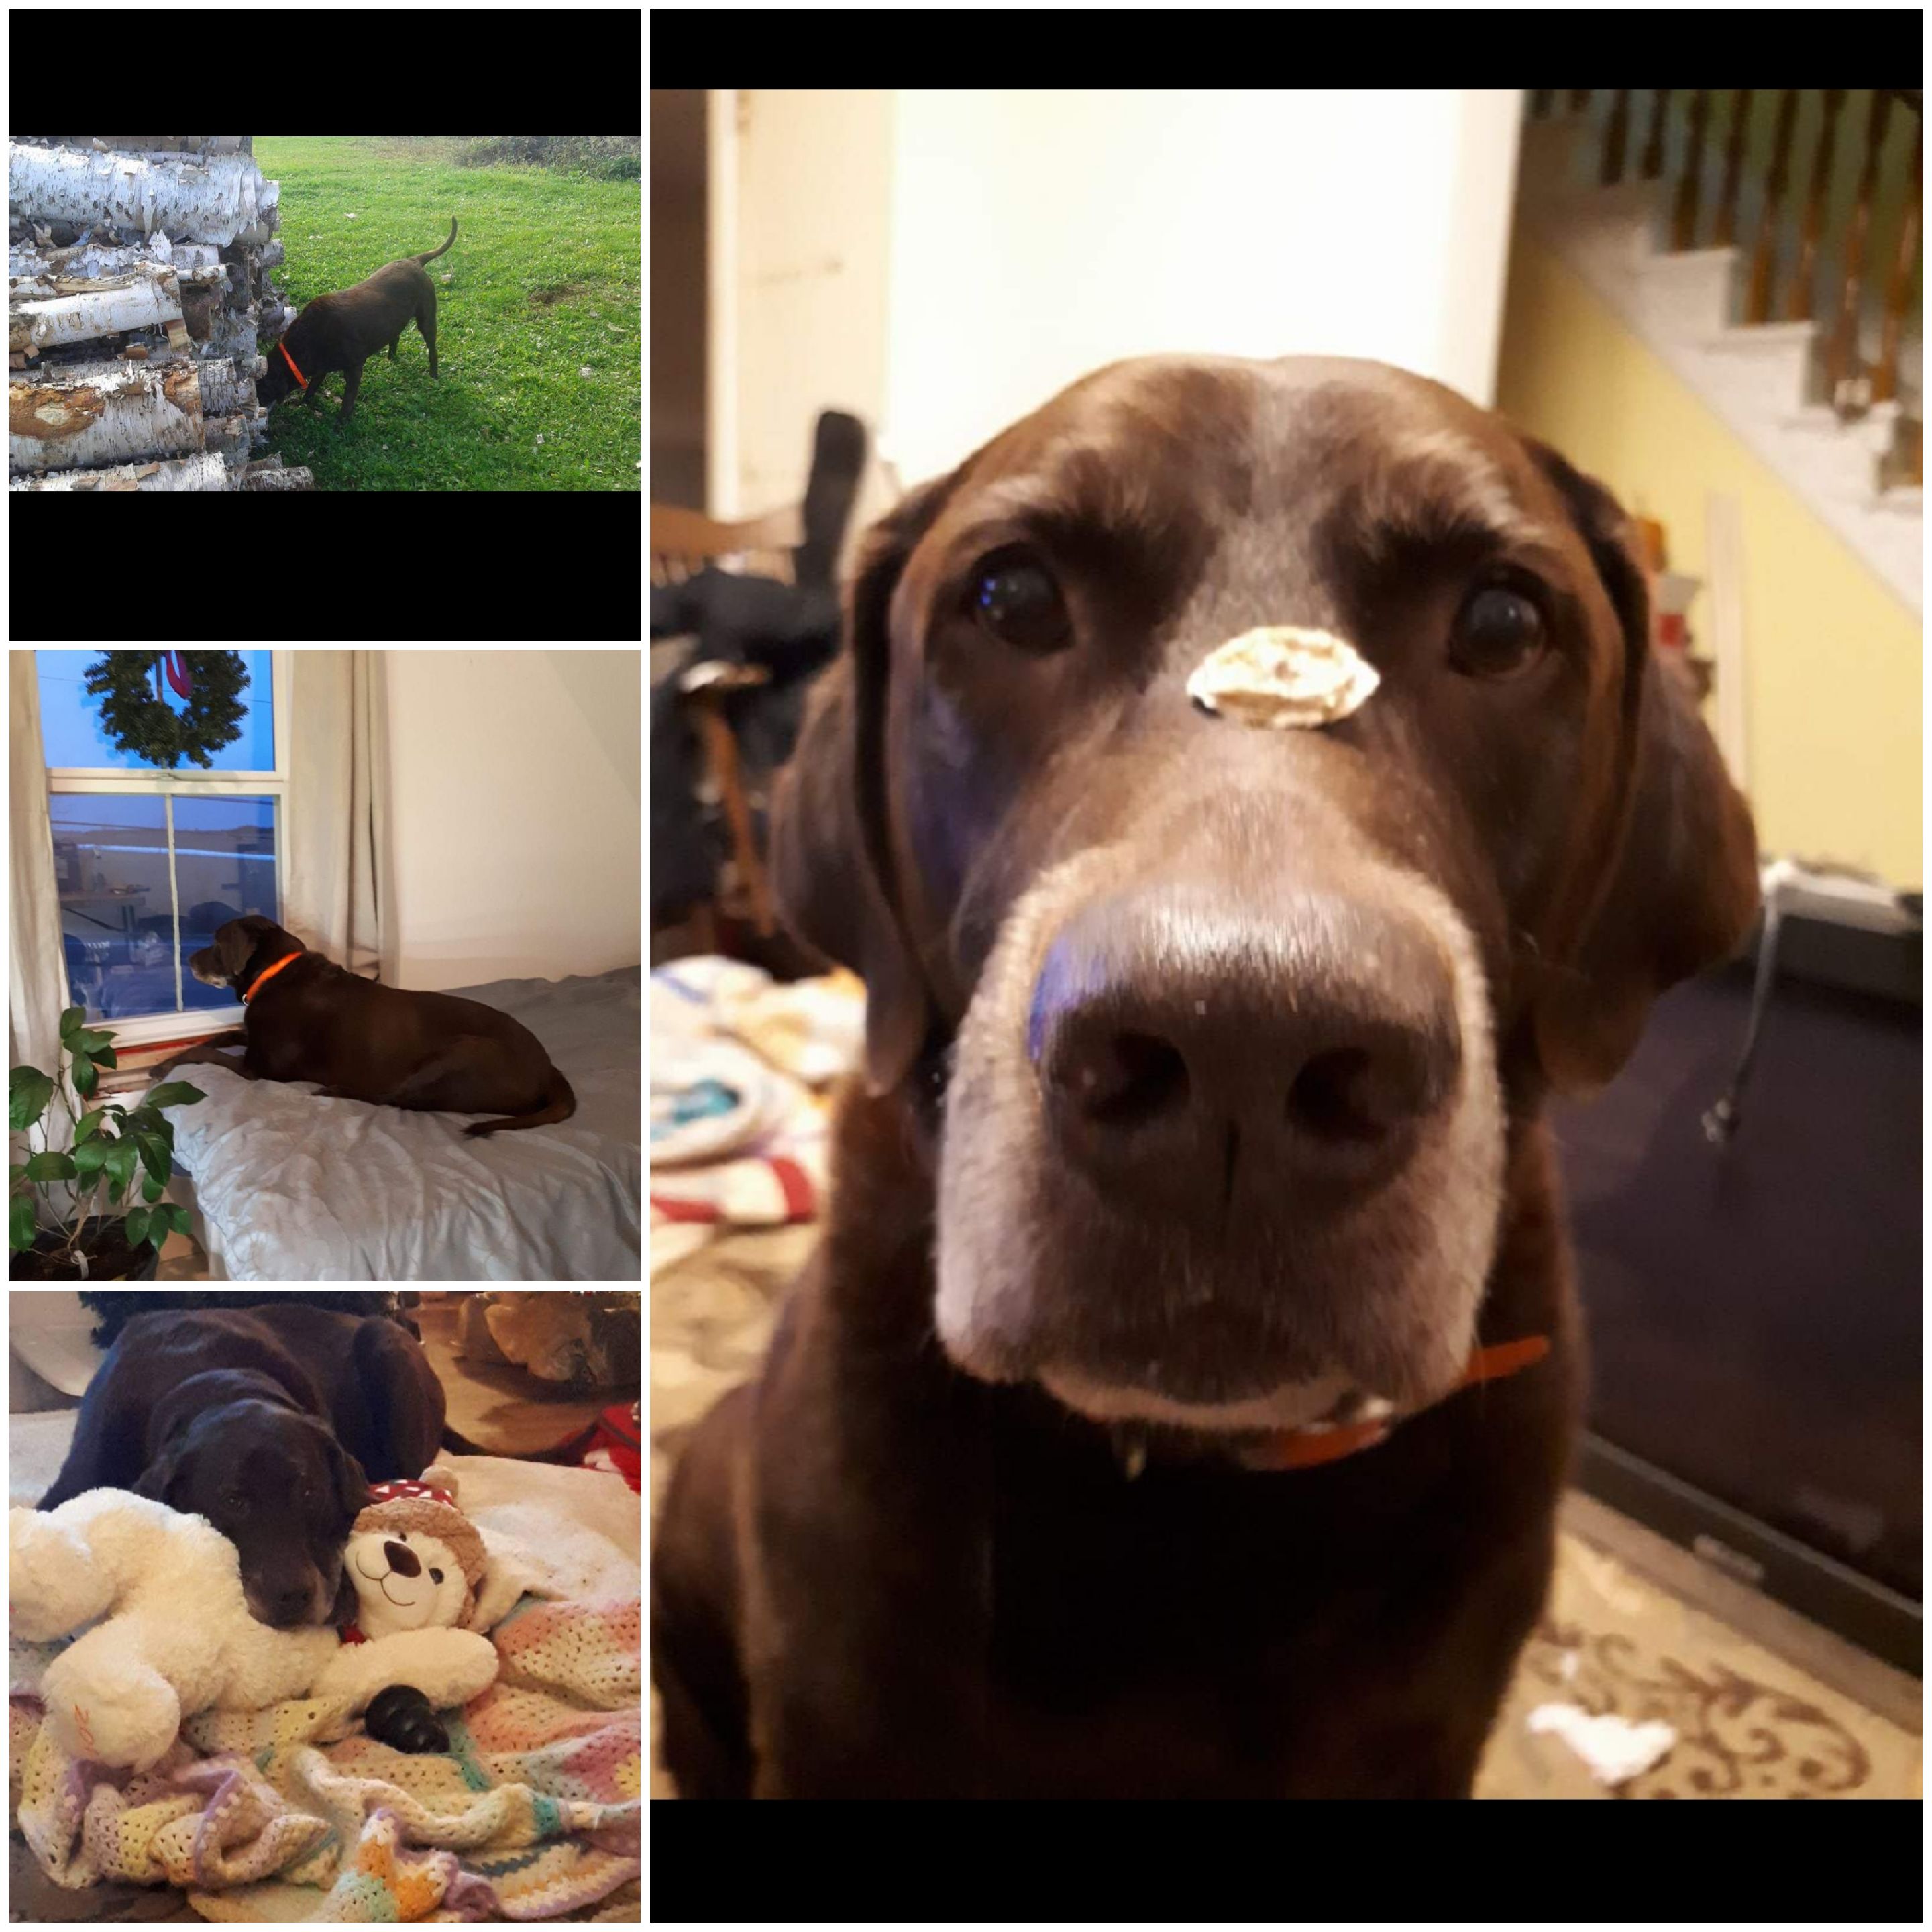


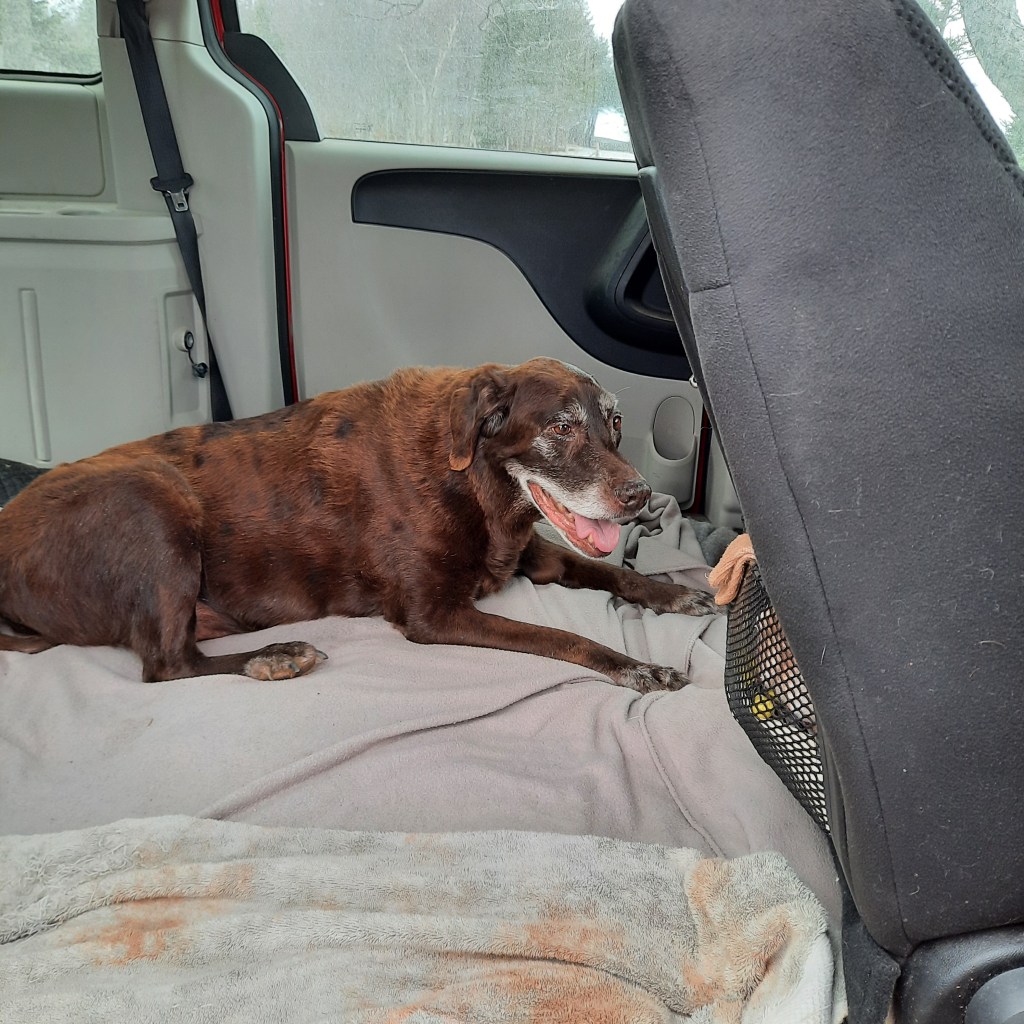
He has outlived his expected age and the last couple months he has really slowed down…. but the last many weeks we have really seen a huge decline in his all around health. He was having a harder time getting into the van for rides…..his hearing was going and he started to have a hard time trying to go up and down the stairs. Seeing all these things you just know ……. what all dog parents know.

But really nothing prepared me and Rusty for the utter sadness yesterday and today. I woke him up from his nappie yesterday evening when Rusty came home cause thats what we do….. i helped him up cause he is usually stiff….. but this time something was different….. he walked very slow to the back addition and then he just stood there and panted really hard. He just didn’t want to go out…. but I knew he needed to go out. In fact he hadn’t really been up all day…. but neither was I as i had a migraine. He went back into the kitchen but he was so unsettled. He was really not himself….. he looked like he had to do business then I said oh my we have to get him outside…… he had his first accident in the house in 13 years having him…. poor fellow. After I cleaned everything up I went outside to see what was up and Rusty was laying down on the deck with him. He could hardly breath and the panting was so laborious. We had never seen him like this ever. We both laid down with him on the floor and we thought for sure he wasn’t going to make it through the evening. I cried so hard as I am gonna miss my friend….. my best dog friend ever…..

I remarked that he had not left his dog bed all day….. he wouldn’t eat dinner and would not eat his treats. Now that is unusual for him as he loves his food and treats… its serious and this might be it.
Rusty decided to sleep downstairs with him last night …… a restless night. When they got up this morning they went out and he did his business he came back in and had a couple really good drinks of water and a hand full of dog treats. That’s it…. he had a small taste of his food and a couple cookies he has not been interested in food.
I took him out this evening and I could barely get him back to the house…. he can barely walk…. when Rusty came home he took him out again we had to half carry him back with a blanket underneath him………I am so sad and broken he is declining pretty fast.
We have the hardest decision to make tonight and into the next few days….I haven’t stopped crying and I won’t for a while…….. how do you let go of your best friend…… WE GOT TO LOVE HIM🐾 but I don’t want to let him go yet♡
Say a prayer please because these things are never easy♡
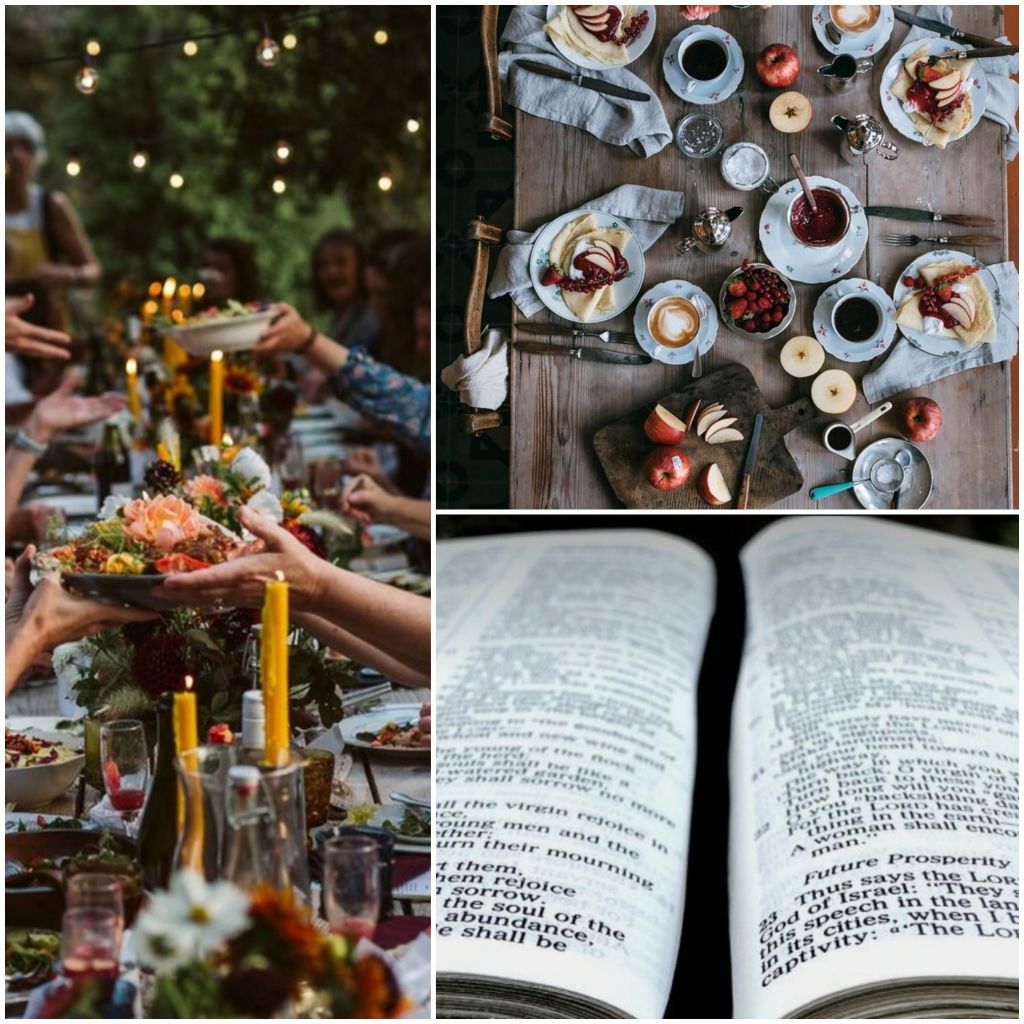
Fellowship, hospitality, friendship, learning,
Proverbs 31 talks about not only a noble wife but a noble woman. How do we learn to be noble women? What does it mean to share hospitality amongst friends and strangers? What does it mean to have friends, friends of different ages?
I have a couple of ladies that I meet with regularly. I cannot tell you how incredibly blessed I am to have these three ladies in my life. There are also a couple ladies that I have not met but are in our ladies prayer group. God has been so incredibly good to me by introducing me to these ladies.
We try to meet weekly, we have food, fellowship, prayer and scripture discussion as well as life learning conversations. We pray for each other needs and we support oneanother and the friendship is amazing. I am the younger of the group and I have so much to learn from these beautiful women.
Once upon a time when we actually lived in communities of family and extended family. We had the older ladies teaching the younger women the ways of life… everything from cooking, sewing, providing, education etc…. we don’t have that today. It was such a blessing for women because they had so much experience and teaching from the older women that helped to shape character and nobility in women. Not only that the older women always had a sense of purpose and were not shipped off when life got hander for them…. the younger took care of them. The younger had the incredible blessing of the wisdom and knowledge passed down. These exrended family communities were a beautiful tight knit bunch. Foe some reason over the years we have fallen out of this practice striving to be independent and stand all by ourselves. I don’t beleive that was the plan of God but our society allowed it to happen and what we have now is sad, broken society and community.
When I met the first of these beautiful ladies, I recognized that she had a lot to offer and that I had alot to learn. Being that my family is not in close proximity to where I live this is a huge blessing. My mom and I chat but it’s not the same as being in person as she is on the west coast and I am on the east coast. 🙃 but God is good by filling in the gaps♡
I am hoping that some women that are my age and younger that are hungry for this same blessing will be lead into our fold. We have so much to learn from each other and God. Times are short and us believing women need each other more then ever to support, love and care for. I call them my tribe.
Below is scripture from proverbs that describes a noble women. Read and be blessed by God today.
Proverbs 31:10-31
10 A wife of noble character who can find?
She is worth far more than rubies.
11 Her husband has full confidence in her
and lacks nothing of value.
12 She brings him good, not harm,
all the days of her life.
13 She selects wool and flax
and works with eager hands.
14 She is like the merchant ships,
bringing her food from afar.
15 She gets up while it is still night;
she provides food for her family and portions for her female servants.
16 She considers a field and buys it;
out of her earnings she plants a vineyard.
17 She sets about her work vigorously;
her arms are strong for her tasks.
18 She sees that her trading is profitable,
and her lamp does not go out at night.
19 In her hand she holds the distaff
and grasps the spindle with her fingers.
20 She opens her arms to the poor
and extends her hands to the needy.
21 When it snows, she has no fear for her household;
for all of them are clothed in scarlet.
22 She makes coverings for her bed;
she is clothed in fine linen and purple.
23 Her husband is respected at the city gate,
where he takes his seat among the elders of the land.
24 She makes linen garments and sells them,
and supplies the merchants with sashes.
25 She is clothed with strength and dignity;
she can laugh at the days to come.
26 She speaks with wisdom,
and faithful instruction is on her tongue.
27 She watches over the affairs of her household
and does not eat the bread of idleness.
28 Her children arise and call her blessed;
her husband also, and he praises her:
29 “Many women do noble things,
but you surpass them all.”
30 Charm is deceptive, and beauty is fleeting;
but a woman who fears the Lord is to be praised.
31 Honor her for all that her hands have done,
and let her works bring her praise at the city gate.